

Learn through the super-clean Baeldung Pro experience:
>> Membership and Baeldung Pro.
No ads, dark-mode and 6 months free of IntelliJ Idea Ultimate to start with.
Learn through the super-clean Baeldung Pro experience:
>> Membership and Baeldung Pro.
No ads, dark-mode and 6 months free of IntelliJ Idea Ultimate to start with.
Data helps organizations to make informed decisions that often yield better business results. However, these data typically require a bunch of pipelines to acquire, transform, extract, and eventually store. Importantly, we must manage these pipelines in a structured and proper manner in order to prevent the pipelines from spiraling into an unmaintainable mess. As such, some organizations use one of the many workflow automation platforms available out there, including Kestra.
In this tutorial, we’ll learn about the workflow automation platform, Kestra.
Kestra is an open-source workflow automation platform. One thing that makes Kestra stand out from other workflow automation platforms is that it embodies the infrastructure as a code practice in workflow management. Specifically, all the workflow code and configurations are defined through YAML files. These files are then versioned and stored in the internal data store. These practices improve the change traceability and robustness of the workflow code and configuration.
Before we use the platform, let’s learn about a few important concepts in Kestra. Firstly, a workflow is known as a flow. A flow has a Namespace and ID that uniquely identifies a workflow within the Kestra instance. Then, each of the flows contains one or more tasks.
A task is a single unit of action. There are three types of tasks in Kestra: flowable tasks, runnable tasks, and script tasks.
Flowable tasks control the flow’s logic, similar to constructs in programming languages like if-else and switch. For instance, the io.kestra.plugin.core.flow.If flowable task can conditionally run different tasks. Then, the runnable tasks process data or perform some computation to produce an output or a side effect to other systems. For example, the io.kestra.plugin.core.http.Request runnable task sends HTTP requests to a remote server and stores the response body into the outputs variable for subsequent usage.
Finally, the script tasks are executed in individual Docker containers to run arbitrary scripts. Kestra supports many programming languages for script tasks, such as Python, Node.js, and Shell.
Kestra executes a flow under two different scenarios. Either we manually trigger the execution of a flow, or we can define a trigger for our flow so that the execution is automated based on certain conditions.
There are various trigger types that we can create for our flow. For example, the schedule trigger triggers the flow execution on a regular cadence using the cron expression. Then, the flow trigger executes the flow when another flow finishes execution. There are also webhook triggers that condition the execution of a flow on an HTTP webhook call.
There are various deployment options for Kestra. Specifically, we can run Kestra as a Docker container or deploy it to a Kubernetes cluster. For demonstration’s sake, we’ll create and run Kestra as a plain Docker container.
To get started, we’ll use the docker run command to run the Kestra Docker container:
$ docker run --pull=always --rm -it -p 8080:8080 -d -v /tmp:/tmp kestra/kestra:latest server local
latest: Pulling from kestra/kestra
Digest: sha256:092bfeb8ae31b4d7eeaac60eb6f4fcdd5f2687263e40d6c351dc001f977f23be
Status: Image is up to date for kestra/kestra:latest
40567ced2c912372cbd51c444e39dc381134e18b46c36c2a159d1ed86f4ef51f
The command above starts a Docker container using the kestra/kestra Docker image, passing the server local as the command to start the Kestra instance in local mode. Critically, the local mode uses an instance of the H2 file database locally as the data store. As such, this command should only be used for testing purposes. For a proper deployment to production, check out all the options in the official documentation.
Once the container runs, the Kestra interface is then reachable via http://localhost:8080:
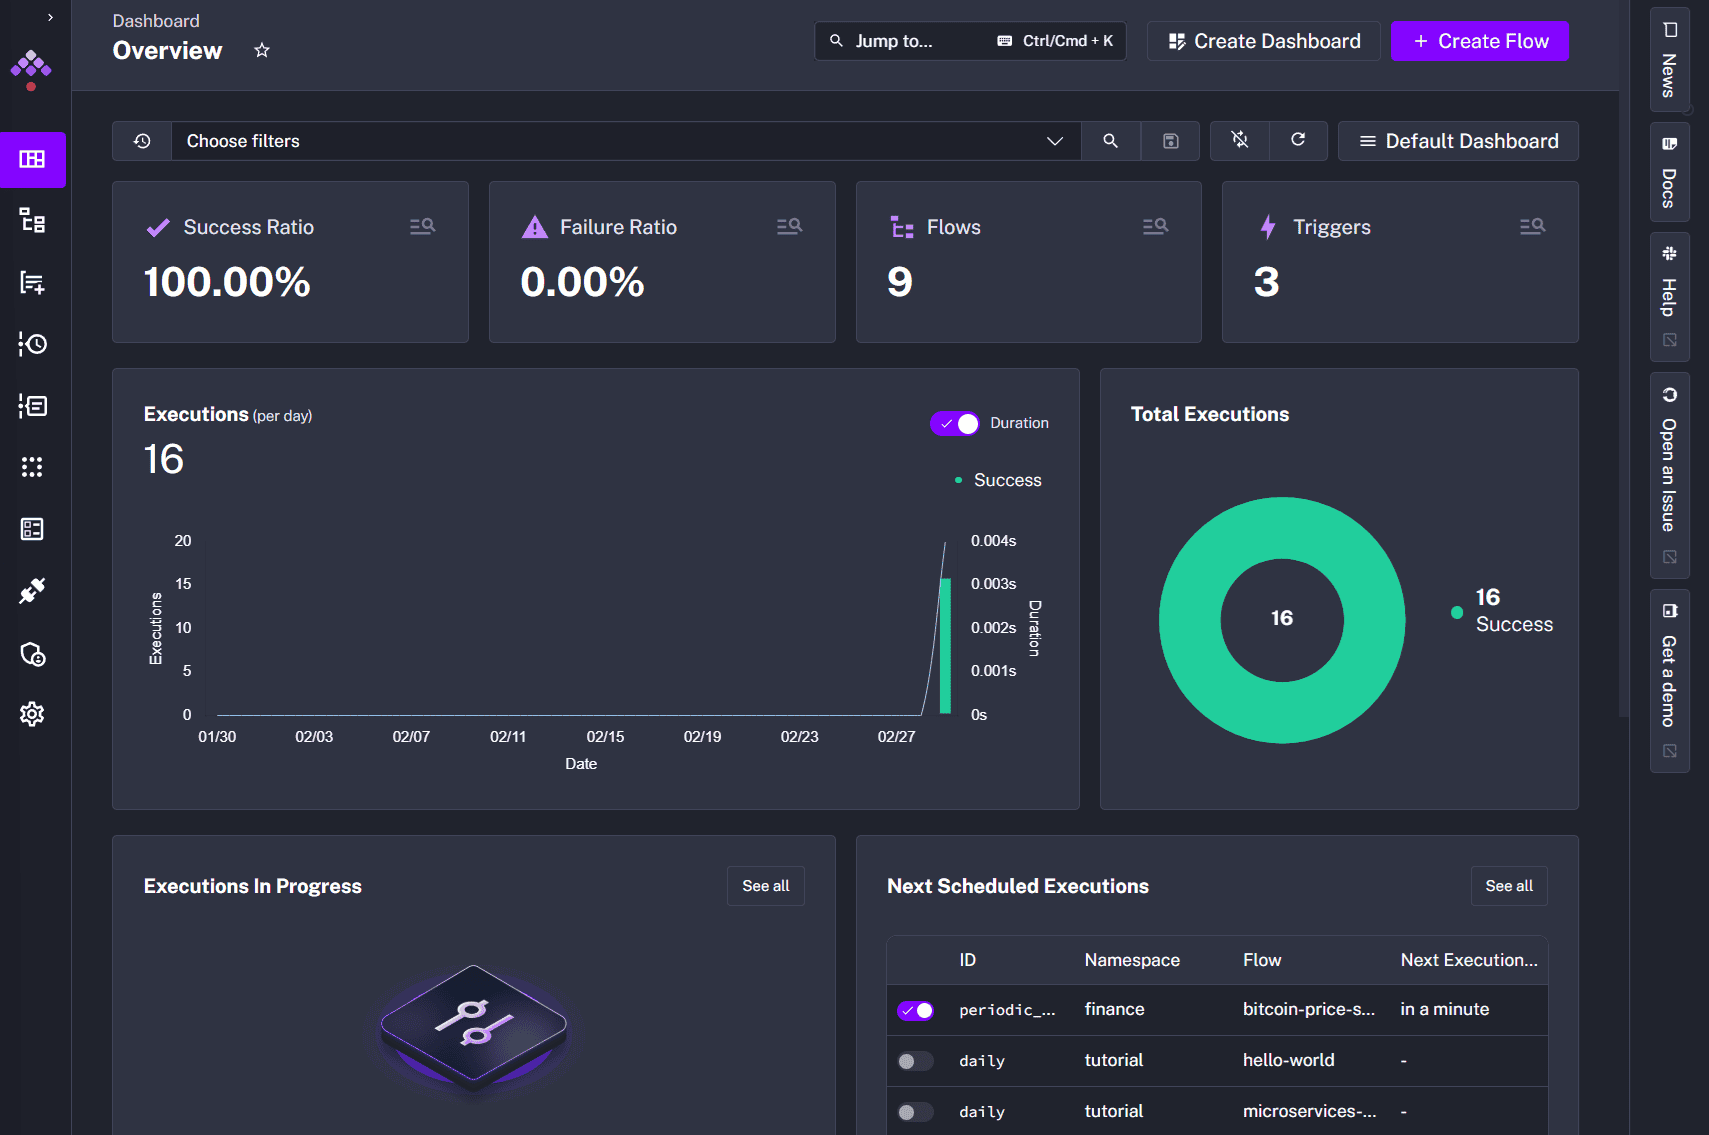
On the main page, there is various information being shown, such as the success and failure ratio of the workflow executions, the number of flows and triggers we have in the instance
To demonstrate the end-to-end process of writing and deploying a workflow automation, we’ll look at a real-world problem. Specifically, we’ll build a workflow automation that scrapes and stores the Bitcoin price once every five minutes. This demonstration will expose us to all the concepts we’ve learned from the previous section, such as flow, tasks, and triggers.
Firstly, we’ll use the https://blockchain.info/ticker endpoint to obtain the Bitcoin price. To check the structure of the output, we can use the curl command to send a GET request to that endpoint:
$ curl https://blockchain.info/ticker
{"ARS":{"15m":9.082713182E7,"last":9.082713182E7,"buy":9.082713182E7,"sell":9.082713182E7,"symbol":"ARS"},"AUD":{"15m":137636.88,"last":137636.88,"buy":137636.88,"sell":137636.88,"symbol":"AUD"},...
From the output, we can see that the API returns us a JSON structure. Within the structure, the first level key represents the different major currencies, such as AUD and USD. Then, inside each of the currencies, we can get the latest Bitcoin price quoted in that currency on the last field.
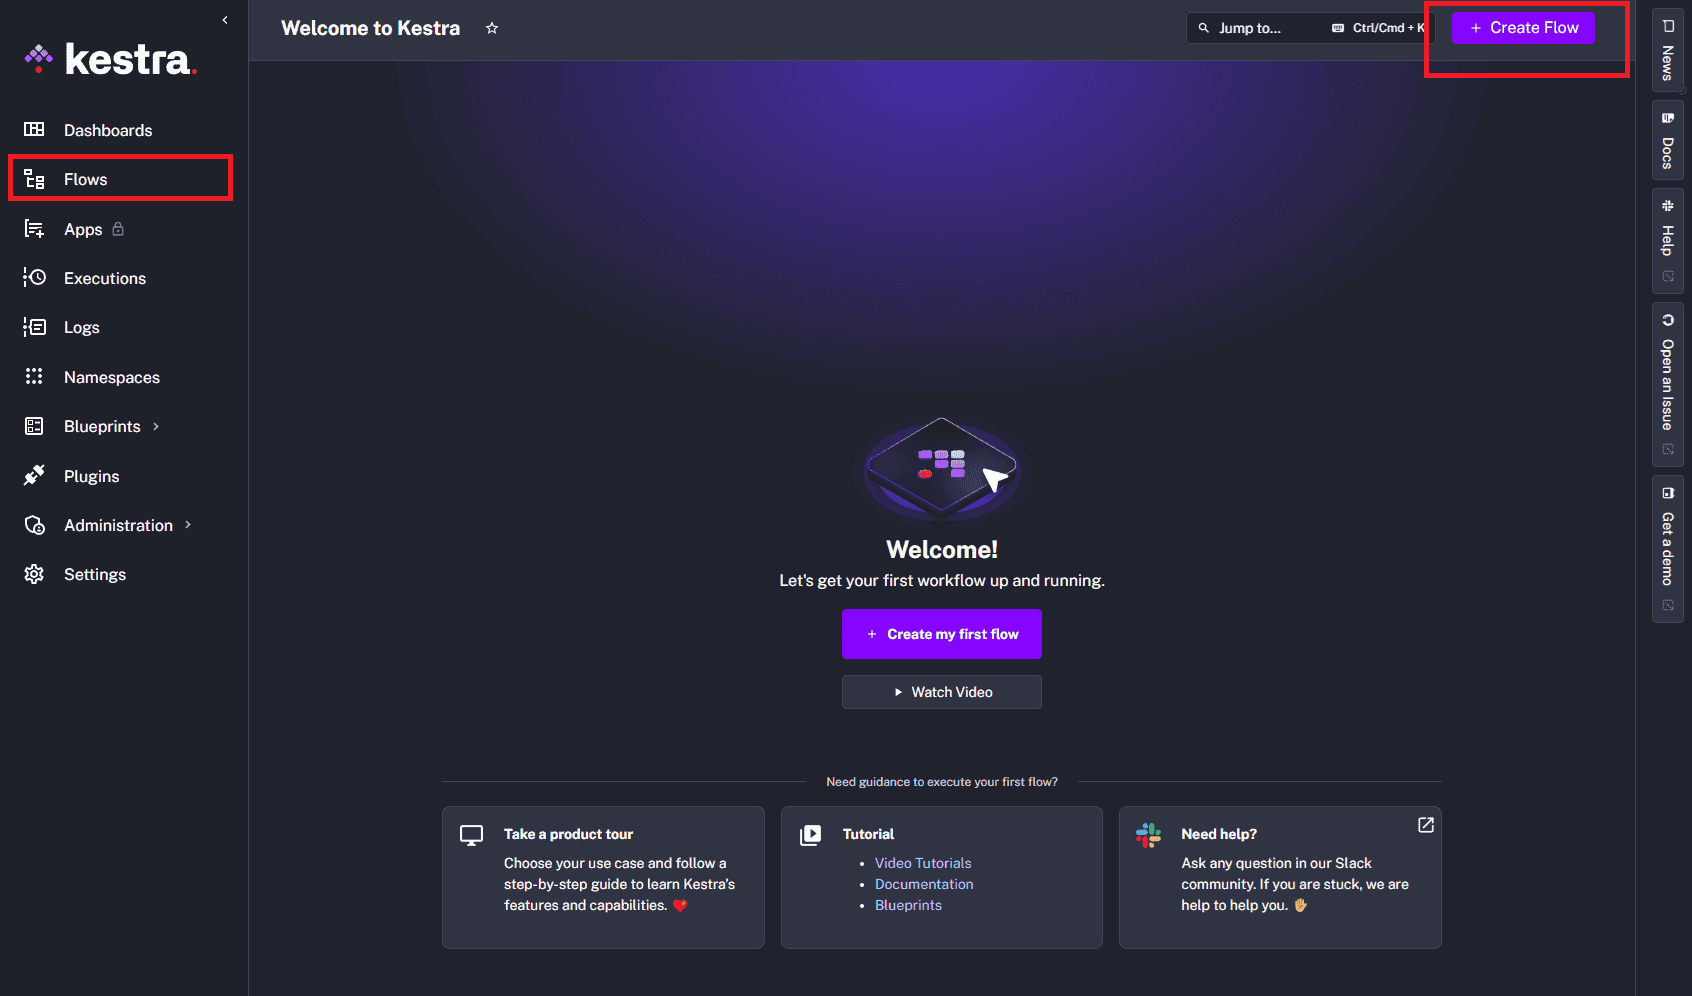
Let’s create a new flow in Kestra. Firstly, we’ll need to navigate to the Flows page and press the Create button on the top right:
Subsequently, we’ll be greeted with an editor that contains a simple “hello world” example. Let’s change the id to bitcoin-price-scraper and namespace to finance, which clears out the list of tasks generated:
id: bitcoin-price-scaper
namespace: finance
Now we’re ready to define our new tasks.
On a high level, our flow will consist of three tasks. The first task will obtain the Bitcoin price by sending an HTTP GET request to the API. We can achieve that using the io.kestra.plugin.core.http.Request runnable task:
- id: fetch_btc_price
   type: io.kestra.plugin.core.http.Request
   uri: "https://blockchain.info/ticker"
   method: GET
We specify the API endpoint using the uri parameter. Then, the method defines the HTTP method we want to use, which is the GET method.
The next task, after we’ve made the API call, is to extract the USD quote for Bitcoin. The extraction involves parsing the response text as a JSON object and then accessing the last field nested within the USD object of the response. There are many ways to perform such extraction, but for this demonstration, we’ll use the Python script task:
- id: parse_response
   type: io.kestra.plugin.scripts.python.Script
   script: |
     import json
     from kestra import Kestra

     from datetime import datetime
     data = json.loads('{{ outputs.fetch_btc_price.body }}')
     Kestra.outputs({"price": data["USD"]["last"], "timestamp": datetime.utcnow().isoformat()})
In Kestra flow execution context, the outputs is a flow-level variable that stores the output of all the tasks execution. This allows us to pass data between different tasks within the same flow execution. In our example, we’re getting the body value of the HTTP requests from our fetch_by_price task.
The script uses the json module to parse the response text into a Python dictionary. Then, we use the Kestra.outputs method to set the extracted price and timestamp value into the flow execution outputs variable.
Finally, we’ll use the io.kestra.plugin.jdbc.postgresql.Query task to persist the value into our database:
- id: store_to_db
    type: io.kestra.plugin.jdbc.postgresql.Query
    url: "jdbc:postgresql://localhost:5432/exchange"
    username: "user"
    password: "password"
    sql: |
      INSERT INTO exchange_rates (currency, last_price, timestamp)
      VALUES (:currency, CAST(:last_price AS DECIMAL), CAST(:timestamp AS TIMESTAMP));
    parameters:
      currency: "USD"
      last_price: "{{ outputs.parse_response.vars.price }}"
      timestamp: "{{ outputs.parse_response.vars.timestamp }}"
We obtain the price and timestamp values from the parse_response task using the outputs variable. Then, we define an INSERT query that inserts the extracted price into our database.
For our flow, we want it to run once every five minutes. As such, we’ll define a trigger for our flow. Specifically, we’ll attach the io.kestra.plugin.core.trigger.Schedule trigger to our flow:
triggers:
  - id: periodic-trigger
    type: io.kestra.plugin.core.trigger.Schedule
    cron: "*/5 * * * *"
We define the cron syntax of */5 * * * * which means once every five minutes.
Putting everything together, we’ll get Bitcoin price scraping flow definition:
id: bitcoin-price-scaper
namespace: finance

triggers:
  - id: periodic_trigger
    type: io.kestra.plugin.core.trigger.Schedule
    cron: "*/5 * * * *"

tasks:
  - id: fetch_btc_price
    type: io.kestra.plugin.core.http.Request
    uri: "https://blockchain.info/ticker"
    method: GET

  - id: parse_response
    type: io.kestra.plugin.scripts.python.Script
    script: |
      import json
      from kestra import Kestra

      from datetime import datetime
      data = json.loads('{{ outputs.fetch_btc_price.body }}')
      Kestra.outputs({"price": data["USD"]["last"], "timestamp": datetime.utcnow().isoformat()})


  - id: store_to_db
    type: io.kestra.plugin.jdbc.postgresql.Query
    url: "jdbc:postgresql://localhost:5432/exchange"
    username: "user"
    password: "password"
    sql: |
      INSERT INTO exchange_rates (currency, last_price, timestamp)
      VALUES (:currency, CAST(:last_price AS DECIMAL), CAST(:timestamp AS TIMESTAMP));
    parameters:
      currency: "USD"
      last_price: "{{ outputs.parse_response.vars.price }}"
      timestamp: "{{ outputs.parse_response.vars.timestamp }}"
Let’s press the Save button on the top right of the editor to persist our flow definition.
Based on the flow’s trigger, Kestra will execute our flow once every five minutes. To check on the execution history, let’s navigate to the Executions tab within the bitcoin-price-scraper flow page:
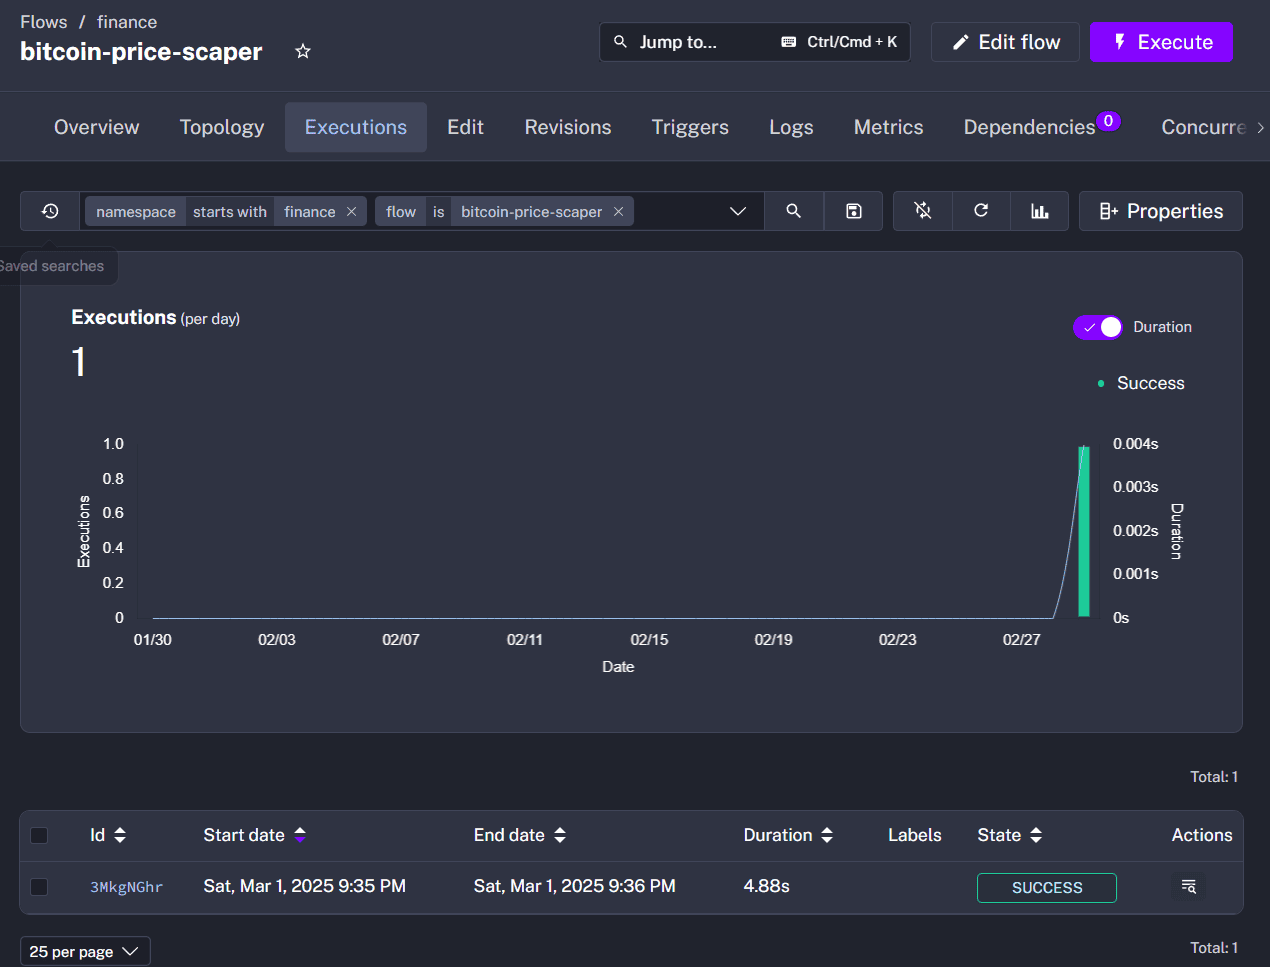
The page lists all the executions of the flow with information like start and end datetime, duration, and execution status. Within each execution details page, there’s the Output page that records the variables within the execution context. This is helpful when we need to debug the flow execution to check the values being passed around.
Additionally, the Gantt tab of the execution shows us the breakdown of the time spent throughout the entire flow execution. By expanding on an individual task execution, we get to see the logs as well. These logs further provide context on the task execution to help in diagnosis when an issue occurs.
In this article, we’ve learned that Kestra is an open-source workflow automation platform that can automate different workflows. We also learned a few concepts in Kestra, such as flow, trigger, and task. Finally, we built a Bitcoin price scraper flow that fetches the Bitcoin price, extracts its quote in USD, and saves the data into our database.