


Learn through the super-clean Baeldung Pro experience:
>> Membership and Baeldung Pro.
No ads, dark-mode and 6 months free of IntelliJ Idea Ultimate to start with.
Last updated: April 11, 2025
Learn through the super-clean Baeldung Pro experience:
>> Membership and Baeldung Pro.
No ads, dark-mode and 6 months free of IntelliJ Idea Ultimate to start with.
Using GitLab CI pipelines to push changes to a repository can effectively automate use cases such as version bumps, dependency updates, and so on.
In this tutorial, we’ll explore different authentication methods for pushing changes to a repository.
In this section, we’ll learn how to use access tokens to push changes to a GitLab repository.
GitLab supports creating various access tokens, such as personal access tokens, project access tokens, and group access tokens. We can create an access token of either type for our use case. However, in practice, it depends on whether we want to allow the reuse of access tokens at the project or group levels.
Now, let’s create a personal access token named AUTOMATION_ACCESS_TOKEN with write_repository scope:
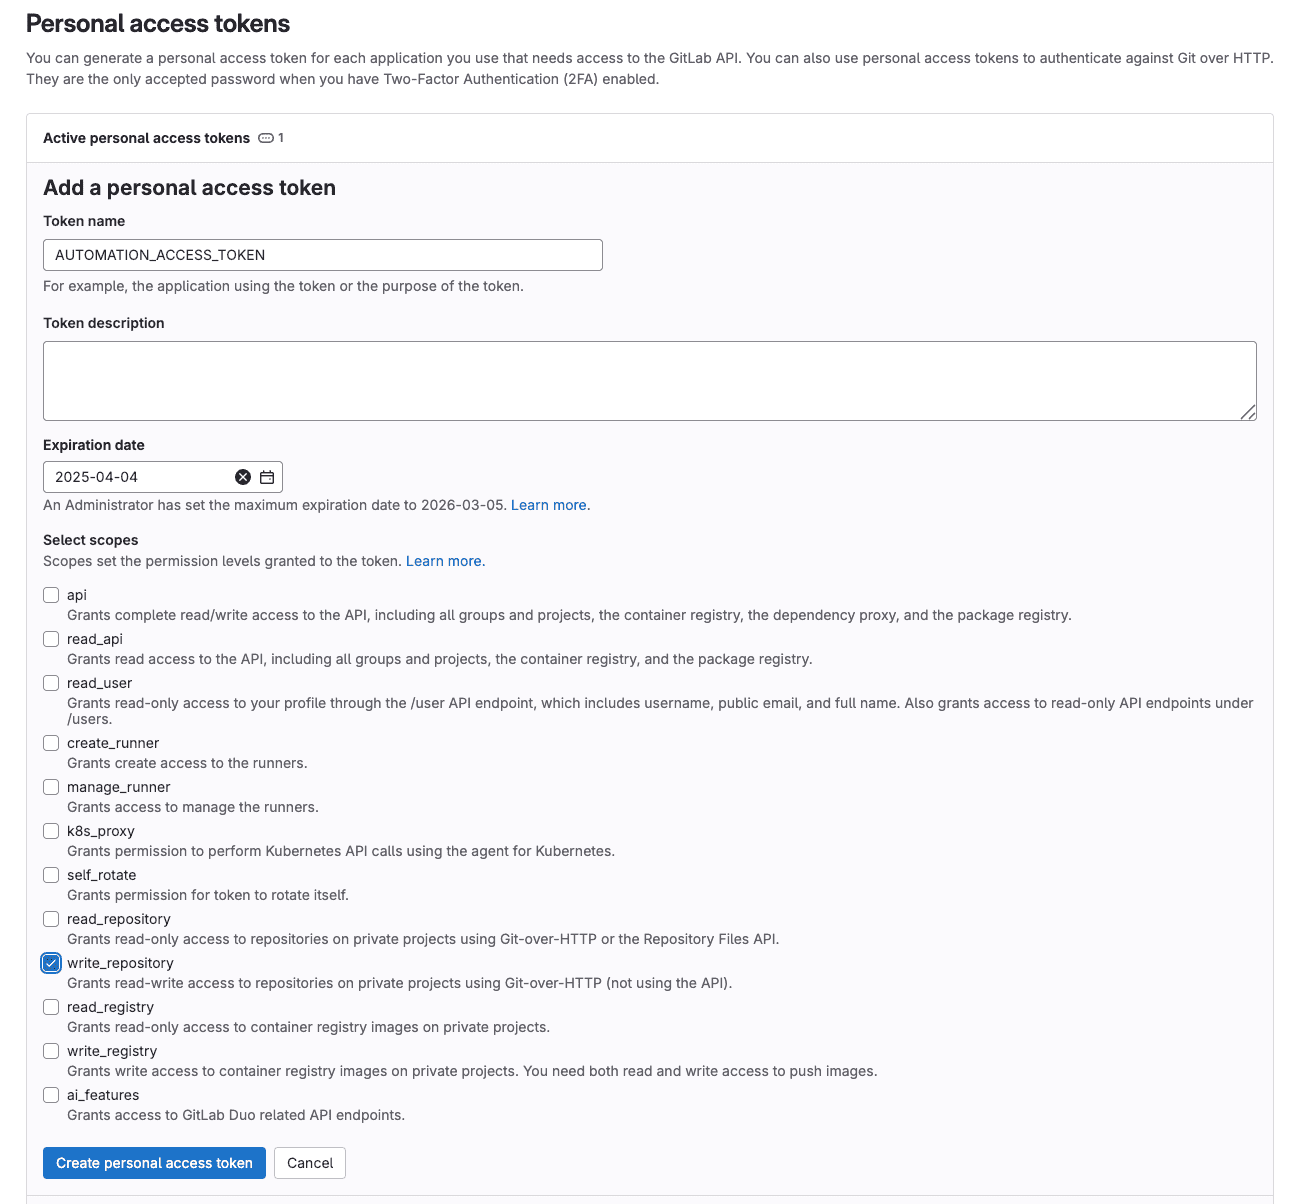 We can add other scopes to the same access token if we plan to use the access token for other use cases. Additionally, it’s recommended to set an expiry during the creation process.
Next, we can define the CI/CD variable for the project with the AUTOMATION_ACCESS_TOKEN key:
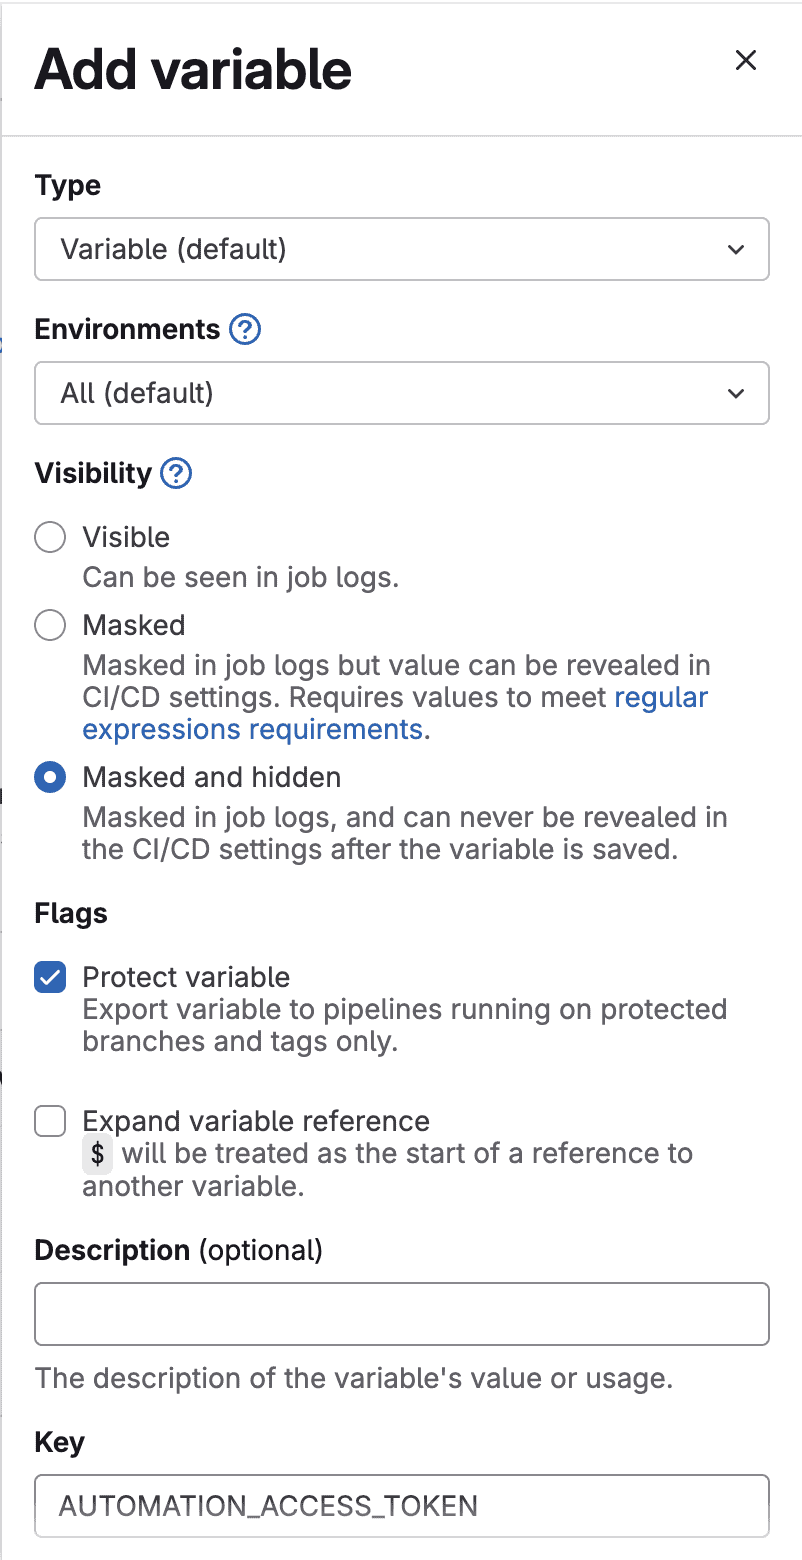
Great! We’re now ready to use the access token for our use case.
Let’s add the push_changes job to the project’s .gitlab-ci.yml CI/CD configuration file:
$ cat .gitlab-ci.yml
push_changes:
  image: ubuntu:latest
  before_script: |
    apt-get update && apt-get install -y git >/dev/null
    git config --global user.email ${GITLAB_USER_EMAIL}
    git config --global user.name ${GITLAB_USER_NAME}
    git remote set-url origin https://oauth2:${AUTOMATION_ACCESS_TOKEN}@${CI_PROJECT_URL#https://}.git
  script: |
    git commit -m "noop" --allow-empty
    git push origin -o ci.skip HEAD:main
In the before_script section, we’ve configured the Git to use the access token. Further, within the script section, we added a “noop” dummy commit and used git push to push the change to the main branch.
Now, we can see the pipeline in action:
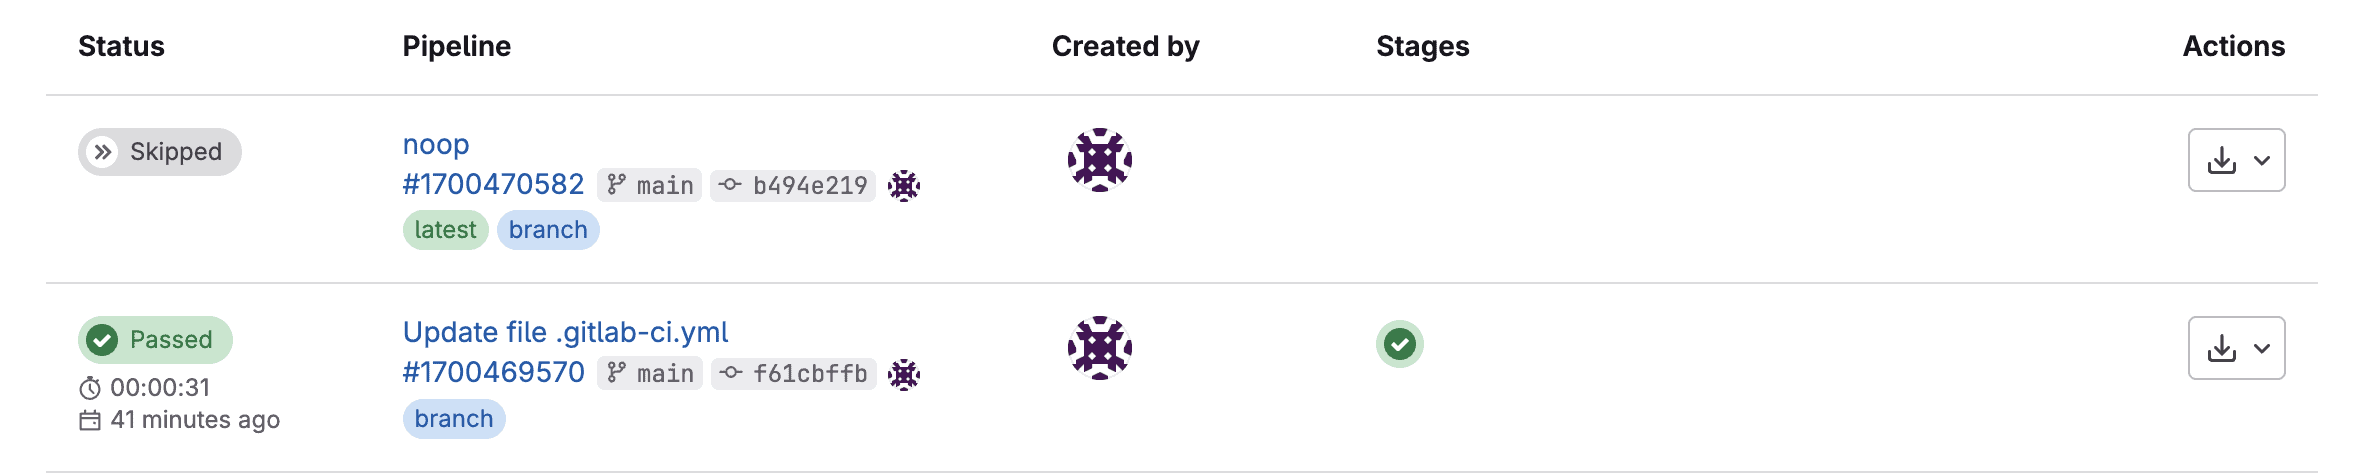
It’s important to note that we used the ci.skip option so that GitLab doesn’t run a pipeline due to the “noop” commit. Otherwise, it’d create an infinite chain of pipelines.
In this section, let’s learn how to use SSH keys to push changes to a GitLab repository.
Firstly, we need to generate an SSH key pair and save the public key in the user profile:
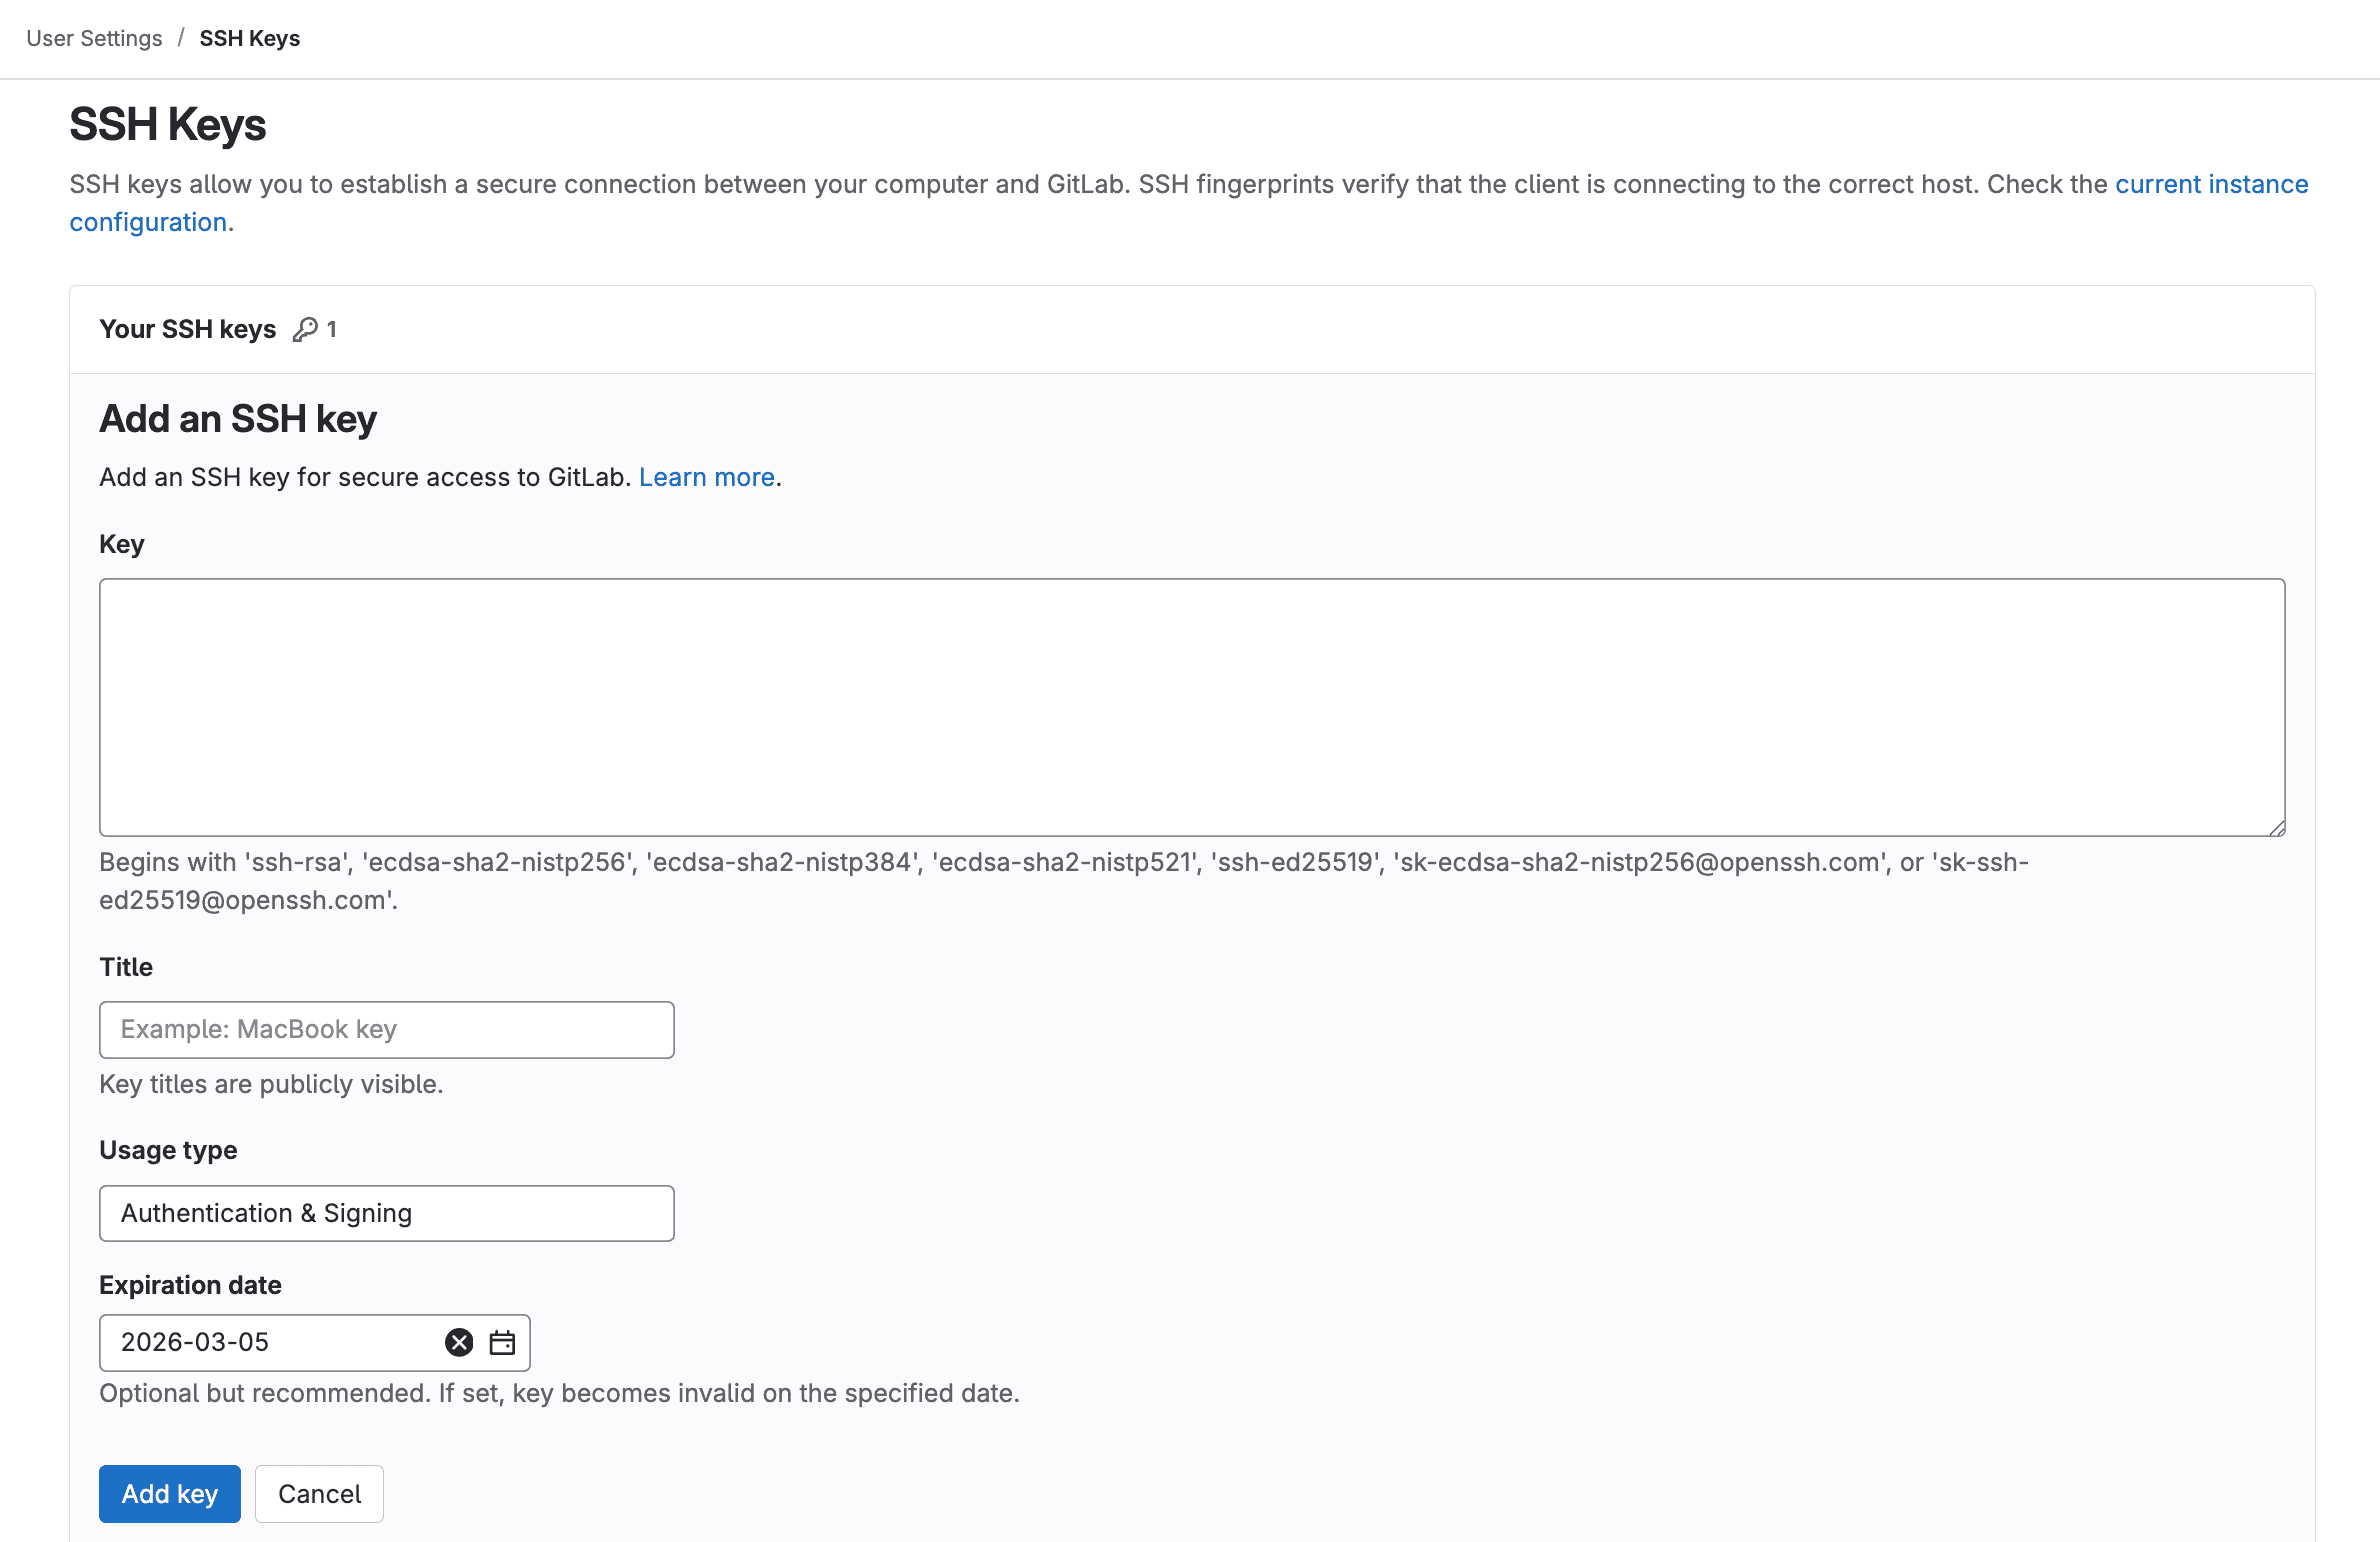
We can set an expiration date while adding the SSH public key.
Next, let’s do a base64 encoding of the SSH private key:
$ cat ~/.ssh/<private_key>  | base64
# hidden due to sensitivity
Finally, let’s define the SSH_PRIVATE_KEY_BASE64 CI/CD variable:
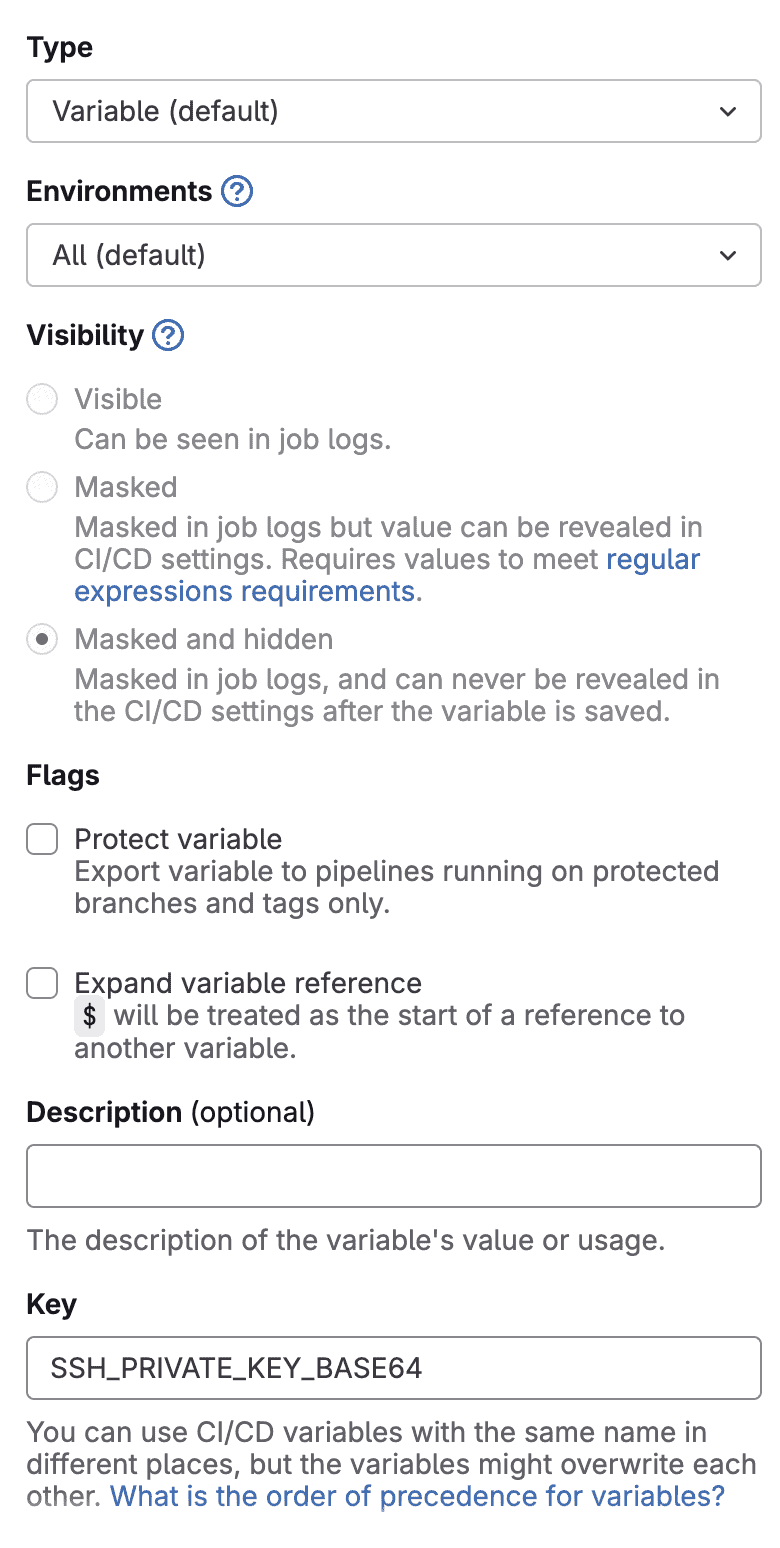
We used the “Masked and hidden” option for increased security. As a result, we were required to use the base64 encoding, as GitLab CI/CD variables don’t accept whitespace when we use this option.
Let’s define the push_changes job in our project’s .gitlab-ci.yml configuration file:
$ cat .gitlab-ci.yml
push_changes:
  image: ubuntu:latest
  before_script: |
    apt-get update && apt-get install -y openssh-client git >/dev/null
    mkdir -p ~/.ssh && chmod 700 ~/.ssh
    echo -n "$SSH_PRIVATE_KEY_BASE64" | base64 -d > ~/.ssh/ssh_private_key
    cat << EOF >> ~/.ssh/config
    Host gitlab.com
        User git
        IdentityFile ~/.ssh/ssh_private_key
        IdentitiesOnly yes
    StrictHostKeyChecking no
    EOF

    chmod -R 400 ~/.ssh/ssh_private_key ~/.ssh/config

    git config --global user.email ${GITLAB_USER_EMAIL}
    git config --global user.name ${GITLAB_USER_NAME}
    eval "$(ssh-agent -s)"
    ssh-add ~/.ssh/ssh_private_key
    git remote set-url origin [email protected]:${CI_PROJECT_PATH}.git
  script: |
    git commit -m "noop" --allow-empty
    git push origin -o ci.skip HEAD:main
In the before_script section, we’ve configured Git to use the SSH key-based authentication. Additionally, we added a noop commit in the script section and used the git push command to push those changes to the repository.
Moving on, let’s see the GitLab pipeline in action:

Like earlier, GitLab skipped any subsequent pipelines due to the new commit as we used the ci.skip option with git push.
We can also use the GitLab commits APIs to push changes to a repository. In this scenario, we can use an access token for authentication.
Let’s add the push_changes job to the project’s .gitlab-ci.yml configuration file:
$ cat .gitlab-ci.yml
push_changes:
  image: curlimages/curl:latest
  rules:
    - if: '$CI_COMMIT_MESSAGE !~ /noop/'
  variables:
    FILE_PATH: README.md
    COMMIT_MESSAGE: noop
    API_URL: "https://gitlab.com/api/v4/projects/$CI_PROJECT_ID/repository/commits"
  before_script: |
    FILE_CONTENT=$(curl --header "PRIVATE-TOKEN: $AUTOMATION_ACCESS_TOKEN"
      "https://gitlab.com/api/v4/projects/$CI_PROJECT_ID/repository/files/$FILE_PATH/raw?ref=$CI_COMMIT_REF_NAME" | base64)
  script: |
    curl --request POST "$API_URL" --header "PRIVATE-TOKEN: $AUTOMATION_ACCESS_TOKEN" --header "Content-Type: application/json"
    --data '{
      "branch": "'$CI_COMMIT_REF_NAME'",
      "commit_message": "'$COMMIT_MESSAGE'",
      "actions": [{"action": "update", "file_path": "'$FILE_PATH'", "content": "'$FILE_CONTENT'", "encoding": "base64"}]
    }'
In the before_script section, we retrieved the base64-encoded contents of the README.md file. Further, in the script section, we used the commits API to push the same contents to the file as a “noop” commit.
It’s critical to note that we added a rules section to define a condition so that GitLab doesn’t execute a new pipeline for the “noop” commit. Otherwise, it could create an infinite chain of pipelines.
Lastly, we can see the pipeline in action:

Great! It looks like we nailed it. We can see that the first pipeline passed, and GitLab didn’t create a new pipeline for the “noop” commit.
In this article, we learned how to push code changes to a GitLab repository. Further, we learned different mechanisms, such as access tokens, SSH keys, and GitLab commits API, to solve the use case.