

Learn through the super-clean Baeldung Pro experience:
>> Membership and Baeldung Pro.
No ads, dark-mode and 6 months free of IntelliJ Idea Ultimate to start with.
Learn through the super-clean Baeldung Pro experience:
>> Membership and Baeldung Pro.
No ads, dark-mode and 6 months free of IntelliJ Idea Ultimate to start with.
The Vim text editor supports autocompletion for standard text files by default. Also, when configured properly, Vim enables an autocomplete feature for files with code in the languages it recognizes.
In this tutorial, we’ll see how the autocompletion support in Vim works.
Recent versions of the Vim editor come with a built-in autocomplete feature. In particular, Vim completes words by checking the available terms currently in the buffer. Importantly, this functionality is case-sensitive.
First, we’ll see how to use the autocomplete feature in a standard text file. In such cases, the completions are derived mainly from the file content.
For this purpose, let’s open an example .vimrc configuration file. Next, we enter a few characters of a word we need to write and press Ctrl-N to trigger autocompletion.
If Vim finds only one match, it automatically completes the term. However, if Vim finds more than one match for the text, a list of words should appear:
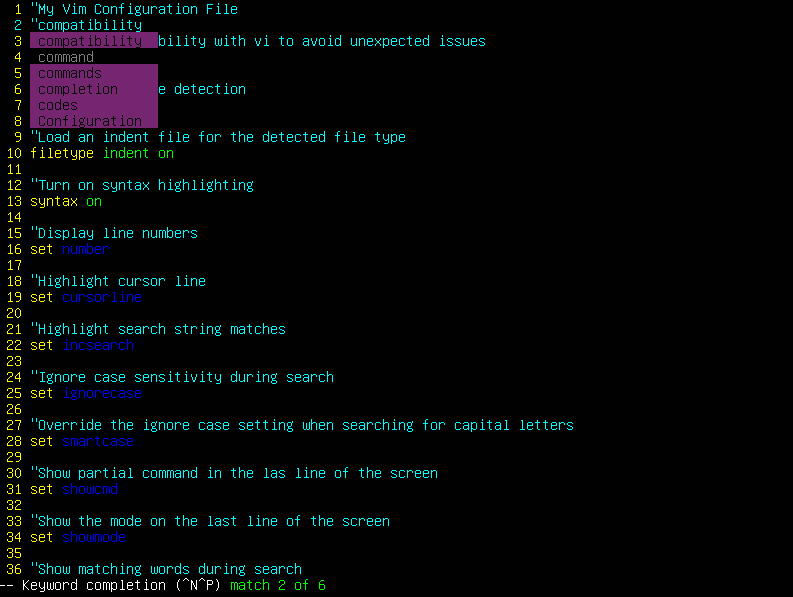
We can select the preferred term from the list.
Also, we can use Ctrl-P to make the list cycle backward. In addition, the arrow keys move around the list.
If the program finds no match to complete a word, we see an error stating Pattern not Found:
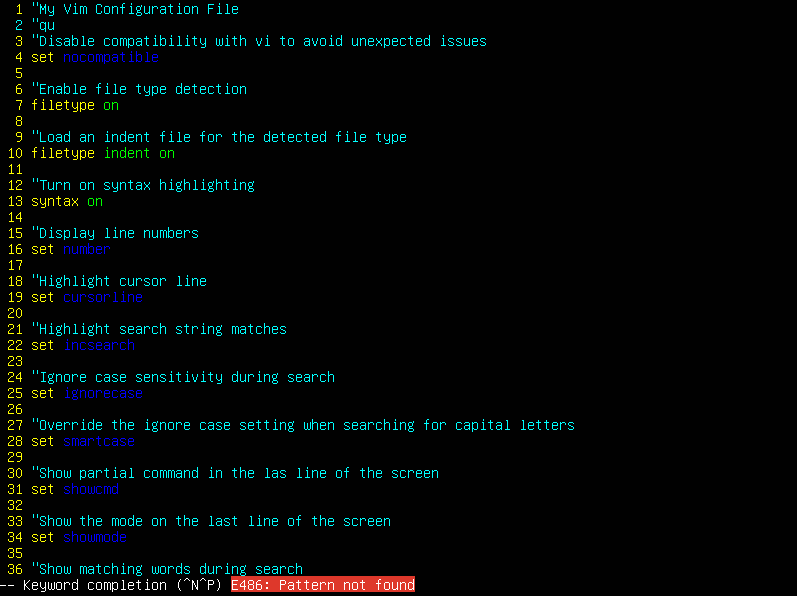
Finally, to see Vim’s documentation on the autocomplete functionality, we can use :help i_CTRL-N.
Omnicompletion provides an intelligent autocompletion feature for programs in Vim. When called, Omnicompletion examines the text before the cursor to predict the intended word.
Ordinarily, Omnicompletion isn’t available by default. So, to enable the Omnicompletion features on Vim, let’s add several lines to our ~/.vimrc:
" Enable plugins and load plugin for the detected file type.
filetype plugin on
" Enable Omnicomplete features
set omnifunc=syntaxcomplete#Complete
Here, the double quotation marks begin comment lines. Below each comment is the line with the described function.
At this point, we can press Ctrl-X and Ctrl-O from within Vim to start Omnicompletion. To check whether Omnicompletion is working, we can use the command :echo &omnifunc in a file.
In addition, Omnicompletion can work with a specific language syntax in Vim. For example, to set up autocompletion for JavaScript syntax, we use javascriptcomplete#CompleteJS:
:set omnifunc=javascriptcomplete#CompleteJS
Similarly, we can configure HTML, CSS, and PHP, respectively:
When it comes to Ctrl-N and Ctrl-P completions, there are so-called popup menu states:
Depending on the popup menu state we’re currently in, the insertion might contain some artifacts. For instance, state 1 and state 3 commonly add a newline character at the end of the insertion. In fact, using Return to insert a match behaves differently according to the state:
So, to avoid such behavior, we can use yet another mapping: Ctrl-Y. It accepts (Yes) the current match and stops completion. Alternatively, if we want to cancel, we can use Ctrl-E to Exit.
Alternatively, we can add some remappings to our .vimrc file:
inoremap <expr> <TAB> pumvisible() ? "\<C-y>" : "\<CR>"
inoremap <expr> <Esc> pumvisible() ? "\<C-e>" : "\<Esc>"
inoremap <expr> <C-j> pumvisible() ? "\<C-n>" : "\<Down>"
inoremap <expr> <C-k> pumvisible() ? "\<C-p>" : "\<Up>"
Here, we remap Tab, Escape, Ctrl-J, and Ctrl-K depending on the visibility of the popup menu. In particular, pumvisible() returns the state of the menu. Then, the mapping directly after the question mark indicates the replacement in case it’s visible, while the mapping after the colon is used when it’s not. Thus, we use Tab as Ctrl-Y to avoid inserting a new line.
Furthermore, Vim autocompletion has other excellent substitutes. The command :h ins-completion shows the variety of built-in completion options on our system.
Generally, plugins add extra functionality to any program. Of course, we can add plugins to Vim to extend its autocompletion features. Notably, we can employ plugin managers like vim-plug and vundle to ease the plugin installation process.
Now, let’s look at some autocompletion plugins for vim and their unique features.
SuperTab is a Vim autocompletion plugin that enables the use of Tab for all insert completions. In othe rwords, the plugin enables us to hit Tab after a partial entry to get an autocompletion functionality.
For instance, we might want to type editors. So, we enter e and press Tab. The plugin shows a keyword completion list. Then, we can select the desired word from the list.
The SuperTab plugin is similar to the built-in Omnicompletion alternative. However, there are a few differences:
To install and set up SuperTab, let’s create a directory for the installation:
$ mkdir -p ~/.vim/pack/plugins/start
Next, let’s clone the SuperTab repository via git:
$ git clone --depth=1 https://github.com/ervandew/supertab.git ~/.vim/pack/plugins/start/supertab
Further, we’ll add packloadall to our ~/.vimrc file:
" Enable packloadall for pack plugins.
packloadall
Finally, we can get to the SuperTab documentation from within Vim using the :help supertab command.
Next, Jedi-Vim is a Python autocompletion plugin within Vim. Basically, it’s a Vim binding to the autocompletion library Jedi. Uniquely, Jedi-Vim stands out with its broad support for most of Python’s core features.
We can use Vundle to install Jedi-Vim. To illustrate, let’s add the plugin to our configuration file:
Plugin 'davidhalter/jedi-vim'Next, we’ll save and source the file. After that, we run the :PluginInstall command in Vim. Importantly, to use Jedi-Vim while coding, we press Ctrl-Space.
As with other plugins, we can access the Jedi-Vim documentation in vim with the :help jedi-vim command.
YouCompleteMe is a fast and intelligent suggest-as-you-type code-completion and refactoring solution for Vim. It has several completion engines built in. Hence, YouCompleteMe can work with almost any language.
Indeed, the YouCompleteMe plugin is unique and has several advantages over other autocompletion plugins:
Similar to other plugins, we use Tab to go through any valid suggestions.
The YouCompleteMe installation is outside the scope of this article. However, an important step is to install CMake and Python. In Debian-based systems, we can do that via apt:
$ sudo apt install build-essential cmake python3-devFurther, we might need to install mono-complete, golang, nodejs, jdk, and npm:
$ sudo apt install mono-complete golang nodejs default-jdk npm
After deploying the necessary packages, we follow the installation guide to set up and compile YouCompleteMe.
In conclusion, autocompletion is a great feature of the Vim editor.
In this article, we saw how to use the built-in autocompletion features in Vim, but also learned about plugins with the same or more features.