

Learn through the super-clean Baeldung Pro experience:
>> Membership and Baeldung Pro.
No ads, dark-mode and 6 months free of IntelliJ Idea Ultimate to start with.
Learn through the super-clean Baeldung Pro experience:
>> Membership and Baeldung Pro.
No ads, dark-mode and 6 months free of IntelliJ Idea Ultimate to start with.
Creating an image of a Linux system can be very useful if we want to create a backup of the system in a particular state. For instance, we can configure our Linux server to our heart’s content and then create a reusable image of it. That way, we wouldn’t need to install Linux and configure it from scratch.
In this tutorial, we’ll discuss how we can create an image of our Linux machine and restore it later on. First, we’ll start with the popular Clonezilla suite to create a complete system image and deploy it. Then, we’ll take a look at the dd utility that comes with most Linux distributions.
Finally, we’ll cover the GNOME Disks utility for the same purpose.
Clonezilla is a set of utilities that we can use to create, restore, and deploy images. A manual approach to managing system images is quite tedious. Clonezilla can simplify this process to manage the system images and deploy them to a single or a group of computers.
Apart from that, Clonezilla costs nothing because it’s open-source. Not only that, but it also allows us to clone and restore disk images on remote devices as well.
We can use Clonezilla in two ways: the Live Clonezilla distribution and the command-line tool. The process of creating and restoring the image is the same for both approaches. Therefore, we’ll go with the former.
However, before we begin, we should get a grasp of how our partitions are arranged:
$ lsblk
NAME   MAJ:MIN RM   SIZE  RO TYPE MOUNTPOINTS
sda      8:0    0 119.2G  0  disk
├─sda1   8:1    0   1G    0  part /
└─sda2   8:2    0   3G    0  part
Our Linux system is installed on the /dev/sda disk — specifically, on the /dev/sda1 partition. Our data partition is /dev/sda2, and that’s where we’ll write the image of /dev/sda1.
We need to grab the ISO or ZIP image of Clonezilla from the official website. Once it’s downloaded, we’ll need to extract the contents of the archive to our USB stick:
$ unzip -d clonezilla-live-12.1-amd64.zip /mnt/pendriveThat’s it. Now, we have a bootable USB stick containing the Clonezilla Live distribution.
Let’s reboot our system and select our bootable USB stick from the menu. Once Clonezilla is successfully booted, we’ll be presented with a GRUB menu:
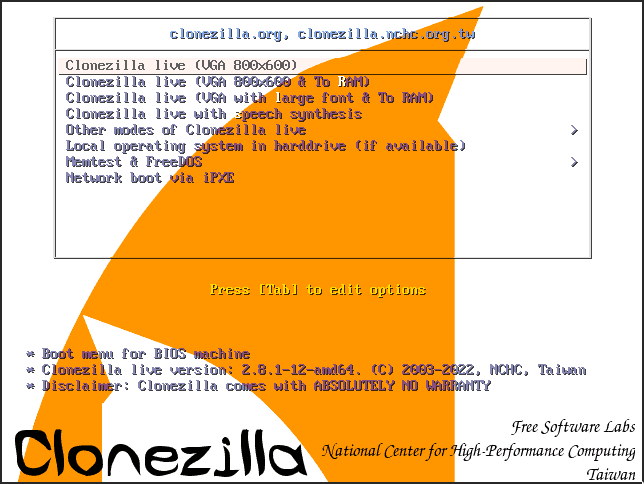
Let’s go ahead and select the first option.
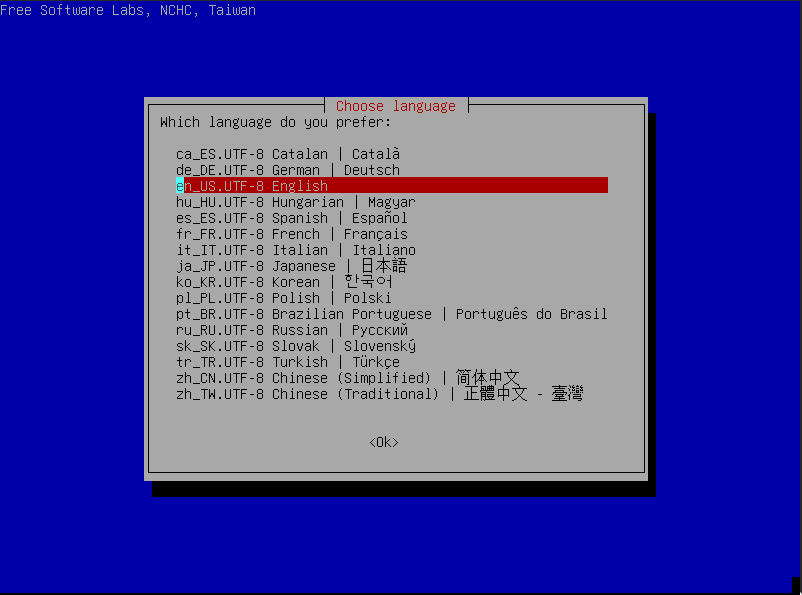
After Clonezilla has successfully initialized, we’ll select our language of choice:
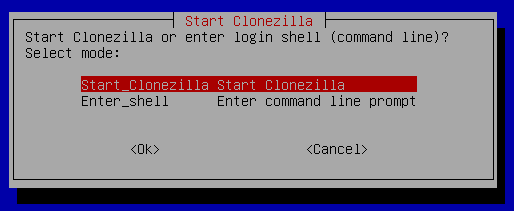
Now, we’ll use the Clonezilla wizard to automate our image creation process:
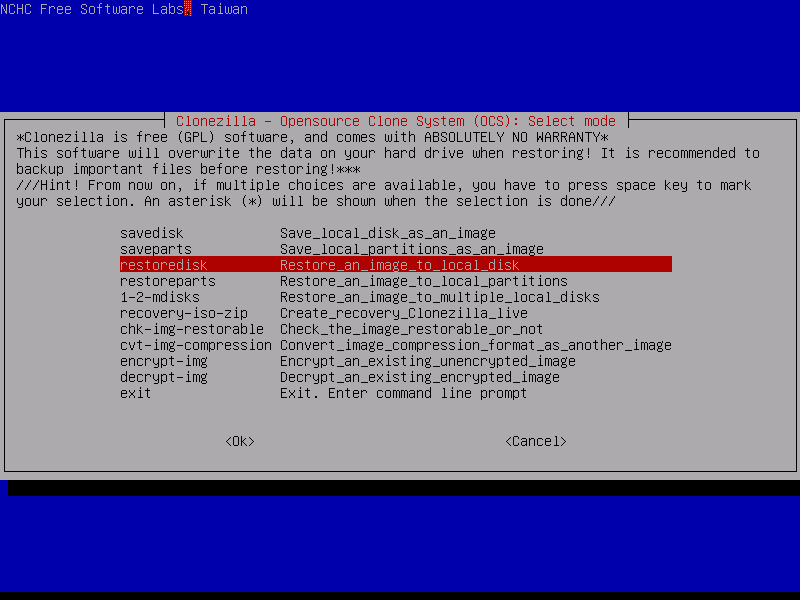
In the next prompt, we’ll need to select the mode. In our case, we’re interested in the device-image and device-device mode:
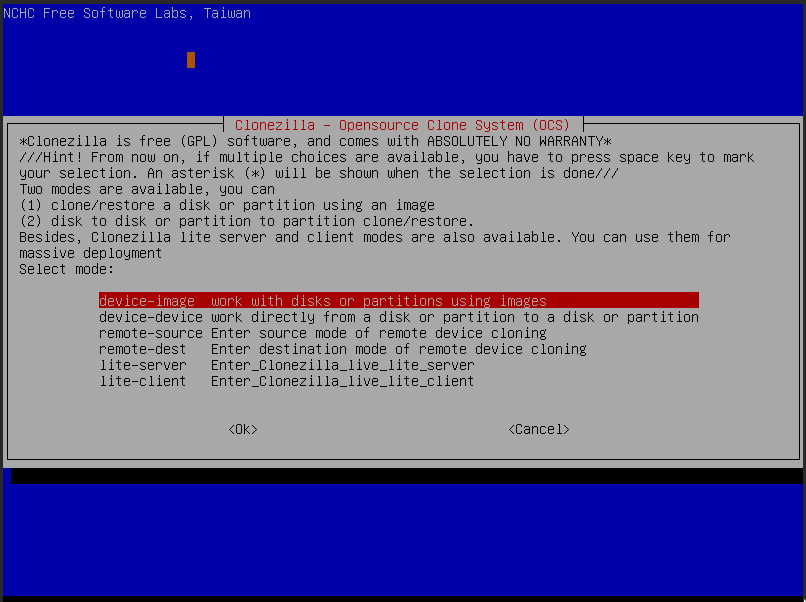
The difference between the two is in the output. In the device-image mode, we will create an image out of our Linux system partition and store it as a file in another partition.
On the other hand, if we want to clone our Linux partition into another partition, then we’ll choose the device-device mode. The device-device mode is useful if we want to clone our Linux system to a new hard drive.
After selecting the mode, we’ll need to select the source of where our image will be stored:
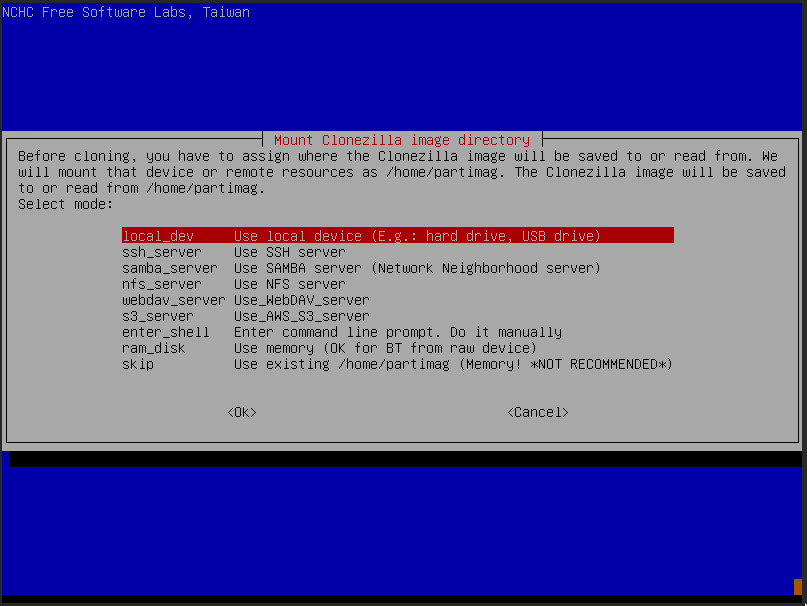
In this case, we want to store the image in another partition on our local hard drive. So, let’s select the local_dev option.
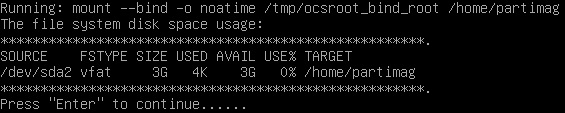
In the next step, Clonezilla will try to scan the disks attached to our machine — including USB devices. Afterward, it will get ready to prepare a mount point, which is usually /home/partimg:

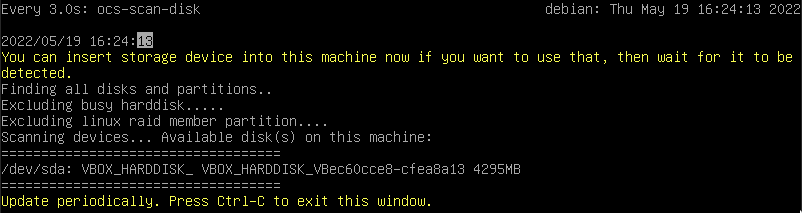
Clonezilla detected the /dev/sda device, which is the primary hard disk on this machine that contains our Linux system. Let’s go ahead and press CTRL+C to go forward:
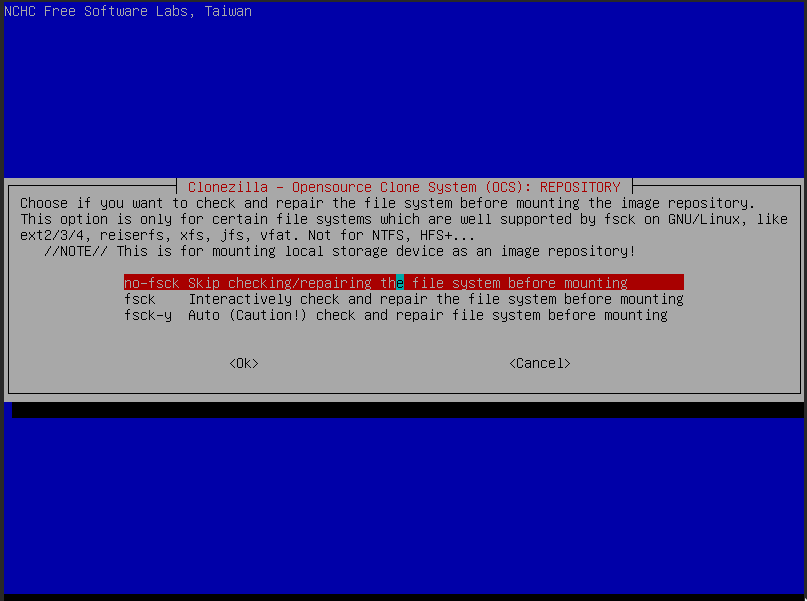
Clonezilla will prompt us whether to run fsck on our destination partition. Let’s skip this step:

Now, Clonezilla will try to mount the partition that we want to store our image on. In this case, it’s /dev/sda2, so let’s go ahead and select it:
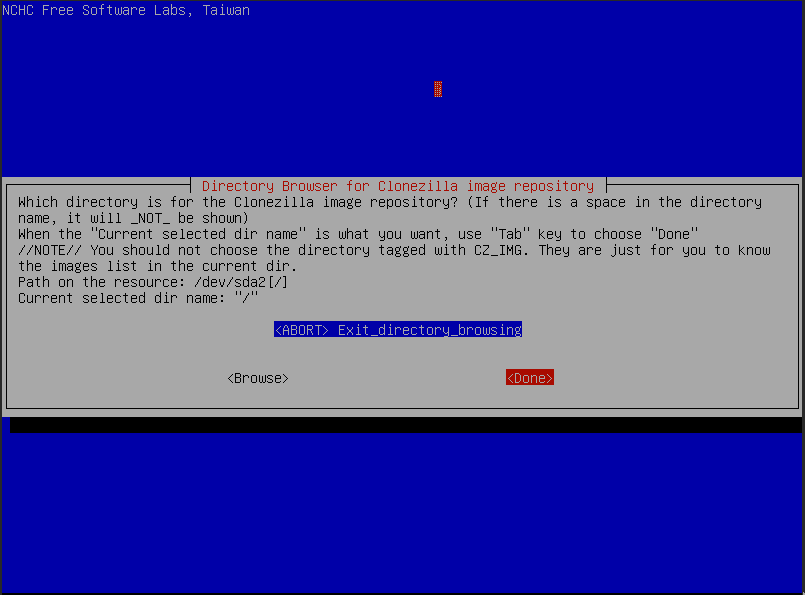
We can select a path in our destination partition. We’ll leave it as-is and select Done:
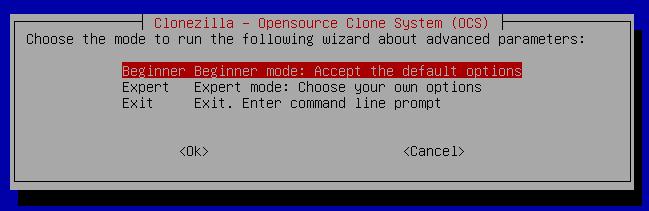
After pressing Return, we’ll be prompted for the wizard configuration mode. We’ll go with the Beginner mode since we don’t need to configure any advanced options:
Afterward, we’ll need to select whether we want to create an image of our entire disk or a specific partition:
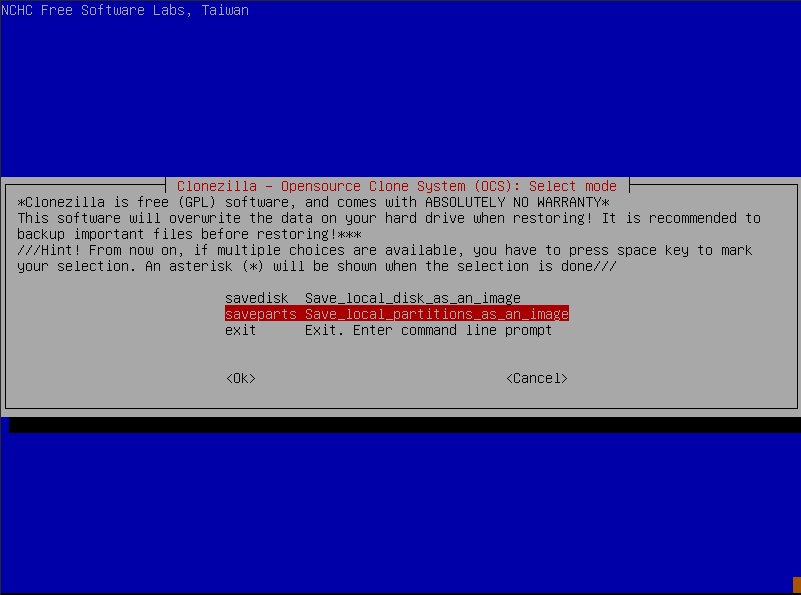
We’ll go with the saveparts option because we only need to create the snapshot of our Linux partition.
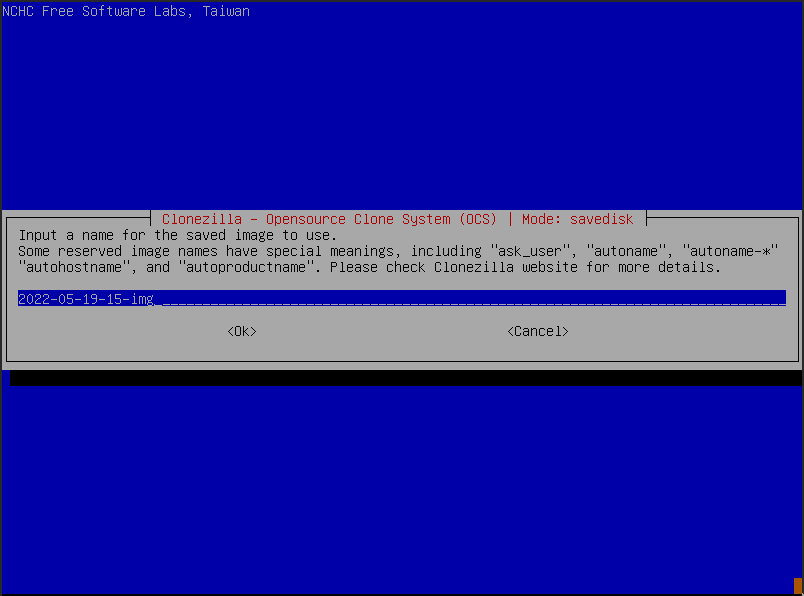
Then, we’ll optionally name the image or go with the default name:
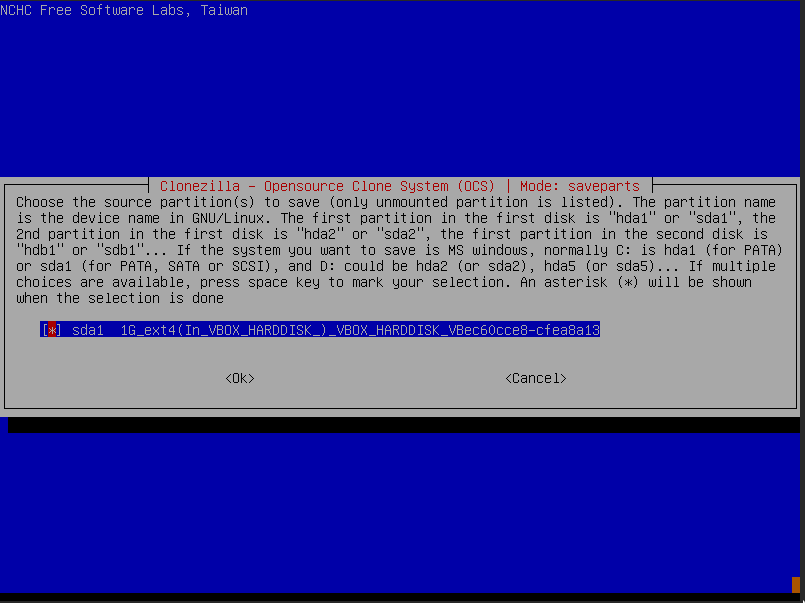
Moving forward, we’ll need to pick the partition that we want to create the image from. Clonezilla is smart enough to leave our destination partition out, so we don’t see that as an option:
During this step, we might get an error that requires us to unmount the source partition. The reason for that is that the state of our source partition might change during the image creation process. Therefore, it will result in an image that might not work as expected.
After picking our source partition, the wizard will prompt us for the check and repair option:
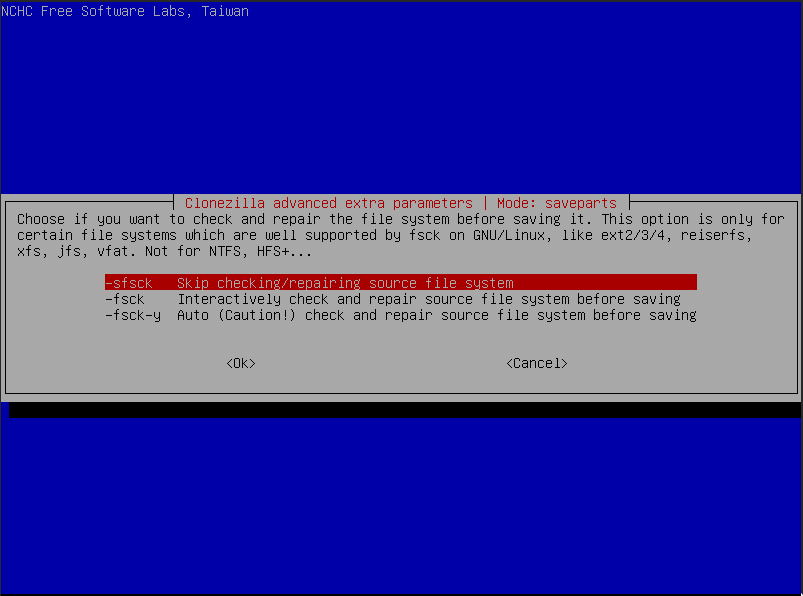
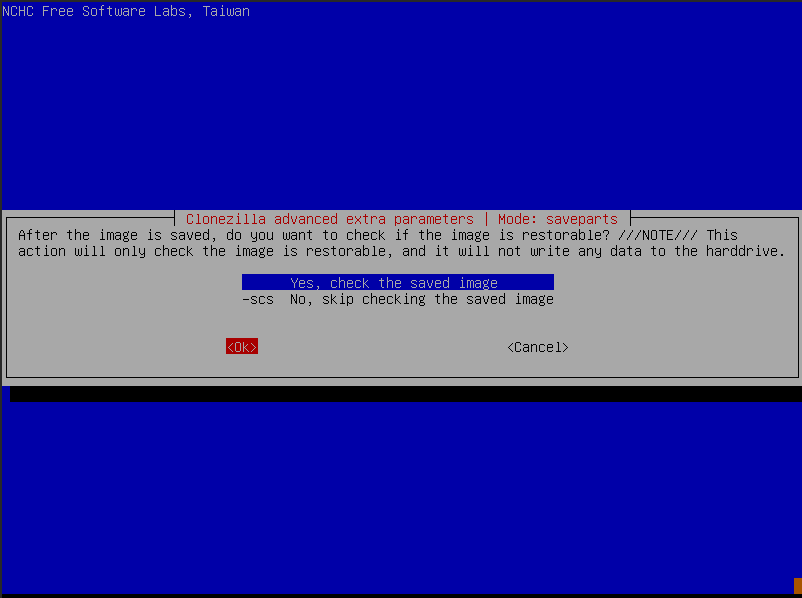
We’ll simply skip checking the partition and select the option for checking the image after it’s created.
In the next step, we’ll need to select whether we want to encrypt our image, which we’ll skip:

In the final step, Clonezilla will prompt us for confirmation:
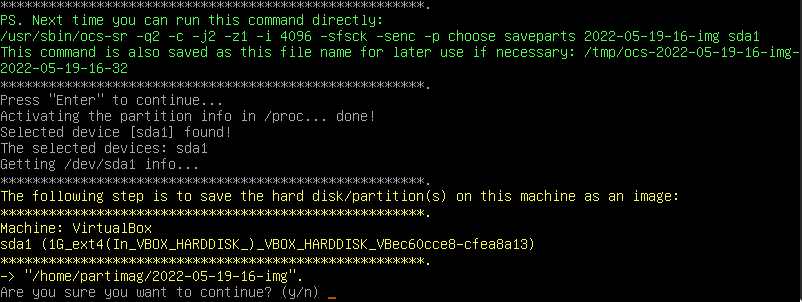
Upon confirming, Clonezilla will start the image creation process.
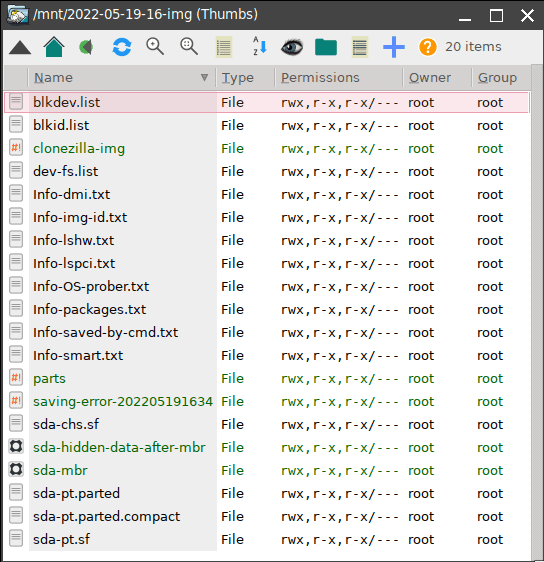
Once the image is created, we’ll be able to see it in our destination partition:
Up to this point, we’ve created the image with the Clonezilla wizard. Similarly, we can also restore the image using the wizard. All we need is to simply boot into the Clonezilla Live USB stick and select the device-image mode.
Afterward, Clonezilla will try to scan the disks and look for any restoration images. We’ll need to select our target partition to restore the image to. However, in the following step, we’ll need to select the restoredisk or restoreparts option:
Clonezilla will mount the required partition and restore the image to our disk or partition.
dd is a low-level byte-by-byte copy utility. It’s a rather dangerous utility if you don’t know much about how it operates.
dd basically creates a complete clone of a partition and even hard disks. We can dump this raw backup to a single file that we can restore later on.
The way we’d use dd to create an image of our system is by dumping our entire Linux disk or partition to a file in an external drive. The destination disk should have free space greater than our actual image.
First, let’s take a look at the overview of the partitions that we have:
NAME   MAJ:MIN RM   SIZE    RO   TYPE  MOUNTPOINTS
sda      8:0    0   119.2G   0   disk
├─sda1   8:1    0     128M   0   part  /boot/efi
└─sda2   8:2    0     16.1G   0   part  /
sdb      8:16   1    29.3G   0   disk
└─sdb1   8:17   1    29.3G   0   part
/dev/sda is our primary Linux disk, and /dev/sdb is an external drive. Before we create the image, let’s mount and cd into our external drive:
$ mount /dev/sdb1 /mntNow, we’ll create an image of the /dev/sda drive and dump it to /mnt/sda.image:
$ dd if=/dev/sda of=./sda.imageDepending on the size of the disk, it’s going to take a while to complete.
The size of the image file will be huge. Fortunately, we can compress the image using a compression program like gzip or bzip2 to achieve a sparse image:
$ sudo bash -c "dd if=/dev/sda | gzip > ./sda-$(date -I).image.gz"$ sudo bash -c "dd if=/dev/sda | bzip2 --best > ./sda-$(date -I).image.bz2"Mind that sudo normally doesn’t apply to redirections. For that reason, we’ll need to create a new instance of bash as sudo. Therefore, the redirect operations will be run as root as well.
For an uncompressed disk image, we need to specify the input file as the image and the output to be the partition or disk:
$ dd if=./sda.image of=/dev/sdaFor restoring compressed images, we’ll simply pipe the output of the image to dd:
$ gzip -c ./sda-2022-05-20.image | sudo dd of=/dev/sda$ bzcat ./sda-2022-05-20.image | sudo dd of=/dev/sdaWhile dd is ubiquitous and easy to use, it has its drawbacks when we make images of the partitions and disks. One of the cons of dd is that it’s very dangerous to use. For instance, an incorrect partition number or typing of instead of if can result in overwriting what we’re trying to back up.
On the other hand, when we restore the partition, the target partition should be the same size as the partition we took the image of. However, we can expand the partition when we restore the backup.
On the contrary, for an entire disk, we don’t need to worry about the disk size if we’re trying to restore the image of the same disk.
GNOME Disks is a GUI for udisks, a disk management service that comes with the GNOME desktop environment. On other desktop environments, we can simply install gnome-disk-utility from our distribution’s official package repository using a package manager.
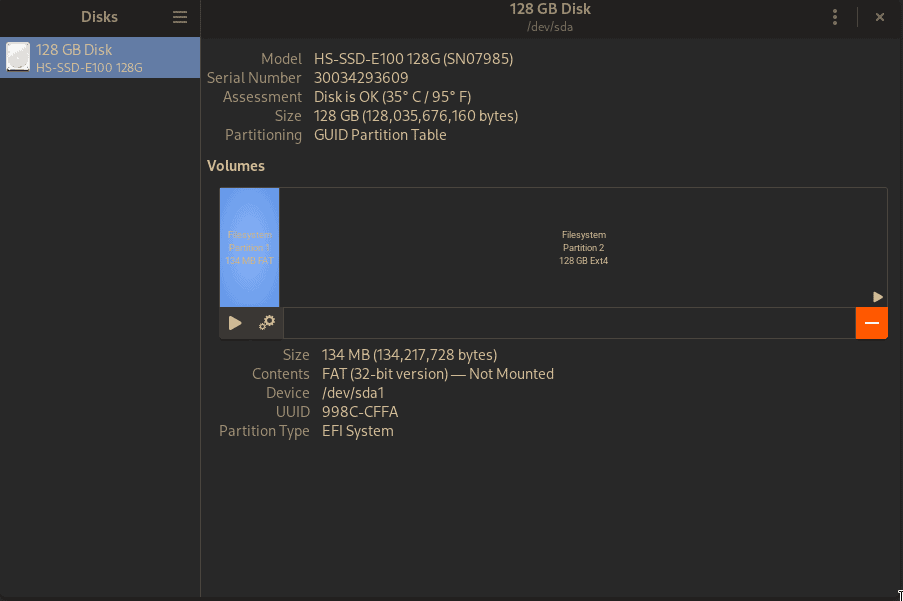
Once we open GNOME Disks, we’ll be presented with a high-level view of our disks:
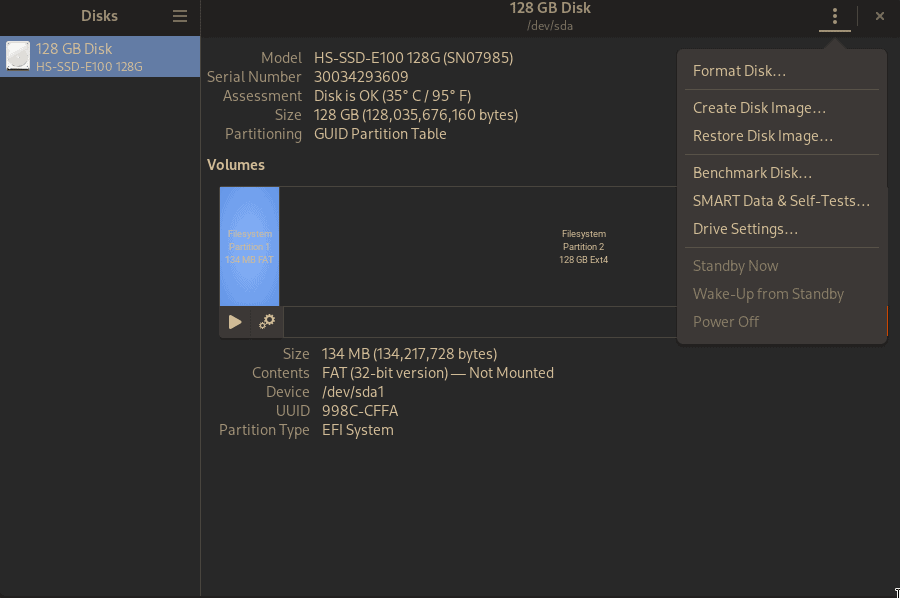
Now, if we want to create an image of our disk, we can simply choose the Create Disk Image option from the Disks menu:
Before we can create the image, make sure the partitions of the disks are unmounted.
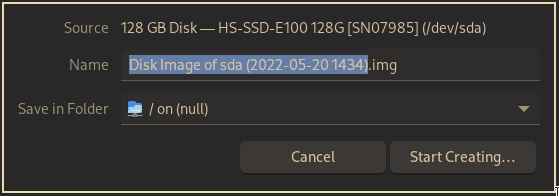
Next, let’s pick a name for our image and click the Create button to start creating the image:
Similarly, to restore the image, we can select the Restore Disk Image option from the menu and select our disk image to be restored.
In this article, we saw how straightforward creating images of our Linux system is. We began by booting a live Clonezilla USB stick and created an image of our Linux partition. Then, we also discussed how we could use dd to create an image of our entire disk.
Finally, we covered the GNOME Disks utility as an alternative to the other programs.