Learn through the super-clean Baeldung Pro experience:
>> Membership and Baeldung Pro.
No ads, dark-mode and 6 months free of IntelliJ Idea Ultimate to start with.
Last updated: March 18, 2024

Learn through the super-clean Baeldung Pro experience:
>> Membership and Baeldung Pro.
No ads, dark-mode and 6 months free of IntelliJ Idea Ultimate to start with.
Most people associate the command line with text operations. So, playing audio does not come to mind naturally.
There can be many reasons to choose to play audio this way. Having limited computing resources is one of them; another is faster control from the keyboard. We may also want a simpler interface.
In this tutorial, we will discuss an audio player called C* Music Player, or cmus for short.
cmus is an open-source command line music player written in C. Its interface is implemented with the ncurses library, and the controls use vi-style.
cmus is feature-rich, but its primary function is to organize our music library and play audio. Other features include powerful filters, a play queue, playlists, and gapless playback. More features can be added in the form of extensions.
Many popular audio file formats are supported, including MP3, Ogg Vorbis, Musepack, MPEG-4/AAC, FLAC, ALAC, WavPack, Wav, and WMA.
Additionally, cmus is lightweight and fast and requires minimal RAM to operate. Loading a music library with a size of tens of gigabytes into the application takes just a few seconds.
cmus is expected to work on most Linux and Unix-based systems, including macOS. To install, we use the package manager that comes with our system. For example, in Debian-based systems:
sudo apt-get install cmus
As an alternative, we can compile the source code following the instructions from their repository.
Let’s launch cmus from the command line:
cmus
After the application starts, we’ll see an empty library view. We need to go to the fifth view, the file browser view, by pressing the 5 key to get started. Here, we can browse our file system in search of audio files:
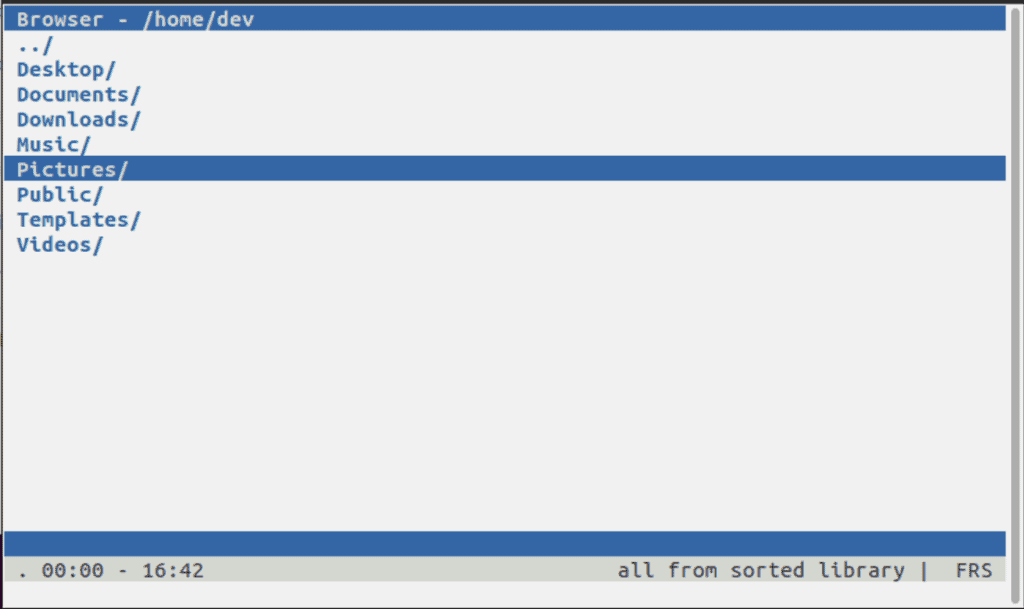
We can either play files directly from this view or import them into our library.
Throughout the application, list navigation is done with the Up Arrow or Down Arrow keys, and we use Page Up or Page Down keys to jump pages.
When we have selected an audio file, we play the highlighted file by pressing the Enter key.
Other useful key controls are:
Note that the above <, >, +, and – keys describe the keys on the keyboard — no need to press Shift for the actual character.
Once we’ve found the audio folder or the files we wish to add to our library, we press the key to add them. Afterward, we can navigate to the library view to see the results.
There are seven views in cmus, and only one view is visible at a time. To switch between the views, we use keys 1 to 7.
The first is the library view:
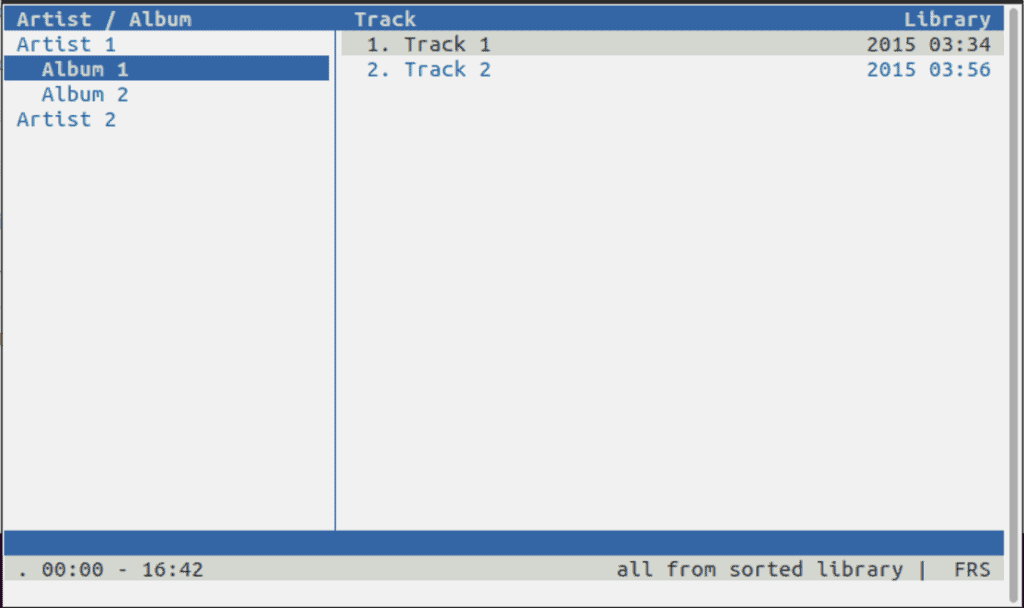
On the left side, the artist/album tree displays an alphabetically sorted list of artists. We unfold the list of albums by selecting an artist and pressing the Space key.
The selected artist or album tracks are displayed on the right side. With the Tab key, we switch between the subviews. To start playing, we select either a track, an artist, or an album, and press Enter.
The second view is another library view with a flat list of all audio files:
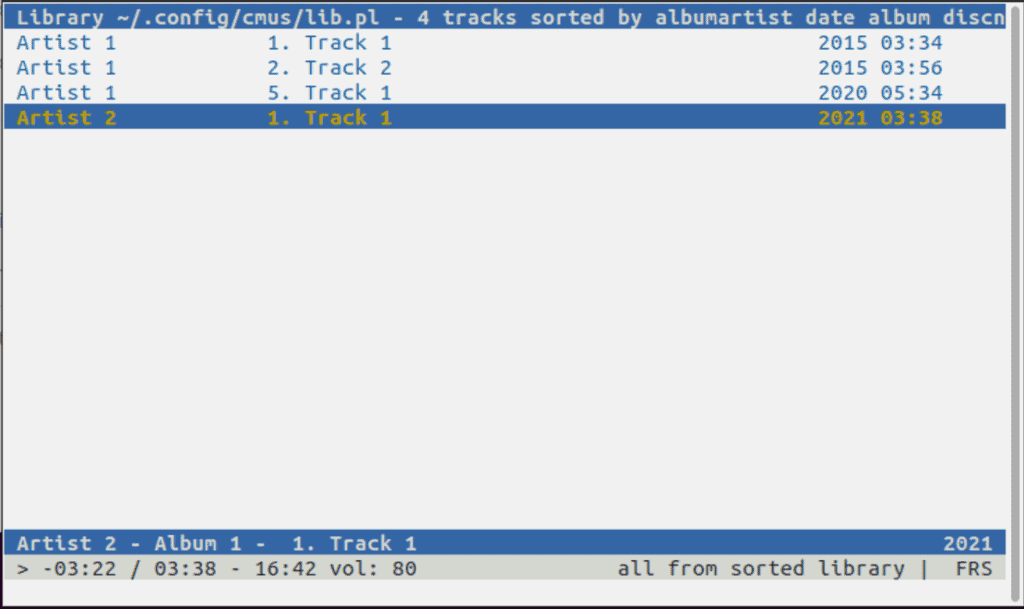
In this view, we have the option to search tracks by name. To start, we use the / command followed by a search query. The list will highlight the first match. By pressing the Enter key, we will switch to search results. Then we can navigate between results by pressing the n key.
The third is the playlist view. Here, too, the main view is split into subviews, with navigation identical to the library view:
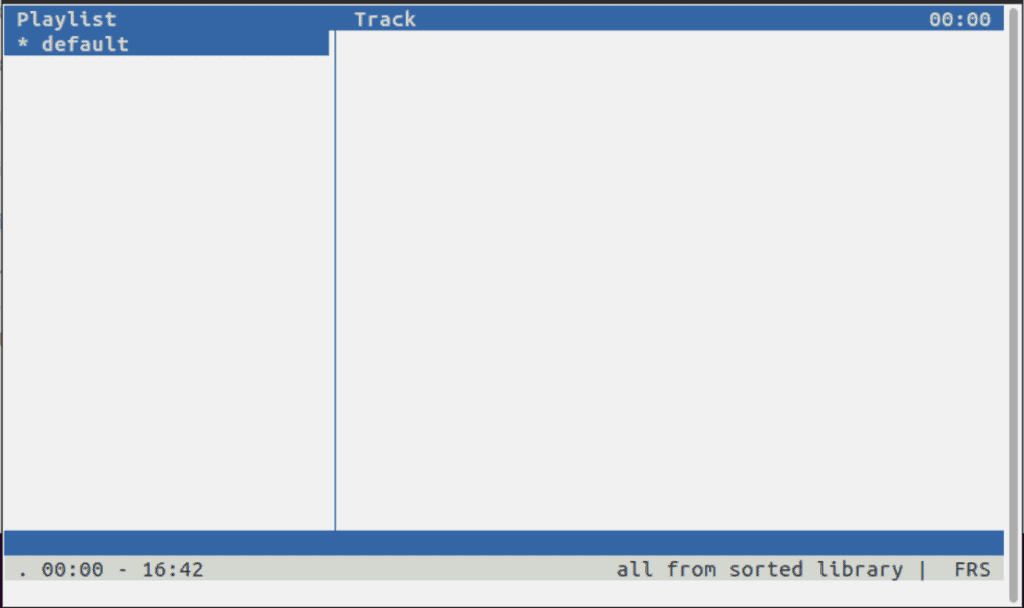
We have the list of playlists on the left side and the tracks on the right side.
To populate the default playlist, we select tracks in the library view and press the y key. We reorder the tracks with the q key. The D key will remove the track from the list.
The fourth view is the queue view:

We can select and add more tracks to play next without interrupting the currently playing audio. To do that, we press the e key.
The delete control is the same as for the playlist tracks. To reorder tracks, we use the p key.
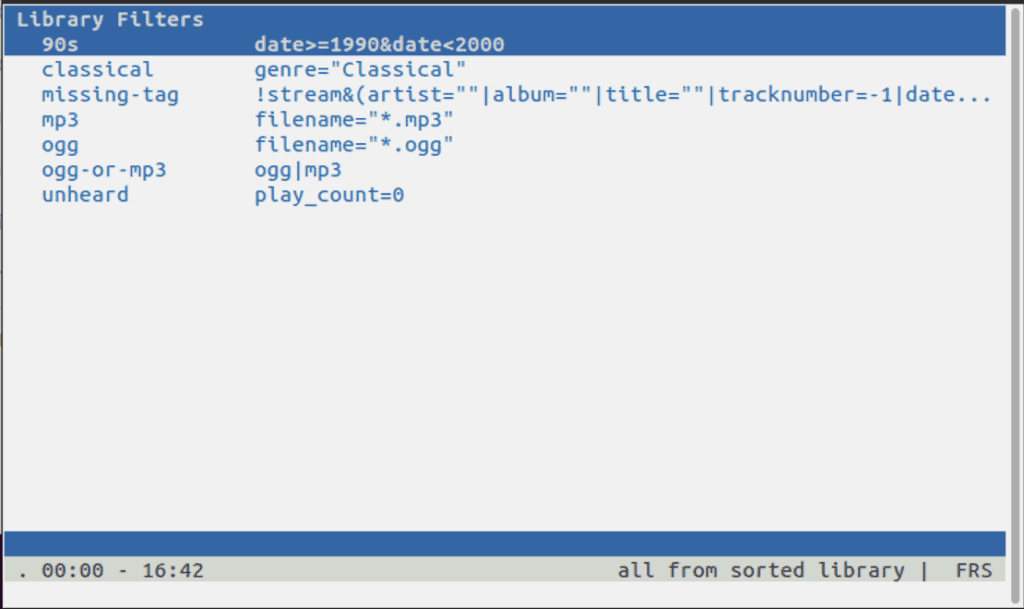
cmus has a powerful filtering feature that allows us to search for tracks beyond the simple name search. To filter in the library view, we use the :filter command followed by an expression:
:filter {expression}
Inside the expression, we can use comparison and logical operators:
:filter duration>180
:filter date>2000&date<2010&genre="Pop"
:filter genre="Rock"|genre="Metal"
Additionally, we can save filters using the fset command and activate them later:
fset {name}={expression}
All the saved filters will appear and can be managed in the filters view:
Finally, the seventh view is the settings view:
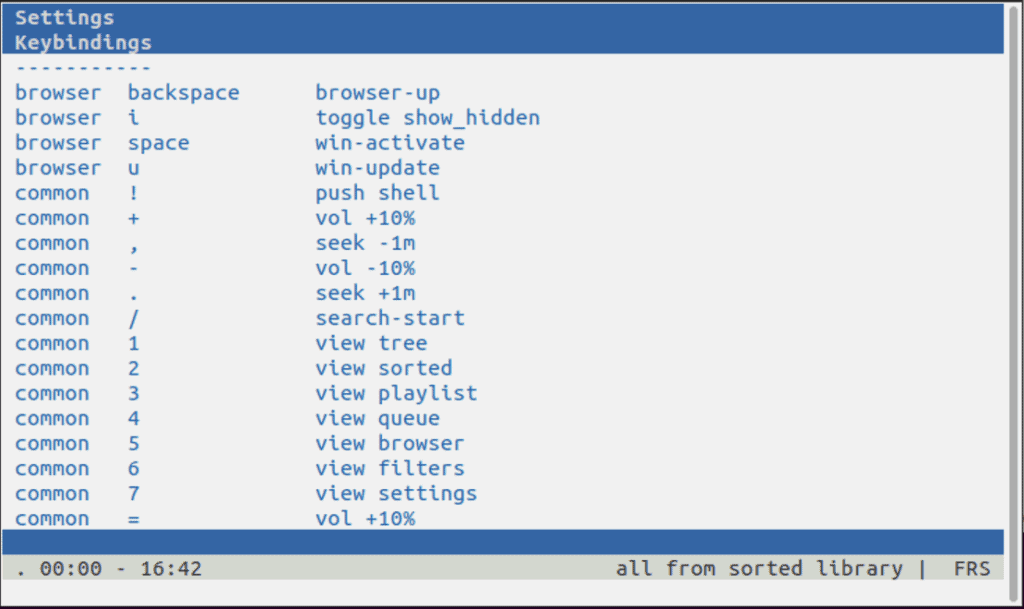
Some of the cmus commands may seem unintuitive. In this view, along with the application configuration, we can also customize the key bindings.
To save everything and exit, we use :quit or :q for short:
:quit
In case we want to reset, we can use the :clear command:
:clearThe command takes flags for views. When no view is specified, the current view is cleared.
cmus does not support playing audio directly from the command line. Nonetheless, it ships with the cmus-remote extension, which allows us to control the detached application remotely.
Any terminal multiplexer can be used to detach the application. For our examples, we’ll use screen that comes pre-installed on most Linux distributions. Alternatively, we can install it using a package manager:
sudo apt-get install screen
To start cmus with screen, we need to start a new named session:
screen -S cmus cmus
Then, we can use the application as usual. However, instead of quitting, we’ll need to detach with the Ctrl +a +d key combination. Afterward, we can use cmus-remote and play audio files:
cmus-remote -C "player-play {file path}"
To reopen the cmus window, we just reattach to the existing screen session:
screen -r cmus
Note that cmus-remote has many commands by itself. The -C option passes the arguments as raw commands.
In this article, we looked at playing audio in the command line with the cmus application. Make sure to check out their manual to learn more.