

Learn through the super-clean Baeldung Pro experience:
>> Membership and Baeldung Pro.
No ads, dark-mode and 6 months free of IntelliJ Idea Ultimate to start with.
Last updated: March 18, 2024
Learn through the super-clean Baeldung Pro experience:
>> Membership and Baeldung Pro.
No ads, dark-mode and 6 months free of IntelliJ Idea Ultimate to start with.
In this brief tutorial, we’ll discuss how we can run the Nginx server inside a Docker container.
First, we’ll install and run Nginx by creating a Docker image from scratch using a Dockerfile. Afterward, we’ll create a simple Docker container from the official Nginx Docker image.
Nginx is a powerful, advanced web server we can use to serve a variety of content, such as static web pages and APIs. In this section, we’ll begin by creating a new Dockerfile with the required instructions for building and running the Nginx image.
First, let’s create a new directory and touch the Dockerfile:
$ mkdir server$ touch DockerfileNow, we’re ready to populate our Dockerfile. Usually, the first command in the Dockerfile instructs Docker to create an image based on another image:
FROM ubuntuOur Docker image will now be based on the minimal Ubuntu image, which is available on Dockerhub. The preceding commands in the Dockerfile will be layered on top of the base image.
In the next line, we’re going to tell Docker to install the nginx package from the official package repository using apt:
RUN apt-get -y update && apt-get -y install nginxThe command first tries to update the package repository. Once that’s successful, it installs the nginx package.
Nginx does come with a default configuration file. However, when we have our own Nginx configuration file, it’s much easier to maintain it outside of a Docker container. Therefore, we are going to create a default config file for Nginx in the same directory as the Dockerfile:
server {
    listen 80 default_server;
    listen [::]:80 default_server;

    root /usr/share/nginx/html;
    index index.html index.htm;

    server_name _;
    location / {
        try_files $uri $uri/ =404;
    }
}
Let’s add an entry in the Dockerfile for copying our config file:
COPY default /etc/nginx/sites-available/defaultNow, every time we build our Docker image, Docker copies the config file to the target directory.
Next, we’ll instruct the system to expose the port on which we’ll access our server. In our case, it’s going to be port 80 using TCP:
EXPOSE 80/tcpNow, we are going to run Nginx whenever our Docker image launches:
CMD ["/usr/sbin/nginx", "-g", "daemon off;"]We should note the ; at the end of the directive. Not specifying it might lead to unexpected problems.
With the final command, our whole Dockerfile now looks something like this:
# Pull the minimal Ubuntu image
FROM ubuntu

# Install Nginx
RUN apt-get -y update && apt-get -y install nginx

# Copy the Nginx config
COPY default /etc/nginx/sites-available/default

# Expose the port for access
EXPOSE 80/tcp

# Run the Nginx server
CMD ["/usr/sbin/nginx", "-g", "daemon off;"]Now, our Dockerfile is ready to be processed. We are going to use the docker command to build our image:
$ docker build . -t haidar/serverLet’s break this down:
Once we run the command, Docker will run each command in the Dockerfile in sequence.
Once our image builds successfully, we are going to take it for a test run.
Let’s issue the following command to run the server:
$ docker run -d -p 80:80 haidar/serverLet’s break this down:
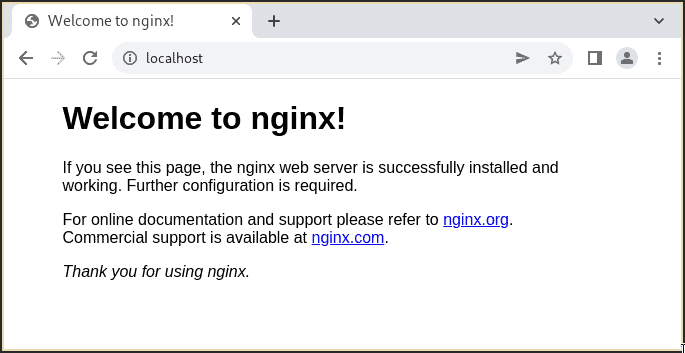
Let’s fire up a browser and check our newly-built server:
Most Linux distributions don’t ship with Nginx by default. So, we’ll need to install Nginx using a package manager or build it from its source.
Not only that, but we’ll also need to maintain Nginx when there’s a new release. Thus, it can become an overhead to update Nginx either with a package manager or build it from the source.
For that reason, when we containerize Nginx from the official Nginx image, we reduce the maintenance overhead. The Docker container will be updated or replaced when a new version of Nginx is released.
The official Nginx image is available on Dockerhub, so we don’t have to worry about building our own image for Nginx. We can simply pull the image:
$ docker pull nginx
The command installs all the necessary components for us. Besides, the image also comes with preset configurations for running the server.
Let’s take the Nginx Docker container for a test run:
$ docker run -d --name server -p 80:80 nginxWe saw these options in the previous section. However, the –name option is used to give a name to the container—a random name if not specified.
We’re done at this point. Let’s see the status of our Docker image:
$ docker ps
CONTAINER ID   IMAGE     COMMAND                  CREATED              STATUS              PORTS                               NAMES
816532f135c8 server "/docker-entrypoint.…" About a minute ago Up About a minute 0.0.0.0:80->80/tcp, :::80->80/tcp nginxIn this article, we saw how we could create an Nginx container from scratch using a Dockerfile. Apart from that, we also discussed how to pull and run the official Nginx Docker image.