

Yes, we're now running our only Summer Sale. All Courses are 30% off until 20th July, 2026:
Learn through the super-clean Baeldung Pro experience:
>> Membership and Baeldung Pro.
No ads, dark-mode and 6 months free of IntelliJ Idea Ultimate to start with.
1. Overview
In this tutorial, we’ll talk about netmask. We’ll define netmask, subnets (subnetworks), and how to find netmask information in our Linux system. We’ll look at commands like ip, nmcli, and ifconfig and how to use them to get the netmask information. Additionally, we’ll use other utilities like ifdata to get the same information.
2. Understanding netmask
When a device connects to the internet, it gets assigned an IP address. The IP address given contains two parts – the network address and the host address.
The network address is used to find the subnetwork in which a device is located, and the host address identifies the specific device in the subnetwork. For example, if we’ve got an IP address of 192.168.0.x, 192.168.0 is the network address, while .x is the host address.
To present this in a network environment, we use a netmask. A netmask is a 32-bit binary mask that divides an IP address into network and host bits.
Netmask helps to identify the range of IP addresses on the same network. Usually, we can use netmask and subnet mask interchangeably.
2.1. Classful Addressing
In early implementations of IPv4 networks, we used address classes to assign IP addresses. The main classes were A, B, and C classes. Each of the address classes had a different netmask:
- Class A IP addresses ranging from 1.0.0.0 to 127.255.255.255 have a default netmask of 255.0.0.0.
- Class B IP addresses ranging from 128.0.0.0 to 191.255.255.255 have a default netmask of 255.255.0.0.
- Class C IP Addresses ranging from 192.0.0.0 to 223.255.255.255 have a default netmask of 255.255.255.0.
2.2. Classless Addressing
Classless Inter-Domain Routing (CIDR) replaced the classful network design. Instead of using network classes to allocate addresses, it uses variable length subnet masking/VLSM (creating subnets of different sizes within a subnet).
In classless IP addressing, we use subnetting to divide classes A, B, and C networks into multiple subnetworks called subnets.
During this process, we postfix the number of “on” bits (the number of ones after we convert netmask to binary) to the IP addresses defined in each subnet. We refer to this as CIDR notation, and it’s the new method to denote network mask.
For example, in a class C network, we have an IP address of 192.168.0.10 with a netmask of 255.255.255.0. This means there are 24 “on” bits on the network portion. We can as well write this as 192.168.0.10/24.
Although netmask and subnet mask can be used interchangeably, in a few instances, we use them differently. For example, when we refer to the network mask of a network we use netmask. However, when we refer to the network mask of a subnet we refer to it as the subnet mask.
Most Linux network commands use the CIDR notation to specify the netmask. Both IPv4 and IPv6 use the CIDR notation. Lastly, genmask refers to the netmask for the destination network.
3. ip Command
We use the ip command to create or show network information such as ip address and routing. When we run the ip command, among the information displayed is the netmask.
Let’s run ip and find the netmask:
$ ip addr show
1: lo: <LOOPBACK,UP,LOWER_UP> mtu 65536 qdisc noqueue state UNKNOWN group default qlen 1000
    link/loopback 00:00:00:00:00:00 brd 00:00:00:00:00:00
    inet 127.0.0.1/8 scope host lo
       valid_lft forever preferred_lft forever
    inet6 ::1/128 scope host
       valid_lft forever preferred_lft forever
2: enp0s3: <BROADCAST,MULTICAST,UP,LOWER_UP> mtu 1500 qdisc fq_codel state UP group default qlen 1000
    link/ether 08:00:27:ea:a5:61 brd ff:ff:ff:ff:ff:ff
    inet 192.168.0.104/24 brd 192.168.0.255 scope global dynamic noprefixroute enp0s3
       valid_lft 7120sec preferred_lft 7120sec
    inet6 fe80::129e:c85e:f067:e115/64 scope link noprefixroute
       valid_lft forever preferred_lft forever
In the above example, the ip addr show command displays the network information, including the IP address, the netmask, broadcast, etc. On interface enp0s3, the IP address is postfixed with a /24. The /24 is the CIDR notation and it indicates the value of our netmask. It also shows that our first three octets are used. This means our netmask is 255.255.255.0. The IPv6 address is also postfixed with /64.
Let’s look at other variations of how we can run this command to get the netmask. In the following examples, the -a option specifies which version of IP to show, and grep filters the results on the last command:
~$ ip -4 a
1: lo: <LOOPBACK,UP,LOWER_UP> mtu 65536 qdisc noqueue state UNKNOWN group default qlen 1000
    inet 127.0.0.1/8 scope host lo
       valid_lft forever preferred_lft forever
2: enp0s3: <BROADCAST,MULTICAST,UP,LOWER_UP> mtu 1500 qdisc fq_codel state UP group default qlen 1000
    inet 192.168.0.104/24 brd 192.168.0.255 scope global dynamic noprefixroute enp0s3
       valid_lft 7080sec preferred_lft 7080sec
$ ip -6 a
1: lo: <LOOPBACK,UP,LOWER_UP> mtu 65536 state UNKNOWN qlen 1000
    inet6 ::1/128 scope host
       valid_lft forever preferred_lft forever
2: enp0s3: <BROADCAST,MULTICAST,UP,LOWER_UP> mtu 1500 state UP qlen 1000
    inet6 fe80::129e:c85e:f067:e115/64 scope link noprefixroute
       valid_lft forever preferred_lft forever
$ ip addr show | grep 'inet'
    inet 127.0.0.1/8 scope host lo
    inet6 ::1/128 scope host
    inet 192.168.0.104/24 brd 192.168.0.255 scope global dynamic noprefixroute enp0s3
    inet6 fe80::129e:c85e:f067:e115/64 scope link noprefixroute
4. nmcli Command
The nmcli command is used to control the network manager, i.e., to create, display, edit, delete, activate, and deactivate network connections. It can also control and display network device status and information.
The output of the nmcli command can be long. We need to filter it to get the specific results we need.
Let’s run it and filter out our result to get the netmask information:
$ nmcli device show enp0s3 | grep 'IP'
IP4.ADDRESS[1]: 192.168.0.107/24
IP4.GATEWAY: 192.168.0.1
IP4.ROUTE[1]: dst = 192.168.0.0/24, nh = 0.0.0.0, mt = 100
IP4.ROUTE[2]: dst = 169.254.0.0/16, nh = 0.0.0.0, mt = 1000
IP4.ROUTE[3]: dst = 0.0.0.0/0, nh = 192.168.0.1, mt = 100
IP4.DNS[1]: 192.168.0.1
IP6.ADDRESS[1]: fe80::129e:c85e:f067:e115/64
IP6.GATEWAY: --
IP6.ROUTE[1]: dst = fe80::/64, nh = ::, mt = 1024
We’ve got the results we need. Similarly to the ip command output, the netmask is shown using the CIDR notation.
5. ifconfig Command
The ifconfig command is deprecated and doesn’t exist in some systems. ifconfig displays the status and configuration of the currently active interfaces. If we give a single interface as the only argument, we only get the given interface’s status. Otherwise, we don’t specify any interface to show all the interfaces.
Let’s install it using apt:
$ sudo apt-get install net-toolsNext, let’s run the ifconfig command:
$ ifconfig
enp0s3: flags=4163<UP,BROADCAST,RUNNING,MULTICAST>  mtu 1500
        inet 192.168.0.104  netmask 255.255.255.0  broadcast 192.168.0.255
        inet6 fe80::129e:c85e:f067:e115  prefixlen 64  scopeid 0x20<link>
        ether 08:00:27:ea:a5:61  txqueuelen 1000  (Ethernet)
        RX packets 410  bytes 64285 (64.2 KB)
        RX errors 0  dropped 0  overruns 0  frame 0
        TX packets 268  bytes 32179 (32.1 KB)
        TX errors 0  dropped 0 overruns 0  carrier 0  collisions 0
lo: flags=73<UP,LOOPBACK,RUNNING>  mtu 65536
        inet 127.0.0.1  netmask 255.0.0.0
        inet6 ::1  prefixlen 128  scopeid 0x10<host>
        loop  txqueuelen 1000  (Local Loopback)
        RX packets 144  bytes 12058 (12.0 KB)
        RX errors 0  dropped 0  overruns 0  frame 0
        TX packets 144  bytes 12058 (12.0 KB)
        TX errors 0  dropped 0 overruns 0  carrier 0  collisions 0
In this example, the netmask is one of the values returned. Instead of using the CIDR notation to get the value of the netmask, we’ve got its value 255.255.255.0. If we have more than one functional interface, we’ll get the netmask for each of those interfaces.
6. ifdata
The ifdata command checks the availability of a network interface and obtains information about an interface.
The beauty of using ifdata is that we don’t have to pipe our output to a command like grep or awk to filter our result – ifdata gives us the exact outcome we need.
ifdata isn’t preinstalled in our system. So we need to first install it. Let’s install the moreutils package, which contains the ifdata utility:
$ sudo apt-get install moreutilsNext, let’s view the options available with this command:
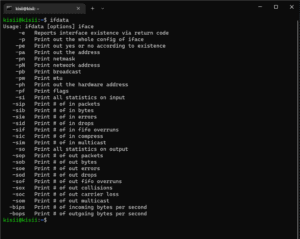
Next, to get information about a particular interface, we add the interface name after setting the options. For example, let’s get the general information of the enp0s3 interface:
$ ifdata -p enp0s3
192.168.178.31 255.255.255.0 192.168.178.255 1500
Now let’s get the netmask information:
$ ifdata -pn enp0s3
255.255.255.0
Finally, the only disadvantage of using ifdata is that we can’t use it to get IPv6 network information.
7. Conclusion
In this article, we learned the various ways we can obtain netmask information. We saw that most of the commands use the CIDR notation to indicate the netmask. We looked at filtering out the result by chaining the common network command like ip with grep.