

Learn through the super-clean Baeldung Pro experience:
>> Membership and Baeldung Pro.
No ads, dark-mode and 6 months free of IntelliJ Idea Ultimate to start with.
Learn through the super-clean Baeldung Pro experience:
>> Membership and Baeldung Pro.
No ads, dark-mode and 6 months free of IntelliJ Idea Ultimate to start with.
Implementing time restrictions on operating system (OS) usage is a way to control and reduce the amount of time a user spends on the computer. This can be particularly useful for individuals who struggle with managing their screen time or for parents who want to regulate their children’s computer usage.
In this tutorial, we’ll learn how to restrict a user’s computer time on Linux using Timekpr-nExT. It’s a more advanced and feature-rich solution compared to using a PAM (pluggable authentication module) or GNOME Nanny.
Timekpr-nExT is a software that limits the time a user can spend on a computer by restricting their access to the system once the user has reached the allotted time.
Further, both Timekpr and Timekpr-nExT are time management applications for Linux. However, Timekpr-nExT is an updated version of Timekpr with additional features and improvements:
To illustrate how to restrict computer time on Linux, let’s set up Timekpr-nExT on a Ubuntu Linux system.
First, to install Timekpr-nExT, let’s add the package to our system with apt:
$ sudo add-apt-repository ppa:mjasnik/ppaIn this case, PPA stands for Personal Package Archive. In fact, this is a software repository for Ubuntu and other Debian-based Linux distributions. PPAs make it simple for users to set up and update software that’s not present in the official Ubuntu repositories.
Next, we need to update the system repositories:
$ sudo apt updateNow, let’s install the timekpr-next software:
$ sudo apt install timekpr-nextOnce we install Timekpr-nExT, we can run it from the applications menu or with a command from the terminal.
We can access the Timekpr-nExT software from the command-line interface (CLI) as an administrator in one of the following ways:
Of course, a user has password-free access to the Timekpr-nExT configuration if they are a member of the timekpr system group.
Let’s execute the following command to add a user to the timekpr system group:
$ sudo gpasswd -a $USER timekpr
Adding user 'username' to group timekpr
Additionally, any user just added to the timekpr group would need to log out and back in to apply the changes. Also , if the intended superuser differs from the currently logged-in user, we need to change $USER to the proper username for administration.
Now, we can use the terminal to run the Timekpr-nExT administration utility. This allows us to get user information and set limits at the same level of functionality as in graphical mode.
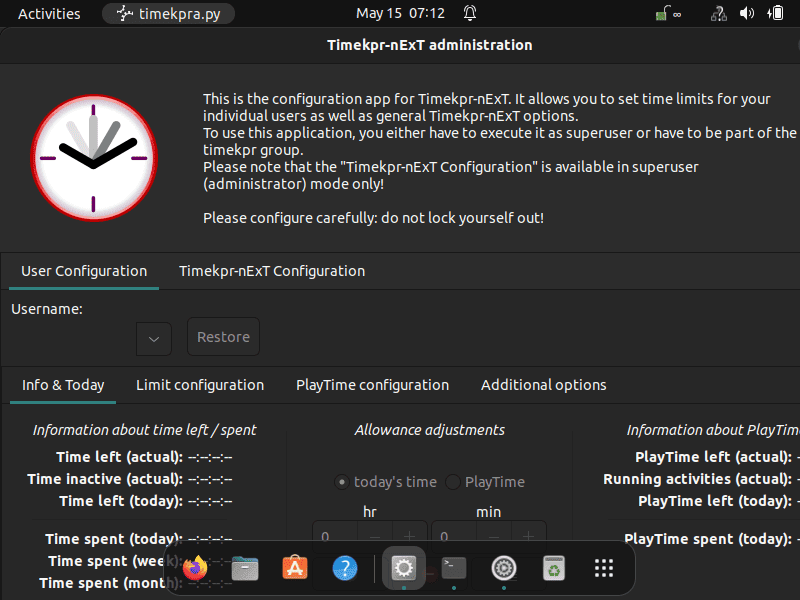
Of course, we can use the (SU) Timekpr-nExT Control Panel (superuser mode) graphical tool from the application menu or simply run it from the CLI. Let’s open Timekpr-nExT administration from the command line:
$ timekpraThis command opens up the Timekpr-nExT administration graphic tool:
In addition, the –help flag shows the Timekpr-nExT CLI commands, usage notes, and examples:
$ timekpra --help
---=== NOTICE ===---
*) numeric time values are in seconds
*) hours are numbered according to ISO 8601 (i.e. 24h clock, format: 0-23)
*) weekdays are numbered according to ISO 8601 (i.e. Monday is the first day, format: 1-7)
...
Let’s proceed to restrict a user’s computer time on Linux using Timekpr-nExT on the CLI.
As seen earlier, the timekpra –help command provides a handy guide on how to configure user restrictions via the CLI.
To illustrate, let’s consider the following scenario:
Rocky is a new member of the team who works a six-hour shift per day from 9:00 to 15:00 every Monday through Friday. Following the company policy, there’s a thirty-minute break on the fourth hour (12:30 – 13:00) and free time at the end of work (15:00 – 15:30) to finish up pending work or check their emails.
Let’s configure the computer time for Rocky using Timekpr-nExT on the CLI.
First, let’s create a user account for Rocky:
$ sudo useradd rockyNext, using the –setalloweddays flag, let’s set up the days Rocky can use the system:
$ sudo timekpra --setalloweddays rocky '1;2;3;4;5'Notably, this command allows Rocky to use the computer from Monday to Friday. The semicolon-separated numbers denote the days of the week with 1 being Monday and 7 – Sunday.
Now, let’s set the hours for each of the days specified.
We can use the –setallowedhours option the configure the range of hours a user can spend on the computer each day. Importantly, this flag allows us to configure several settings:
Now, let’s fix the hours for each day with a thirty-minute break on the fourth hour and thirty minutes of free time in the end:
$ sudo timekpra --setallowedhours rocky '1;2;3;4;5' '9;10;11;12[00-30];13;14;!15[00-30]'Thus, we’ve allowed the user 6 hours of computer time from 9:00 to 15:30 from Monday to Friday. We lock out the user for 30 minutes at 12:30 and the user regains access at 13:00. Lastly, the user can operate the computer between 15:00 and 15:30 as free time which is unaccounted for.
Notably, a time-restricted user cannot access their computer before the defined time periods or over the specified time allowance.
Further, we can set time limits per month, week, and day using the timekpra –settimelimit options. This provides even more flexibility in terms of user time management. For instance, a user can exhaust a weekly time limit within two days or spread the usage across the week.
To illustrate, let’s set a daily time limit for the user steve.
First, to set the time limit allowed to a user each day, we have to configure the days the user is allowed to use the computer.
So, let’s set the days of the week when steve can access the computer:
$ sudo timekpra --setalloweddays steve '1;2;3;6;7'Here, the user, steve, can use the computer from Monday through Wednesday and on Saturdays and Sundays.
Next, let’s configure the total time limit for steve per day:
$ sudo timekpra --settimelimits steve '19800;19800;19800;28800;28800'The command shows that steve can use the computer for a total time of 19800 seconds (5 hours and 30 minutes) for the weekdays. However, on Saturdays and Sundays, he can spend up to eight hours on the computer.
Notably, the number of values for the daily time limit must not exceed the number of allowed days for the user.
To set the weekly time limit, let’s use the –settimelimitweek option:
$ sudo timekpra --settimelimitweek steve '117000'Here, we’ve set the time limit per week to be 117000 seconds (32 hours and 30 minutes) for the user steve.
Similarly, we can set up a total amount of time a user can spend on the computer using the –settimelimitmonth flag:
$ sudo timekpra --settimelimitmonth steve '489600'The command sets 136 hours as the total monthly time limit for the user.
Lastly, we can set the restriction or lockout type. This is the action the system takes once user time limits elapse.
There are five different lockout types:
To demonstrate, using the –setlockoutype flag, let’s configure the system to shutdown when the time limit is reached:
$ sudo timekpra --setlockouttype steve 'shutdown'Uniquely, the suspendwake lockout allows us to set the spend and wake time in hours:
$ sudo timekpra --setlockouttype steve 'suspendwake;7;10'This command suspends the system at hour 7 and wakes it up at hour 10.
In this article, we learned how to restrict a user’s computer time on Linux using Timekpr-nExT. First, we briefly discussed Timekpr-nExT and how it differs from Timekpr. Next, we looked at how to install and run Timekpr-nExT on a Ubuntu Linux machine. Finally, we configured the program to restrict computer time for users in different scenarios.