

Yes, we're now running our only Summer Sale. All Courses are 30% off until 20th July, 2026:
Configuring Automatic LetsEncrypt SSL Certificate Renewal
Last updated: September 10, 2025
Learn through the super-clean Baeldung Pro experience:
>> Membership and Baeldung Pro.
No ads, dark-mode and 6 months free of IntelliJ Idea Ultimate to start with.
1. Introduction
SSL stands for Secure Sockets Layer. It’s a web protocol used to wrap normal traffic in a protected, encrypted wrapper.
LetsEncrypt is a reliable free service that allows us to serve web content over HTTPS. This is useful as it protects us and our users from online security risks. Furthermore, it promotes higher search engine ranking because it offers credibility and security.
We can configure automatic LetsEncrypt certificate renewal by executing an auto-renew script. In this tutorial, we’ll explore how to configure automatic LetsEncrypt SSL certificate renewal for Nginx and Apache-based servers before their certificate expiration date.
2. Setup
To setup LetsEncrypt, we need to add its software repo:
$ sudo apt-get install software-properties-commonThen, we update our system to use it:
$ sudo apt-get updateNext, let’s install the latest version of Certbot:
$ sudo apt-get install certbotFinally, we’ll add the Nginx plugin for Certbot:
$ sudo apt-get install python-certbot-nginxWe must also set up the Apache plugin for Certbot:
$ sudo apt-get install python-certbot-apacheThe last step is crucial for correctly setting up the SSL certificates and their autorenewal.
We can now use the certbot command to generate and renew SSL certificates anytime.
We’ll next explore how to set up automatic renewal on Nginx and Apache-based servers.
3. On Nginx-based Servers
The generation of certificates on a server running on Nginx is based on the server block setup. Backing up the server block before proceeding is a good practice as Certbot may modify the contents.
Let’s start the Certbot Nginx wizard to generate the certificates:
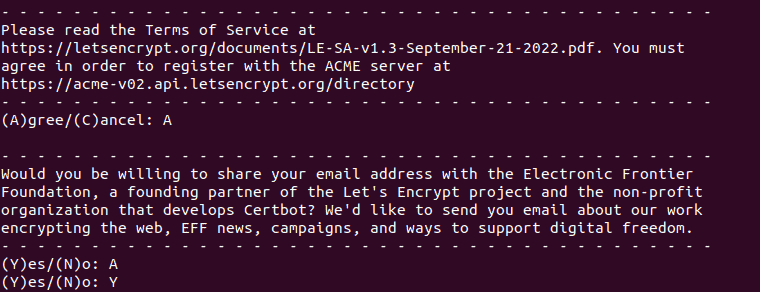
$ sudo certbot --nginxIf this is our first time running certbot, we’ll get a prompt to enter an email address for urgent renewals and security notices:

This is followed by prompts to accept the terms and conditions:
Finally, we get a list of all available sites detected by their server block entries:
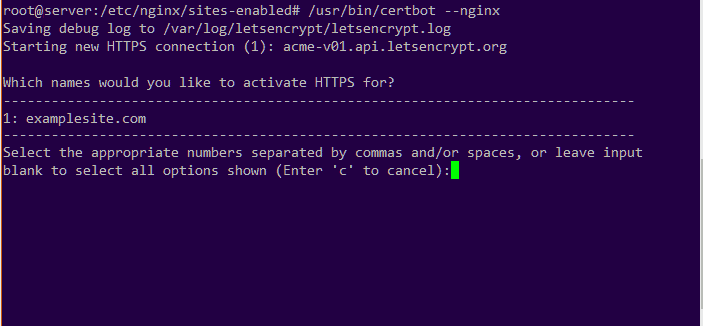
We need to select all the domains we want to include in the SSL certificate that we’re generating. We can add more domain names by separating the site numbers by commas. Here, we have the domain examplesite.com as the first domain.
Next, we can choose to enforce redirects to the secure HTTPS URL.
To test if it’s working, let’s try opening our domain name using the https:// prefix.
All new SSL certificates generated are only valid for 90 days before they expire.
To manually renew the certificate, let’s run this command:
$ sudo certbot renew --nginxThis command prompts us with a dialogue containing a few steps on the renewal process. LetsEncrypt only allows renewal of certificates that are within 30 days of expiry.
Finally, let’s set up the auto-renew feature to avoid logging in to the server to manually update it. The auto-renew feature is run by a cron job. A cron file is automatically added during the installation of Certbot and we can find it in the /etc/cron.d/certbot directory. In case it’s not available, we need to create it.
Let’s open the cron file with a text editor like nano and then add this content:
SHELL=/bin/sh
PATH=/usr/local/sbin:/usr/local/bin:/sbin:/bin:/usr/sbin:/usr/bin
0 */12 * * * root certbot -q renew --nginx
This automatically runs the auto-renew process twice a day. We’re using the -q flag to prevent outputting of any logs.
4. On Apache-based Servers
On servers running on Apache, the generation of the certificates is based on the vHosts setup. Backing up the vHosts block before proceeding is a good practice as Certbot may modify the contents.
Let’s start the Certbot Apache wizard to generate the certificates:
$ sudo certbot --apacheWe’ll get a dialogue box with steps to follow to generate an SSL certificate based on the domains detected in the vHost blocks:
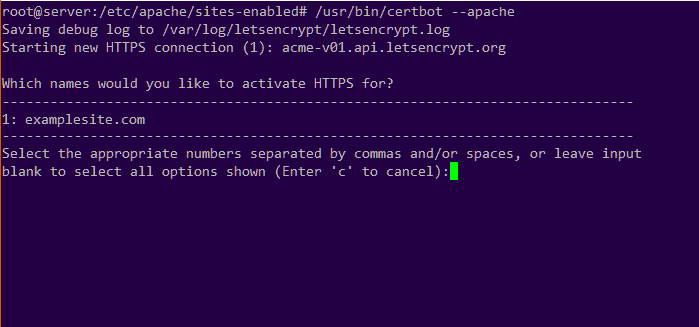
Here, we can choose one or more domain names to include in the SSL certificate. We can add multiple domain names by separating each domain number by a comma. Here, we have the domain examplesite.com as the first domain.
Furthermore, we can choose whether to enforce redirects to the secure HTTPS URL.
To renew the certificates manually, let’s run this command:
$ sudo certbot renew --apacheWe’ll get a dialogue box with steps that will take us through the renewal process. Renewal of certificates only happens if they are within 30 days of the expiry date.
A cron job manages the SSL auto-renew feature. A cron file is automatically added during the installation of Certbot and we can find it in the /etc/cron.d/certbot directory. In case it’s not available, we need to create it.
Let’s populate the cron file with this content:
SHELL=/bin/sh
PATH=/usr/local/sbin:/usr/local/bin:/sbin:/bin:/usr/sbin:/usr/bin
0 */12 * * * root certbot -q renew --apache
The auto-renew process will run automatically twice a day. We’re using the -q flag to prevent outputting of any logs.
5. Conclusion
In this article, we’ve explored how to install Certbot and use it to auto-generate free LetsEncrpyt SSL certificates. A valid SSL certificate is essential as it protects us from external attacks and helps build credibility with our users. Furthermore, it contributes to higher rankings in search engines.