

Learn through the super-clean Baeldung Pro experience:
>> Membership and Baeldung Pro.
No ads, dark-mode and 6 months free of IntelliJ Idea Ultimate to start with.
Learn through the super-clean Baeldung Pro experience:
>> Membership and Baeldung Pro.
No ads, dark-mode and 6 months free of IntelliJ Idea Ultimate to start with.
Kotlin is well-known for its interoperability with Java. This is, of course, possible because they both are running on the Java Virtual Machine – in other words, they are compiled to the same bytecode.

In this tutorial, we’ll explore two ways to perform a conversion from a Kotlin file to a Java file.
First, let’s consider a few reasons why we may want to do such a conversion:
Conversion from Kotlin to Java requires two steps. We need to compile the Kotlin code to the JVM bytecode. Then, we need to decompile the result to the Java code.
However, this process will never give us a properly working production code. Therefore, further manual work is usually needed.
In the next sections, we’ll have a closer look at two methods for performing the conversion.
Let’s say we have a Kotlin file name Sample.kt with the following content:
fun printEvenNumbers() {
    for (i in 0..10 step 2) {
        println(i)
    }
}
First, let’s compile the code with the command:
kotlinc Sample.ktAs a result, a file with the name SampleKt.class will be created.
Now, we need to decompile this file to Java.
To do this, we will use FernFlower. We can get the fernflower.jar by downloading the project and running the Gradle build. Once we have the JAR file, the command to run is:
java -jar fernflower.jar SampleKt.class .After that, we’ll see the file SampleKt.java:
import kotlin.Metadata;
import kotlin.ranges.IntProgression;
import kotlin.ranges.IntRange;
import kotlin.ranges.RangesKt;

@Metadata(
   mv = {1, 1, 15},
   bv = {1, 0, 3},
   k = 2,
   d1 =
     {"\u0000\u0006\n\u0000\n\u0002\u0010\u0002\u001a\u0006\u0010\u0000\u001a\u00020\u0001"},
   d2 = {"printEvenNumbers", ""}
)
public final class SampleKt {
   public static final void printEvenNumbers() {
      byte var3 = 0;
      IntProgression var10000 = RangesKt.step((IntProgression)(new IntRange(var3, 10)), 2);
      int i = var10000.getFirst();
      int var1 = var10000.getLast();
      int var2 = var10000.getStep();
      if (var2 >= 0) {
         if (i > var1) {
            return;
         }
      } else if (i < var1) {
         return;
      }

      while(true) {
         boolean var4 = false;
         System.out.println(i);
         if (i == var1) {
            return;
         }

         i += var2;
      }
   }
}
As we can see, the code is pretty complicated. Furthermore, it still has Kotlin language dependencies. We got a piece of code that is useless in production because of readability and performance.
With IntelliJ IDEA, we can do the same two steps in a more convenient way.
To compile the source to bytecode, let’s click Tools -> Kotlin -> Show Kotlin Bytecode from the main context menu.
A new card will appear and we should be able to see JVM bytecode in a human-readable form:
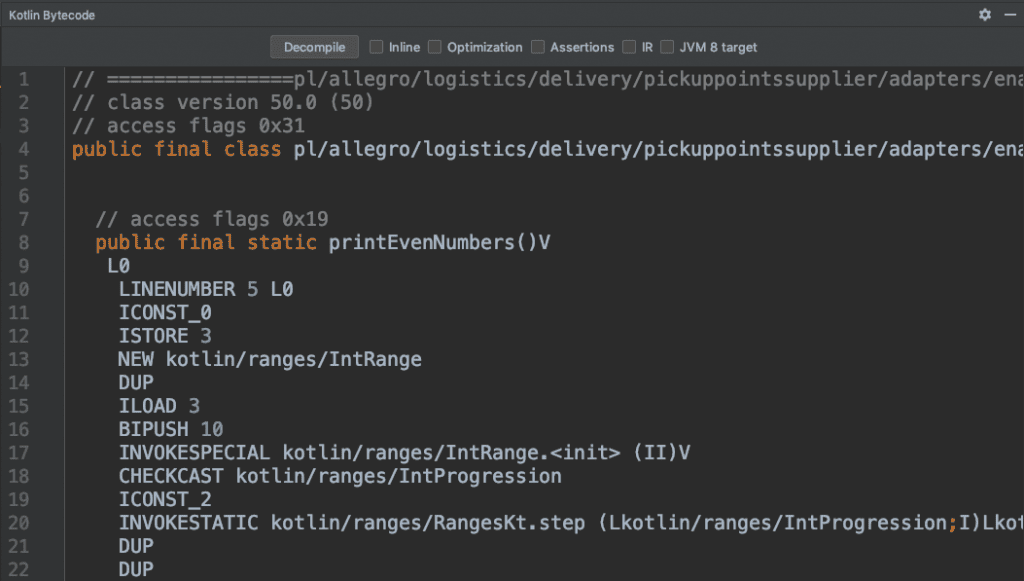
From there, we simply click the Decompile button to produce a Java file. Note that IntelliJ IDEA is using Fernflower under-the-hood, so the resulting Java file will be identical to the one shown above.
In this quick tutorial, we’ve learned two ways to convert a Kotlin file to Java.
We also discussed a few cases where this process is useful and why we should avoid it for production code.