

Learn through the super-clean Baeldung Pro experience:
>> Membership and Baeldung Pro.
No ads, dark-mode and 6 months free of IntelliJ Idea Ultimate to start with.
Learn through the super-clean Baeldung Pro experience:
>> Membership and Baeldung Pro.
No ads, dark-mode and 6 months free of IntelliJ Idea Ultimate to start with.
Overleaf is an online platform for creating and editing LaTeX documents, ideal for academic papers, presentations, and other scientific and technical documents. It combines the robustness of LaTeX with the ease of a cloud-based editor.
In this tutorial, we’ll explore Overleaf’s basic features and functionality.
Creating documents with a traditional editor on a local machine can pose many challenges for collaboration. Sharing a document often means emailing it or using a shared drive, which can lead to confusion and conflicts between different versions. It can also be difficult to ensure that everyone has compatible software and fonts installed on their computers.
Overleaf solves these problems by providing a centralized platform where documents can be created, edited, and shared in real time, eliminating the barriers of version control and software compatibility. It allows multiple users to work on the same document, with changes visible to all collaborators as they are made.
Overleaf also makes creating LaTeX documents much easier by providing a user-friendly interface. The platform automatically compiles the LaTeX code, provides instant feedback, and allows us to see the result of our documents in real time, which is especially helpful for resolving formatting issues.
Let’s take a look at the first steps we need to take to become familiar with the Overleaf environment.
Overleaf has several plans. The Free Plan is a solid base for individual users, as it includes the core Overleaf features for easy document creation and editing in LaTeX. The Standard Plan enhances our experience with more features, such as real-time collaboration and priority support, which are useful for team projects and professional use. In addition, the universities shown on this Overleaf’s map have agreements to provide premium plans to their students at no additional cost.
A good option for new users is the 7-day trial of the Standard Monthly Plan:
There is no initial payment and no commitment with this trial, and we can switch to the free plan if the premium features are not what we need.
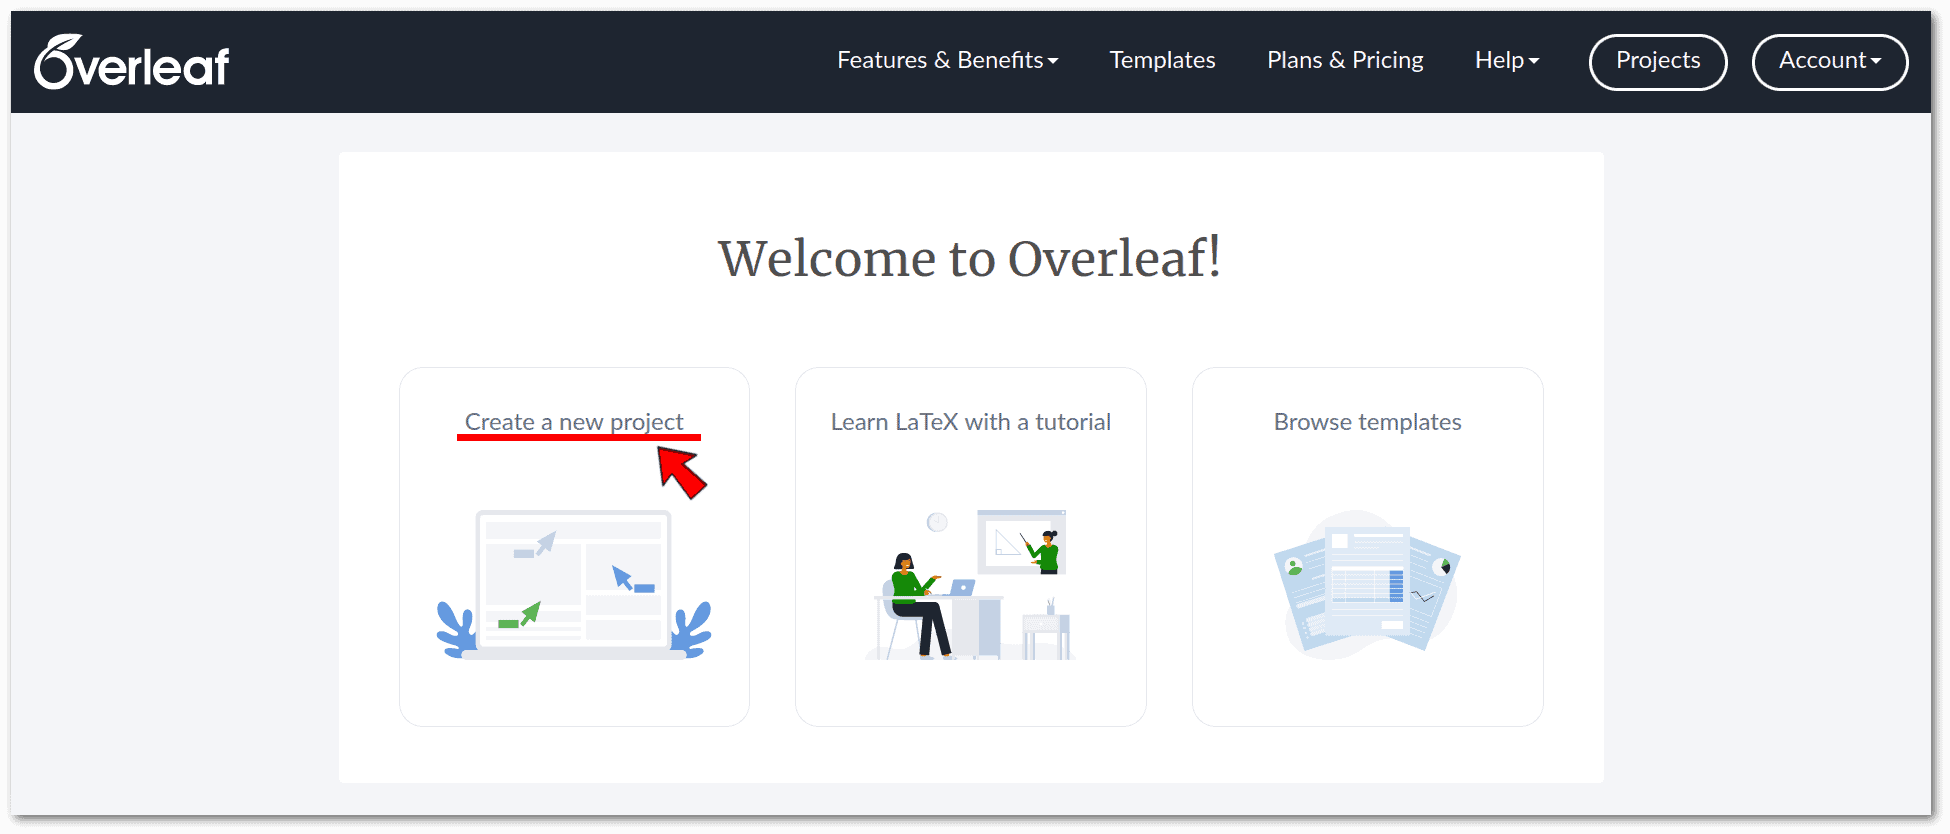
After successful registration, we can start a blank project, upload an existing project, or choose from a variety of templates offered by Overleaf. In this case, we chose to create a new blank project:
 Once we’ve selected our project, we’ll be taken to the Editor, which we’ll see later.
Clicking on the Editor’s Home icon takes us to the Projects Dashboard, which is essentially the control center of our Overleaf account. This is where we can view, organize, and manage all of our projects:
The Dashboard also allows us to sort, search, and tag our projects for better organization.
When we open a project, we are directed to the Editor, which consists of three parts:
In the following, it’s helpful to be familiar with the main differences between LaTex and a traditional text editor.
We can start writing our LaTeX document in the Code Editor and see a real-time preview of our document on the right by clicking the green Recompile button. As we add sections, they will appear in the File Outline on the left:
Here is a copy of the code we used in the video.
Although a basic knowledge of LaTeX is certainly helpful, the Visual Editor can help us reduce the amount of code we have to enter manually.
First, it’s easy to organize the text into sections, subsections, sub-subsections, and so on:
It’s fairly simple to boldface or italicize text, insert images, tables, mathematical formulas, and anything else we can find on the toolbar:
The Visual Editor also provides a useful autocomplete feature for LaTeX commands.
Now, let’s see how to download and publish our project.
When we finish our project, we can download it in ZIP or PDF formats:
The ZIP format keeps a complete copy of the Overleaf project so that we can upload it to the Dashboard later for further editing.
The PDF format, on the other hand, can be accessed on any platform or device because it’s widely compatible, but it can’t be edited with Overleaf.
One of the benefits of Overleaf is that it provides specific templates for various academic journals and university theses, ensuring that our document conforms to the appropriate formatting and style guidelines. This feature eliminates the hassle of manually adjusting the layout and guarantees that our document meets the exact criteria required.
We won’t go into detail about the templates as our general recommendation is to always request an updated template from the institution we are writing for.
In addition to templates, Overleaf has built-in submission integrations with several academic journals:
This built-in submission feature is available for select journals, so we first have to check if the journal we are interested in is supported.
Overleaf allows multiple authors to collaborate on a single document seamlessly. This increases team performance and effectiveness by ensuring that everyone is aligned and up-to-date on the project.
To invite collaborators, we click the Share button at the top of the page and enter the email addresses of the people we want to invite. We can also set permissions for each collaborator to determine their access level and permissions:
The people we invite will receive an email notification:
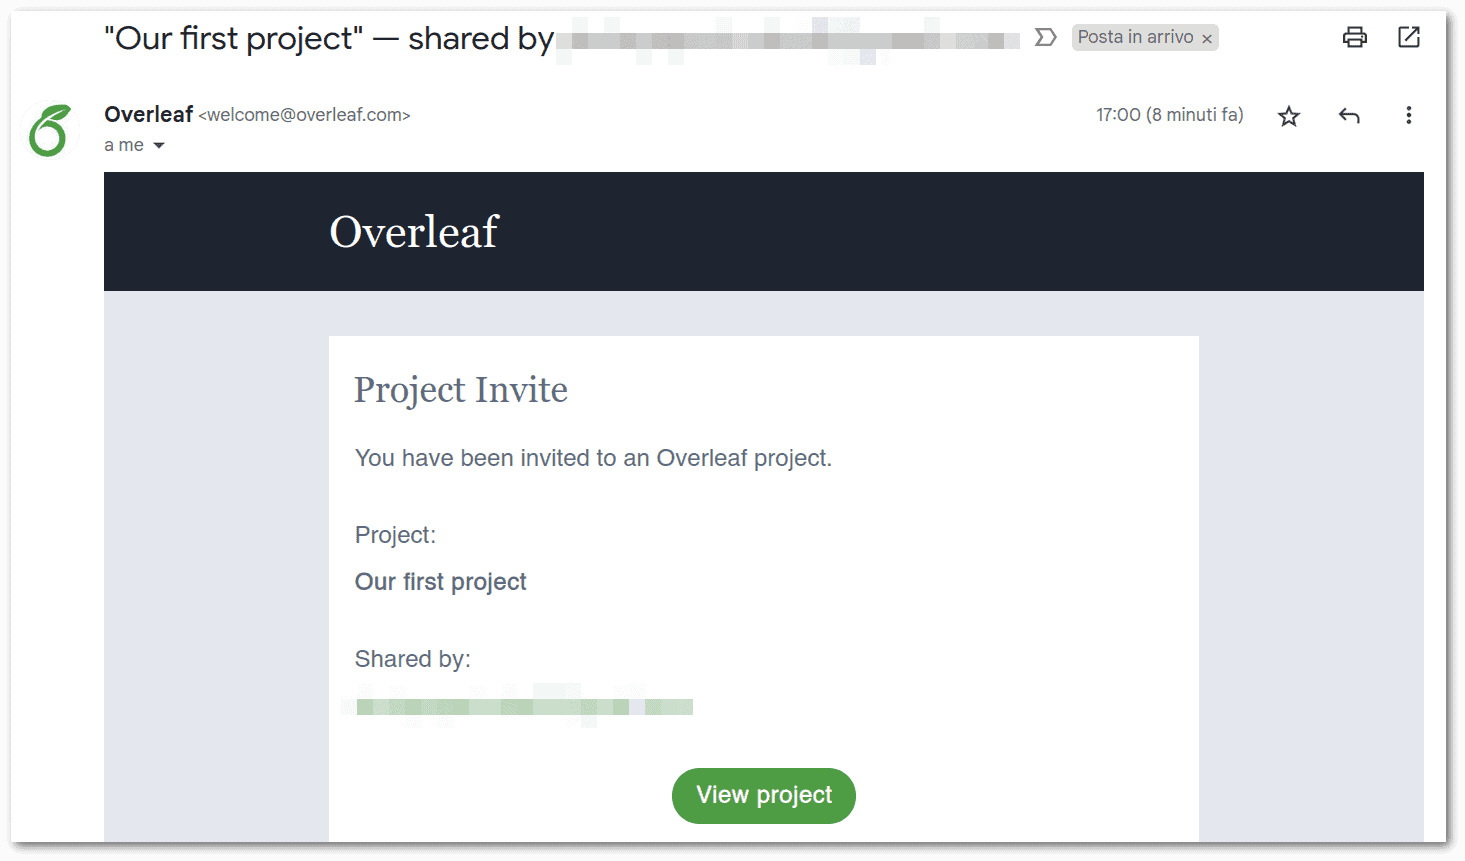 Following the link, the invited person can join the project from their Dashboard:
One of the main benefits of working on a project with a premium plan is that we can share some of the premium features with our collaborators, even if they are using a free plan. This means that we can invite anyone to join our project without worrying about the cost. More details about this are in the FAQ section.
Each person sees the changes made by the other person in real time:
Each person’s cursor is labeled with their name, so we know who is editing which part of the document.
Comments are very helpful for providing feedback or asking questions about specific parts of the document. Comments are easily visible, and we can respond to them:
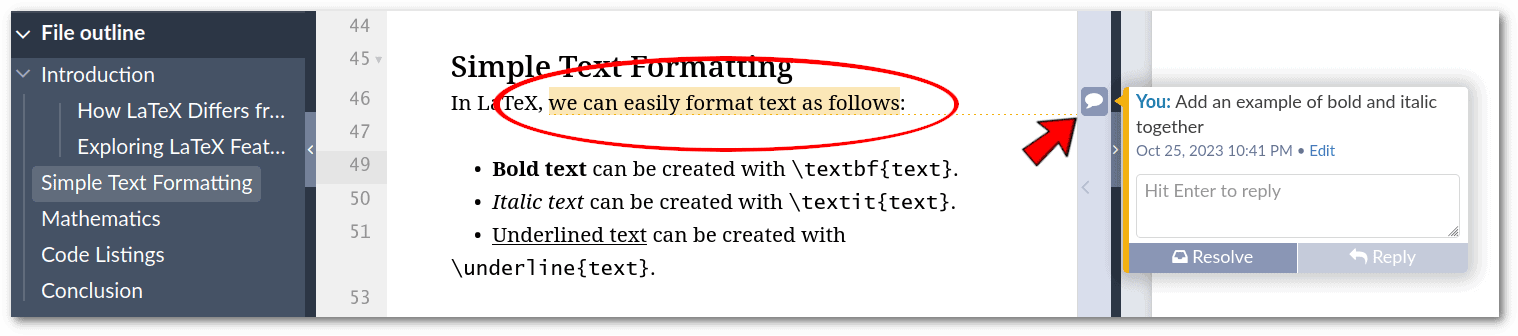 To add such a comment, we need to select the text we want to comment on and click the Add Comment button:
Once a discussion is finished or the suggested changes have been made, we can use the Resolve button to close the comment and remove it from the main view.
Overleaf also has a chat feature that allows us to communicate with our collaborators instantaneously. Let’s look at an example of a chat between two contributors:
This chat feature, which also correctly displays LaTeX math formulas and other LaTeX code, is valuable for coordinating work or discussing changes to the document.
The Version History feature allows us to view previous versions of the document, compare two versions of the same document, or download the project as it was at some point in the past:
Version History is useful for tracking progress and ensuring that important information isn’t lost.
To recap, let’s look at the key benefits and shortcomings of Overleaf:
| Benefits | Shortcomings |
|---|---|
| Easy-to-use interface | Dependence on a reliable Internet connection |
| Real-time collaboration | Limited free version |
| Cloud-based | Privacy issues (this is a common problem with all cloud services) |
| Version control | |
| Extensive LaTeX support |
It’s worth noting that while Overleaf offers a more user-friendly interface and better collaboration tools, LyX may be a better choice for people who prioritize open-source software, full offline access, and extensive customization options.
In this article, we’ve seen the main steps for creating, formatting, and collaborating on documents using Overleaf. It can simplify our writing process and help us achieve our desired results, whether we are students, researchers, or professionals.
Overleaf is a remarkable platform for anyone who wants to produce high-quality LaTeX documents without the hassles of a traditional LaTeX editor.
It offers an easy-to-use interface, real-time collaboration, tracking of changes, and a large selection of templates suitable for various academic and scientific purposes.