

Learn through the super-clean Baeldung Pro experience:
>> Membership and Baeldung Pro.
No ads, dark-mode and 6 months free of IntelliJ Idea Ultimate to start with.
Learn through the super-clean Baeldung Pro experience:
>> Membership and Baeldung Pro.
No ads, dark-mode and 6 months free of IntelliJ Idea Ultimate to start with.
LyX and LaTeX are widely used in the academic and research communities. LyX uses LaTeX as its backend engine, with access to all LaTeX functionality and the ability to insert plain LaTeX code anywhere in a document.
However, knowledge of LaTeX isn’t necessary, as LyX allows anyone to create perfect LaTeX documents without writing a line of LaTeX code just by using the graphical interface.
In this tutorial, we’ll learn how to use the basic features of LyX.
Installing LyX requires a complete LaTeX environment. There are many details to take care of, so we recommend our step-by-step instructions for installing LyX on Linux, macOS, and Windows.
LyX is much more than a typical word processor. With LyX, we can focus on our content while the software takes care of the formatting and layout, ensuring that our documents are aesthetically pleasing and consistent.
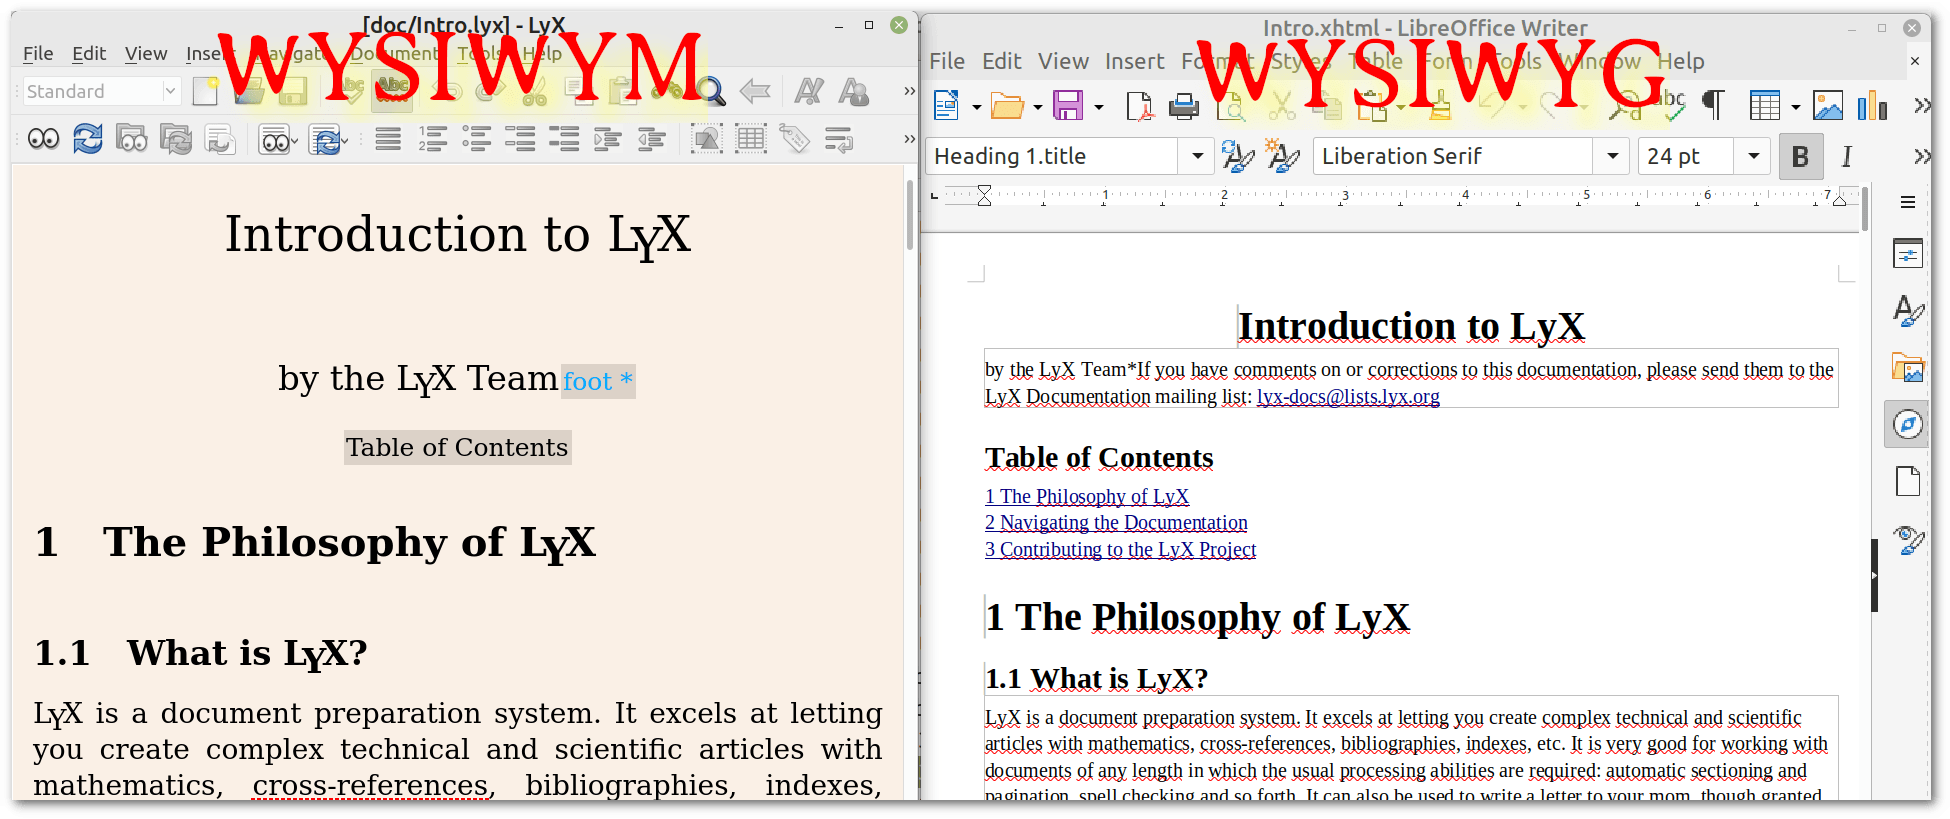
The terms WYSIWYG (What You See Is What You Get) and WYSIWYM (What You See Is What You Mean) are two different paradigms for creating and visualizing documents.
WYSIWYG is a popular approach in document editors, where we interact with the document in a way that closely resembles its final appearance. What we see on the screen is a close approximation of what the final printed or published document will look like.
WYSIWYM, on the other hand, focuses on the structure and semantics of the document rather than its visual appearance. The visual representation of the document is determined separately, and we may not see a direct visual representation of the final appearance as we edit. Instead, we see a representation of the document’s structure and content.
LyX uses the WYSIWYM approach, which is especially helpful for complex documents such as academic papers, dissertations, or technical manuals. Visual formatting is handled by LaTeX, which offers advanced typography and formatting options that are essential for producing high-quality documents:
 However, LyX’s WYSIWYM approach can require a long learning curve, especially if we’re used to traditional WYSIWYG editors.
In LyX, we can create as many new documents as we like by clicking on the appropriate icon. These are arranged in tabs on Linux and Windows or in new windows on macOS:

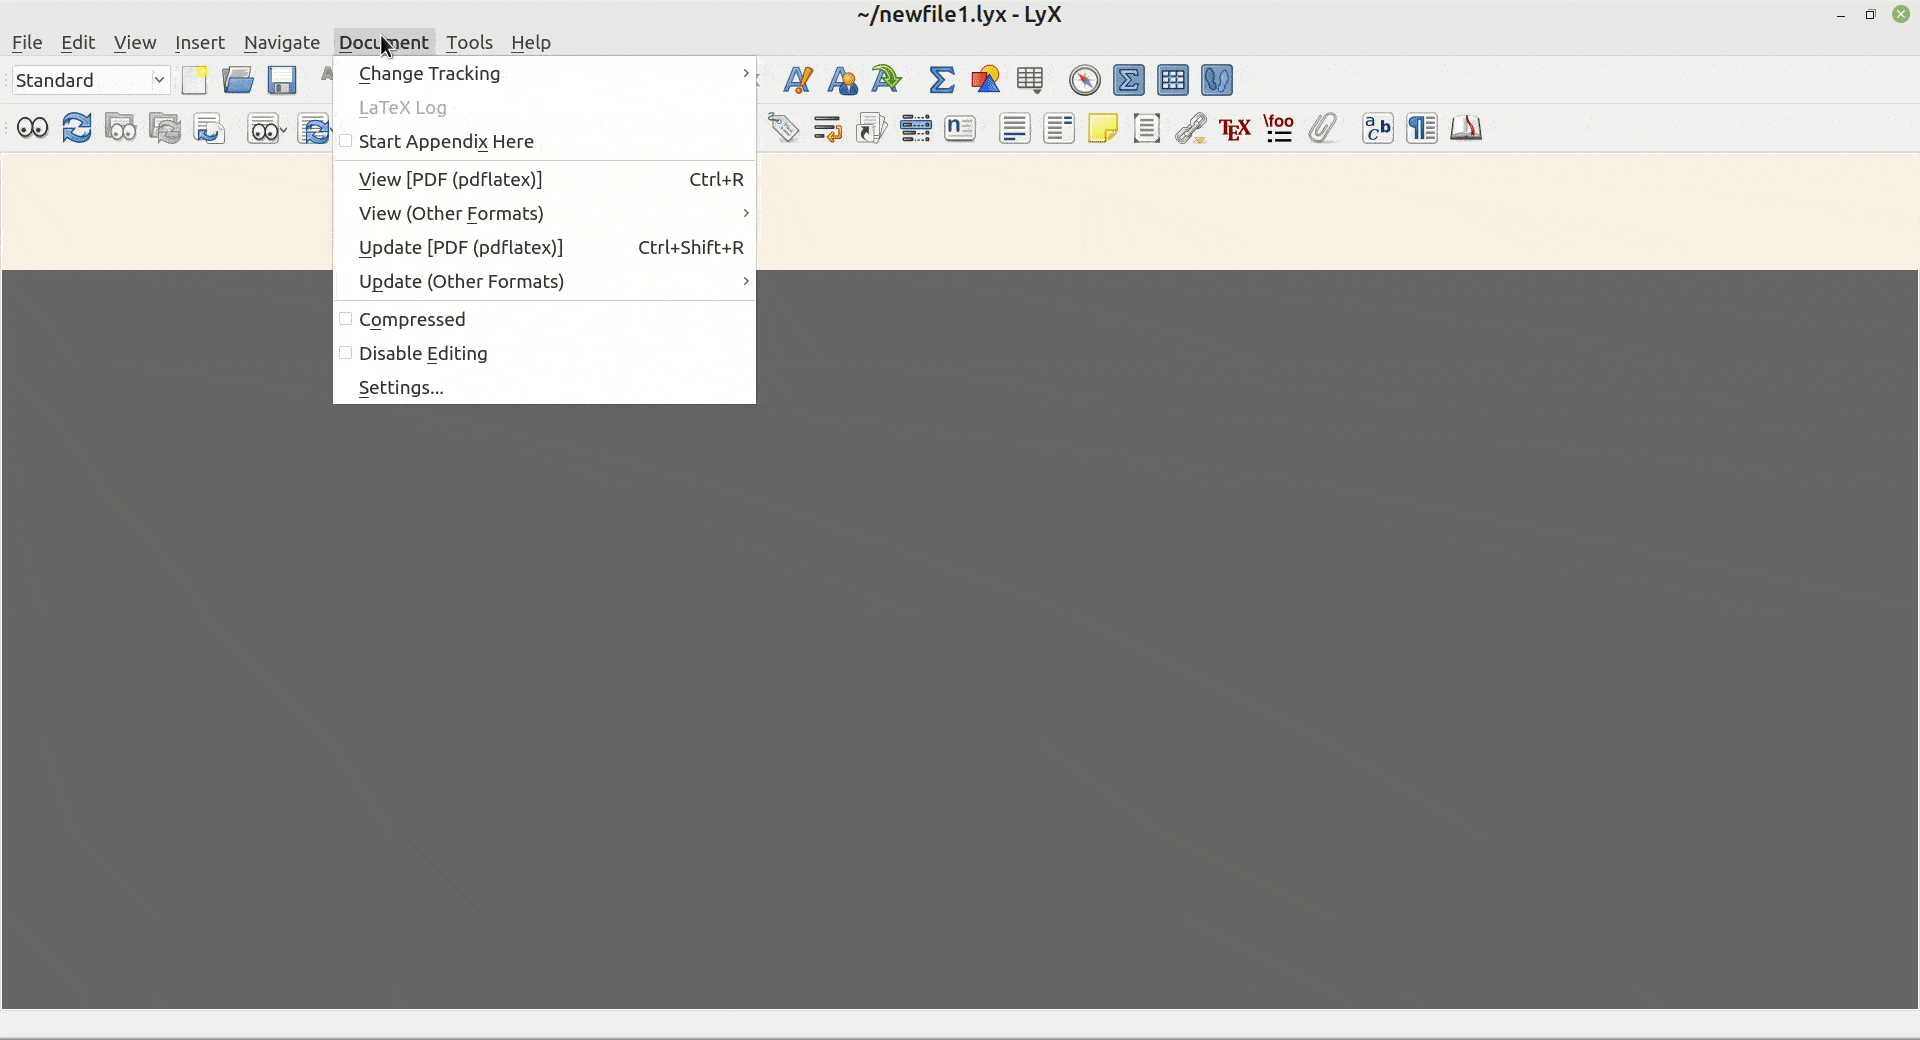
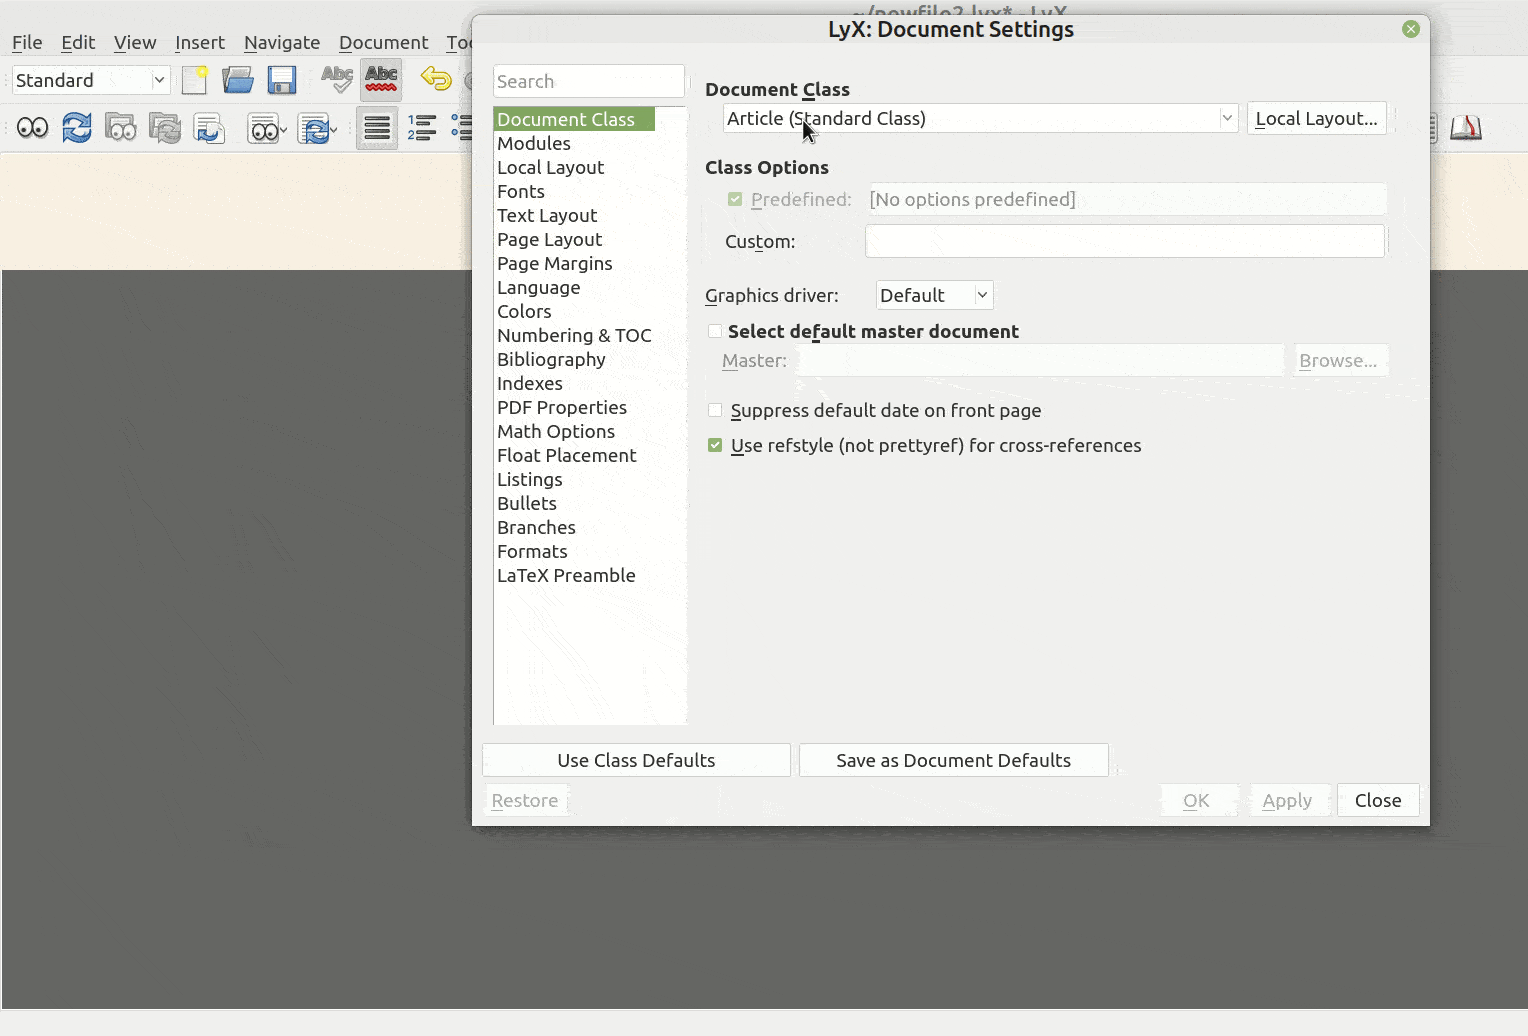
Before we start writing our new document, we need to set its class and check its options.
In LaTeX and LyX, a document class defines the overall structure, format, and behavior of a document. It’s used to create documents of specific types, such as articles, reports, books, dissertations, and more.
When we provide the semantic structure of a text, which includes elements such as chapters, sections, subsections, and paragraphs, LaTeX and LyX use the rules defined in the document class file to determine the typographic presentation of the text. These rules include aspects such as the layout of the title page, the formatting of section headings, the selection of font sizes and styles, and other elements that collectively contribute to the appearance and structure of the document:
Many readily available classes are related to specific scientific documentation. We can also use a custom class if our university or institution requires a class not provided with LyX. However, this is an advanced topic that we won’t cover in this article.
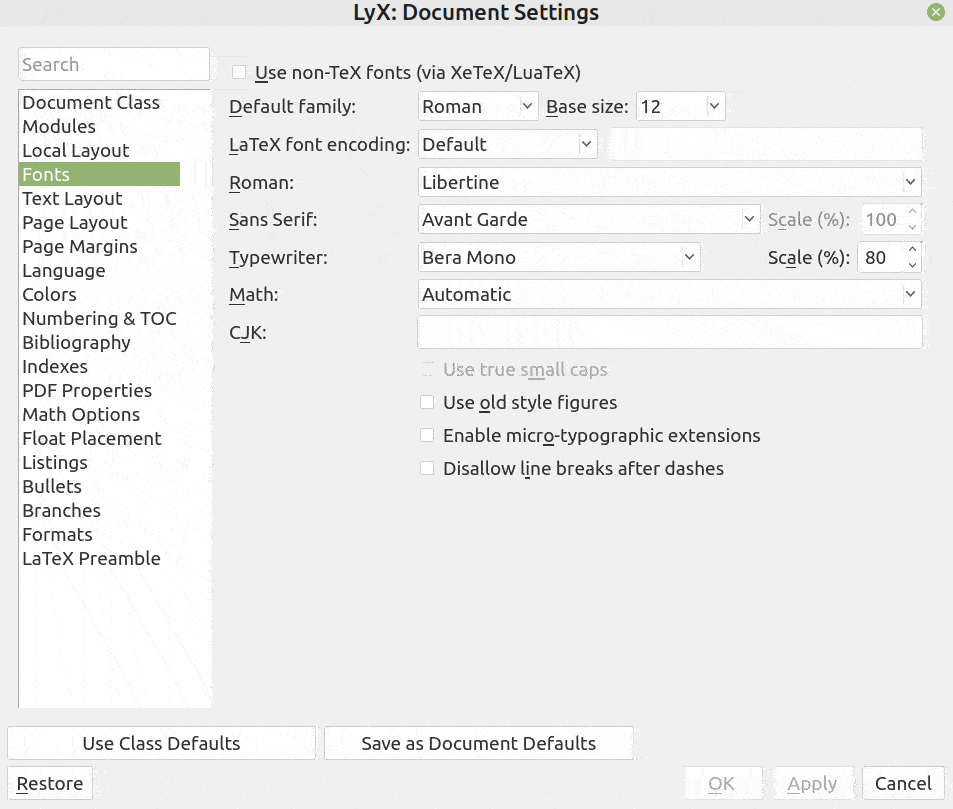
The next step is to set our own options for the document, which usually includes fonts, text layout, page layout, page margins, and PDF properties:
Usually, when we write for an institution, most of these settings are communicated to us.
In the PDF properties, there is a line where we can specify additional options, such as colors:
pdftex,linkcolor=blue,citecolor=blue,filecolor=blue,urlcolor=blueSince these parameters are generally useful, here’s a breakdown of them:
In this example, we used the blue color in all instances, but any other color can be specified.
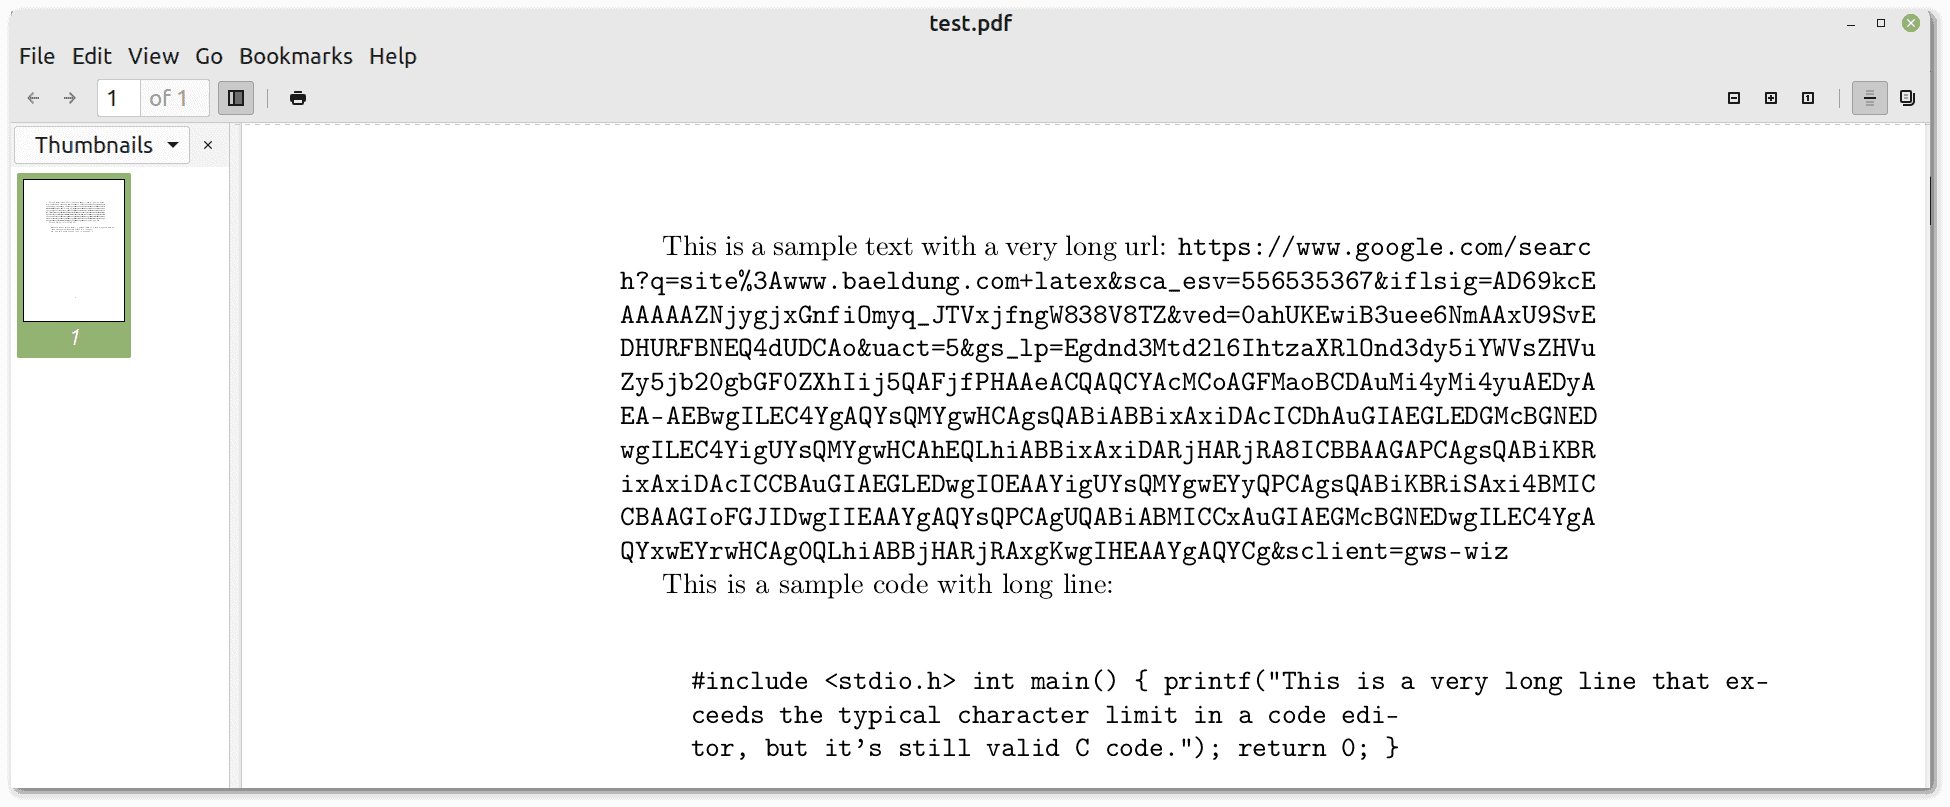
Sometimes LyX produces poorly formatted output. In a new document, let’s test a very long URL using the Insert menu and then the URL option and a very long C line using LyX code from the drop-down menu:
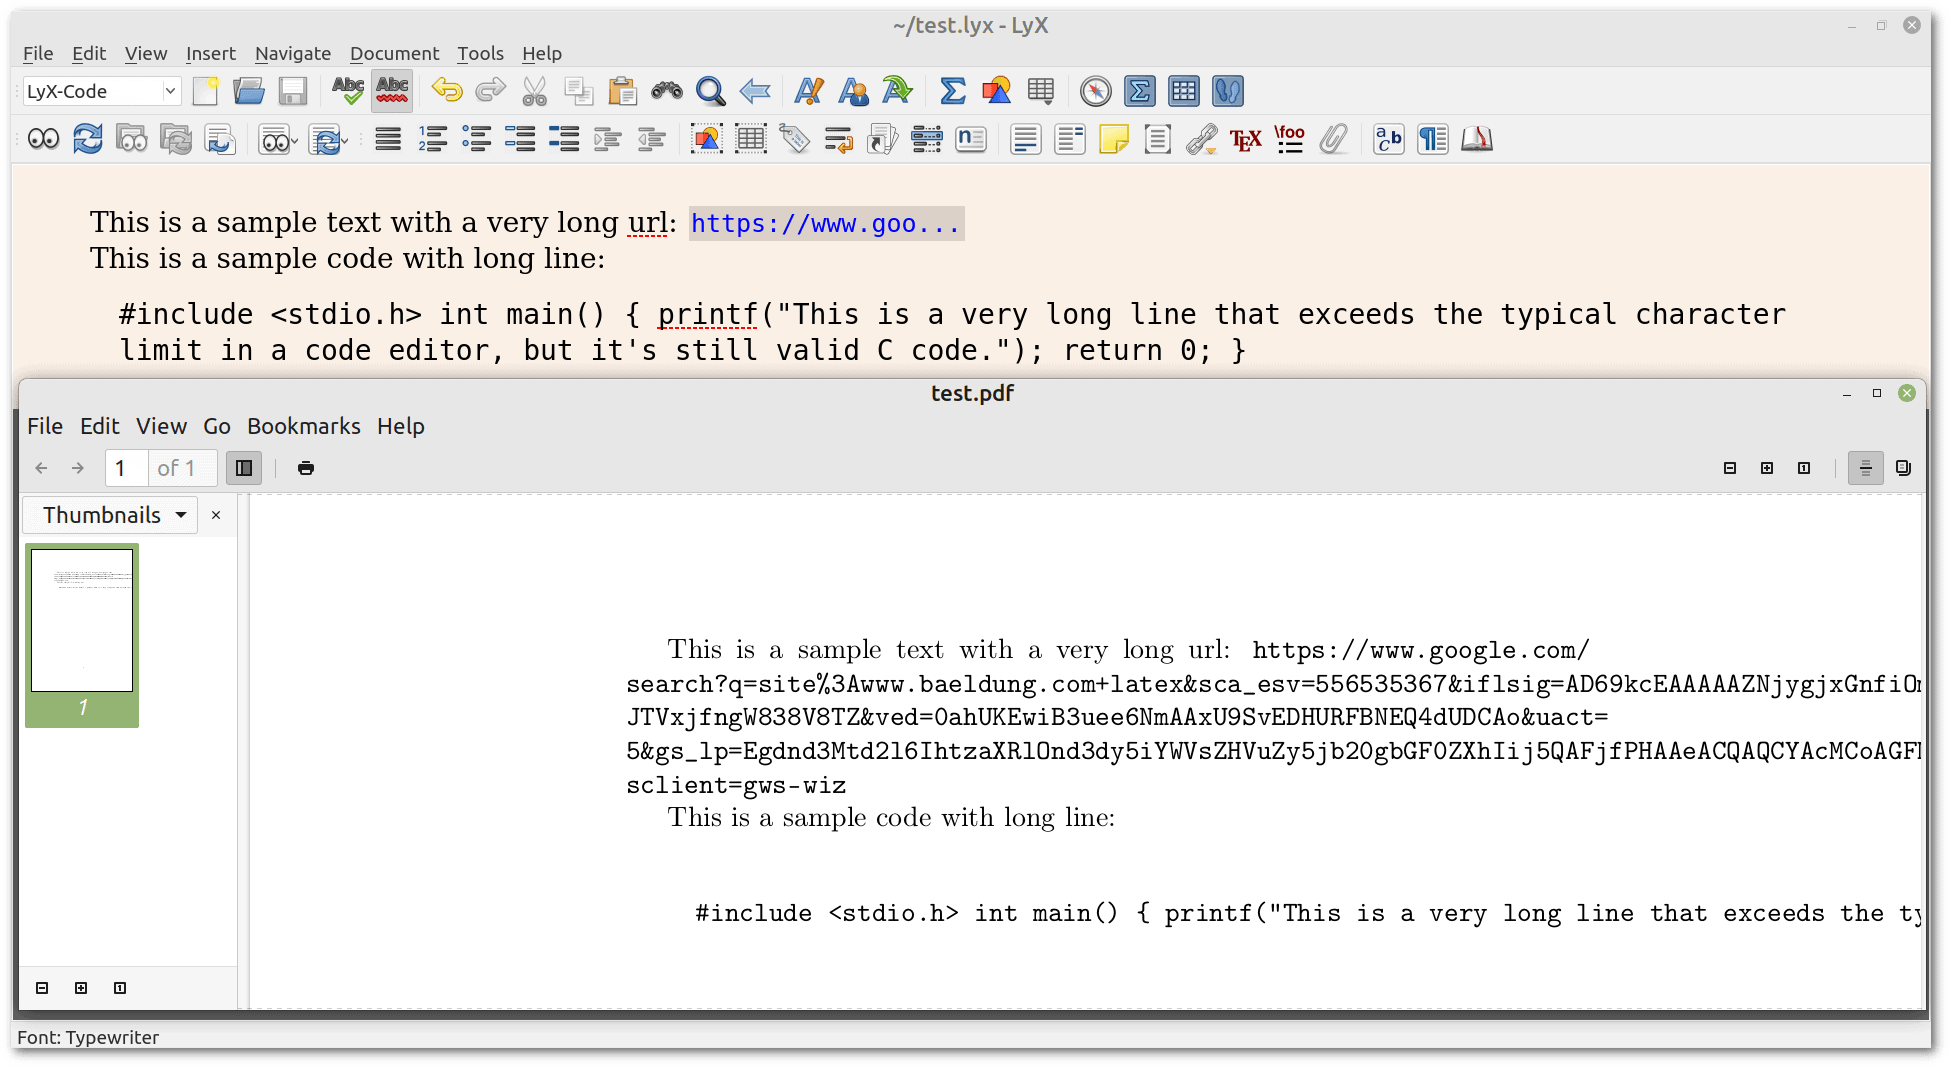
In this case, the text extends beyond the page margins, resulting in misplaced and partially illegible text.
In the document settings, there is a place for a LaTeX preamble. Let’s copy and paste this code:
%break monospaced
\usepackage{everysel}
\EverySelectfont{%
\hyphenchar\font=`\-%
}

% break urls
\expandafter\def\expandafter\UrlBreaks\expandafter{\UrlBreaks%
  \do\1\do\2\do\3\do\4\do\5\do\6\do\7\do\8\do\9\do\0%
  \do\a\do\b\do\c\do\d\do\e\do\f\do\g\do\h\do\i\do\j%
  \do\k\do\l\do\m\do\n\do\o\do\p\do\q\do\r\do\s\do\t%
  \do\u\do\v\do\w\do\x\do\y\do\z\do\A\do\B\do\C\do\D%
  \do\E\do\F\do\G\do\H\do\I\do\J\do\K\do\L\do\M\do\N%
  \do\O\do\P\do\Q\do\R\do\S\do\T\do\U\do\V\do\W\do\X%
  \do\Y\do\Z\do\-\do\_\do\/\do\\\do\:}
The code changes the hyphenation behavior for monospaced fonts and allows line breaks at any character in URLs to improve the overall formatting and readability of the document. Here’s the new result:
In addition, a common setup for documents that require page numbering in the outer footer of the page but don’t require any specific content in the outer header is the following preamble:
% pagenumbers
\usepackage{scrlayer-scrpage}
\pagestyle{scrheadings}
\ofoot{\arabic{page}}
\ohead{}
In general, LyX already has a myriad of options that allow us to do just fine without inserting LaTeX code, but sometimes, customizing the LaTeX preamble is the way to solve non-trivial problems.
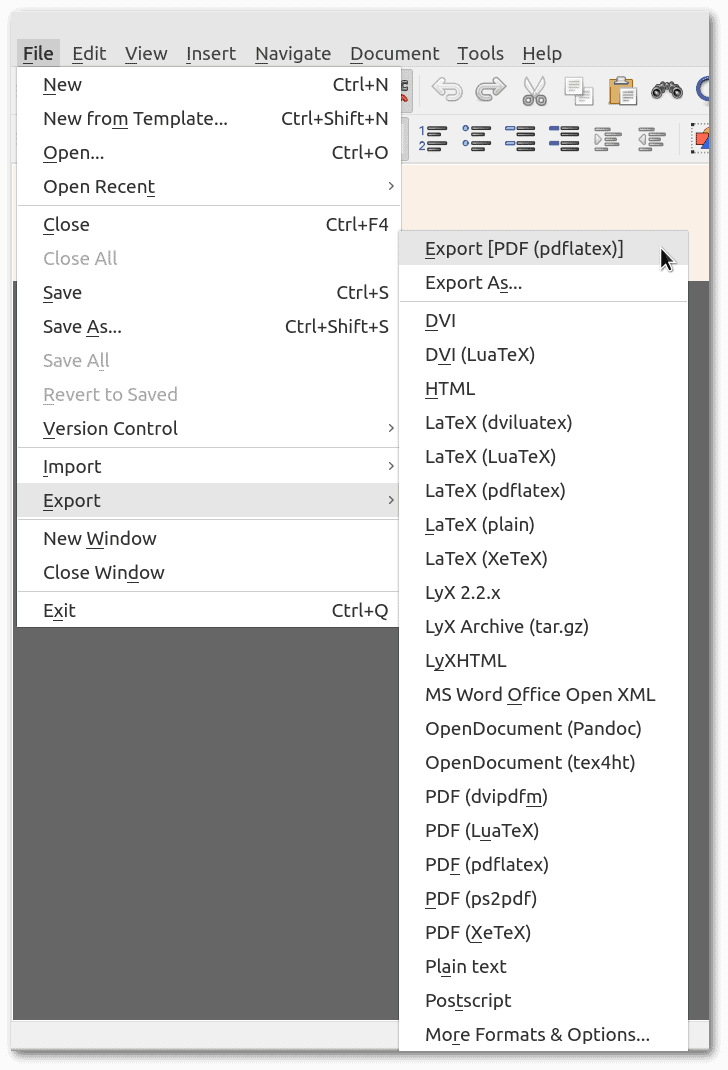
LyX has many formats to which it can export. The default output is PDF via pdflatex:
Some export formats offer different tools for this task. It’s a matter of trying them out to see which one suits our needs best.
One of the first differences we may notice between LyX and popular editors such as Word and LibreOffice is the inability to enter multiple consecutive spaces. There are good reasons for this:
So, in general, our need to manually intervene in formatting should be minimized.
Let’s look at some options for manually formatting a piece of text:
It’s easy to use but intentionally not very user-friendly for the reasons we’ve already discussed.
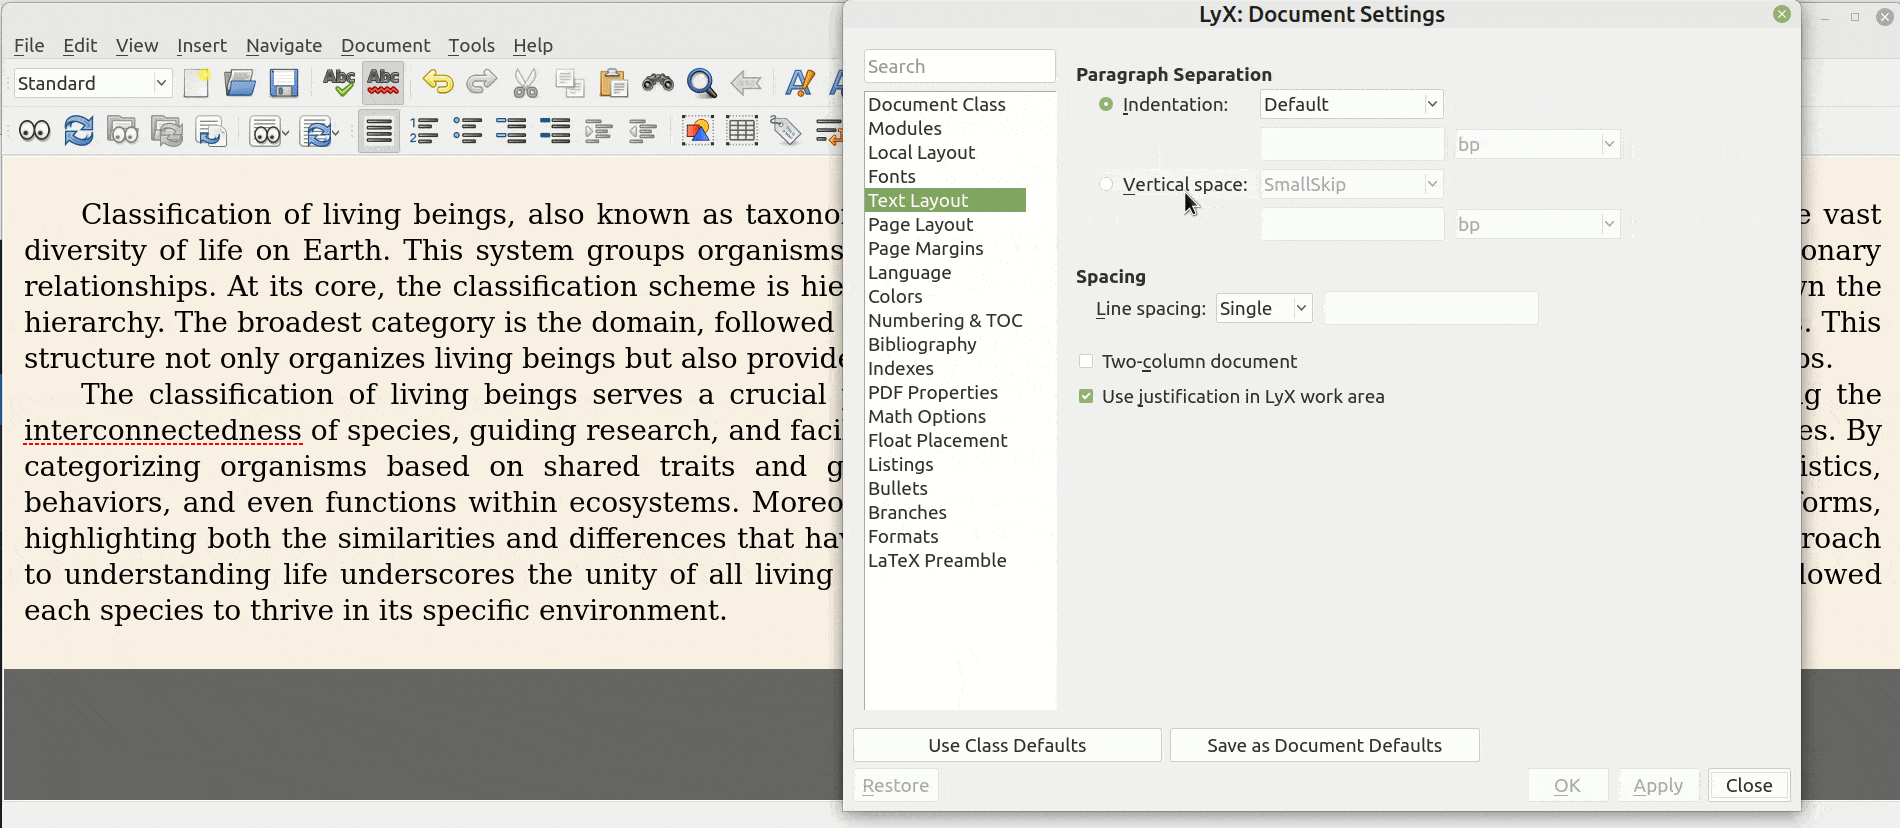
Regarding paragraphs, the first choice we have to make in the document settings is whether they should be separated by indentation or vertical spacing:
Then, it’s still possible to manually change the settings of a single paragraph:
 In general, the more we use manual formatting, the less we use the benefits of LyX.
LyX has a Math menu with many options:
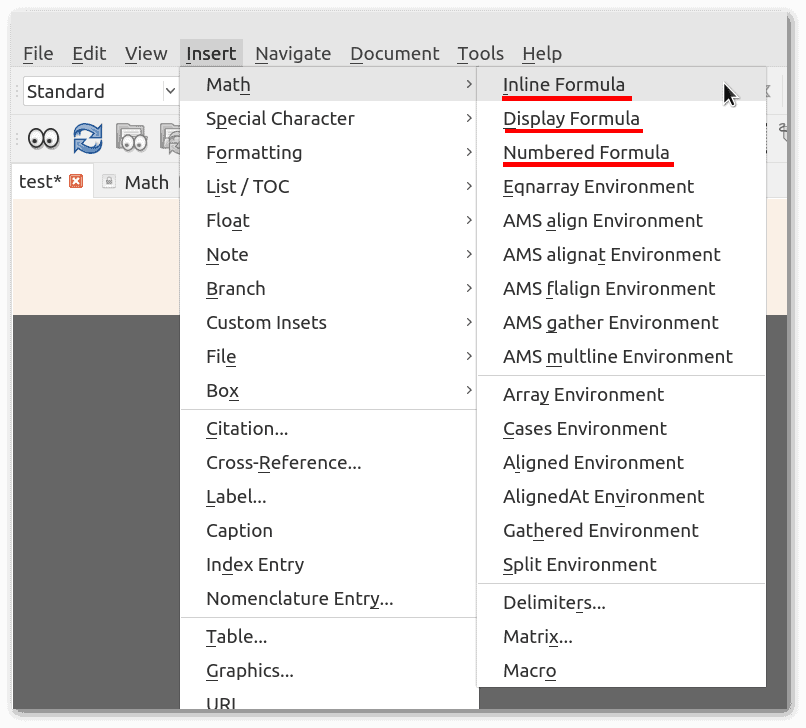
Here’s a brief description of the first three options, which are sufficient to get us started:
A common shortcut for inserting inline formulas is CTRL+M on Linux and Windows and ⌘+M on macOS.
Each of these options activates LyX’s intuitive equation editor:
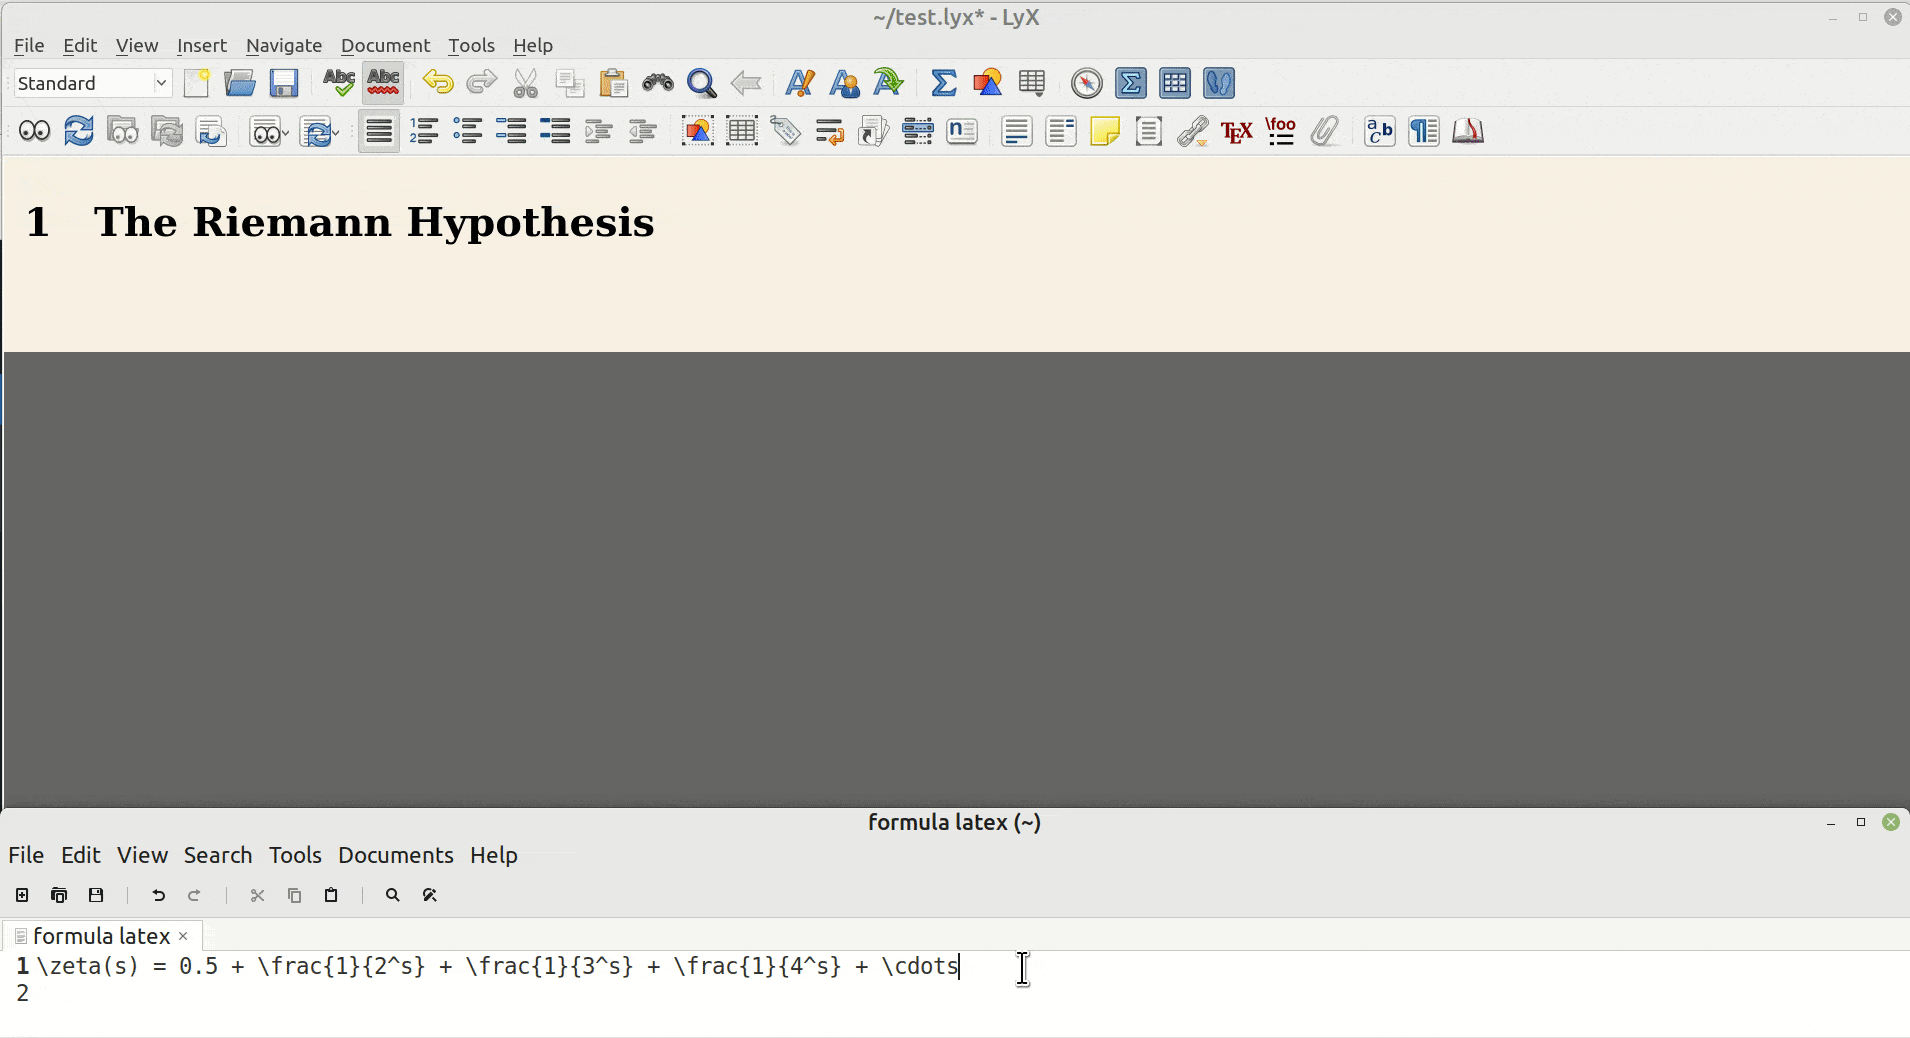
 If we are used to a CAS or other software that provides the LaTeX code of a formula, we can just copy and paste it. For example, let’s look at the LaTeX code that generates the same formula from the previous example:
\zeta(s) = 0.5 + \frac{1}{2^s} + \frac{1}{3^s} + \frac{1}{4^s} + \cdotsLyx can convert this code on the fly and display the formula immediately:
The Help menu includes LyX’s detailed Math manual for more information.
LyX never embeds images in a .lyx file, so we have to be careful not to move them after inserting them. Alternatively, we can move the .lyx file and the images together, keeping the same relative paths.
We can open the Insert menu and choose Graphics to insert an image. However, this isn’t the most convenient way because the image will remain exactly where we placed it relative to the text, with layout difficulties similar to those in a traditional editor such as Word or LibreOffice.
The best practice is to insert images as “floating” elements, allowing them to move freely within the document and automatically adjusting their placement so as not to disrupt the flow of the text. In addition, LyX provides easy tools for referencing figures within the text, ensuring consistency and ease of navigation for the reader.
Floating figures are figures that are not tied to a specific location in the text. This flexibility allows LaTeX to determine the figures’ optimal placement, taking into account page layout and text flow.
Inserting the image is quite simple. First, we need to create a frame that will contain the floating image, write a caption, and then insert the image above it. We can center the paragraph to center the image horizontally:
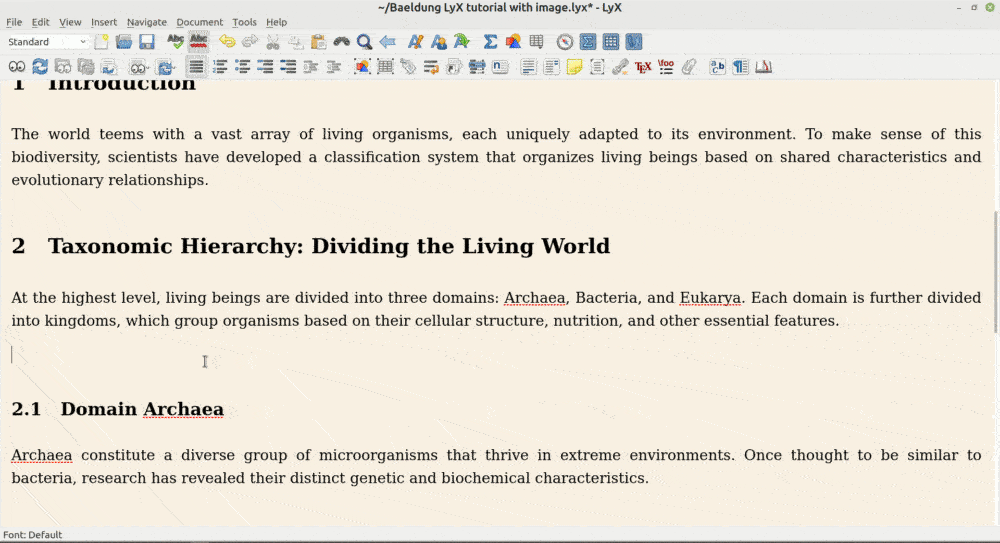
In this example, we placed the floating image at the end of section 2, but in the PDF, it appears at the beginning of page 2 and before section 2. This is more graphically correct and pleasing.
Cross-referencing figures allow us to refer to them by their numbers, ensuring that readers can easily locate the figures we’re discussing.
To turn the image in the previous example into a referenced image, we must first add a label to its caption and then add a reference to that label in the text:

An advantage of this approach is that the numbering is fully automatic and updates itself as we insert new cross-references before or after the current one.
The drop-down menu in the LyX toolbar contains a number of items tailored to the specific type of document we’re creating based on the rules defined by the selected document class. For example, let’s look at the differences between Article (Standard Class) and American Mathematical Society (AMS) Article:
So, this drop-down menu helps us access relevant formatting options without having to manually configure each detail, making the document creation process more efficient and user-friendly. It’s important to note, however, that we should not change the class once we’ve started writing. Otherwise, we may get unexpected results.
That said, let’s create a new document with the class Article (Standard Class with Extra Font Sizes). The process is quite intuitive:

Sections and subsections are numbered automatically, and all items in the ToC of the PDF are clickable.
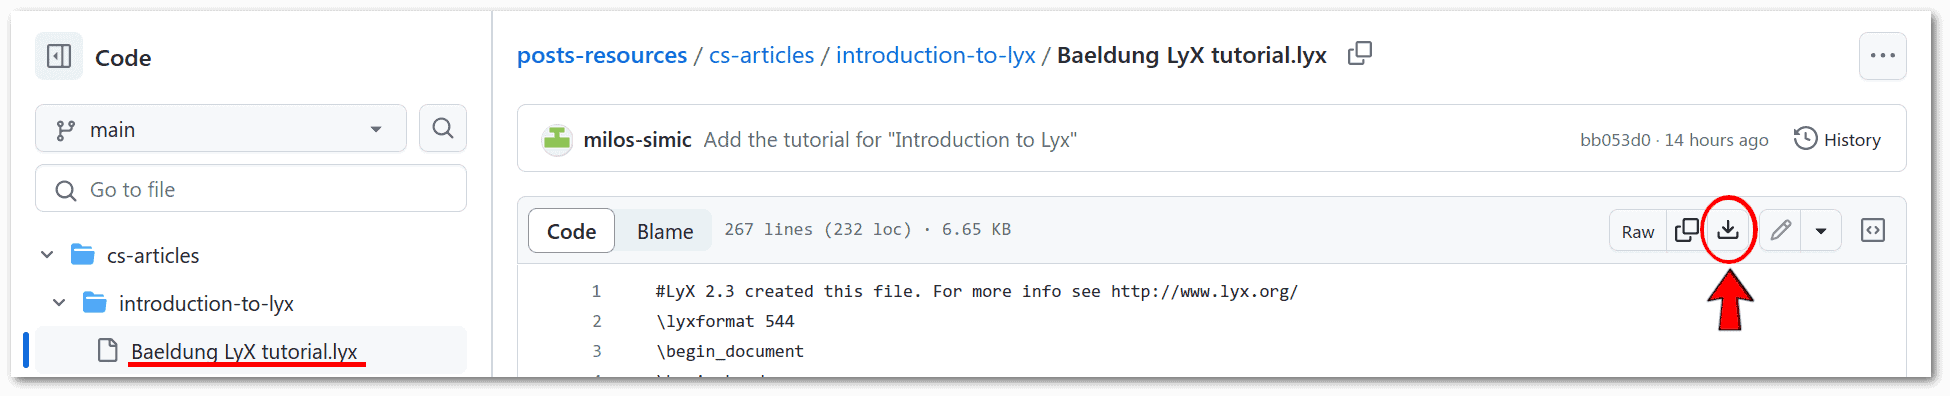
Here is the link to download this sample LyX scientific article. On the page that opens, we’ll see the internal LyX code. We can safely ignore it and click on the download icon:
In the settings of this example document, we’ve also included the same LaTeX preamble that we discussed earlier.
On high-resolution screens, the LyX icons are usually too small. By right-clicking on an empty space in the toolbar, we can choose their size:
![]()
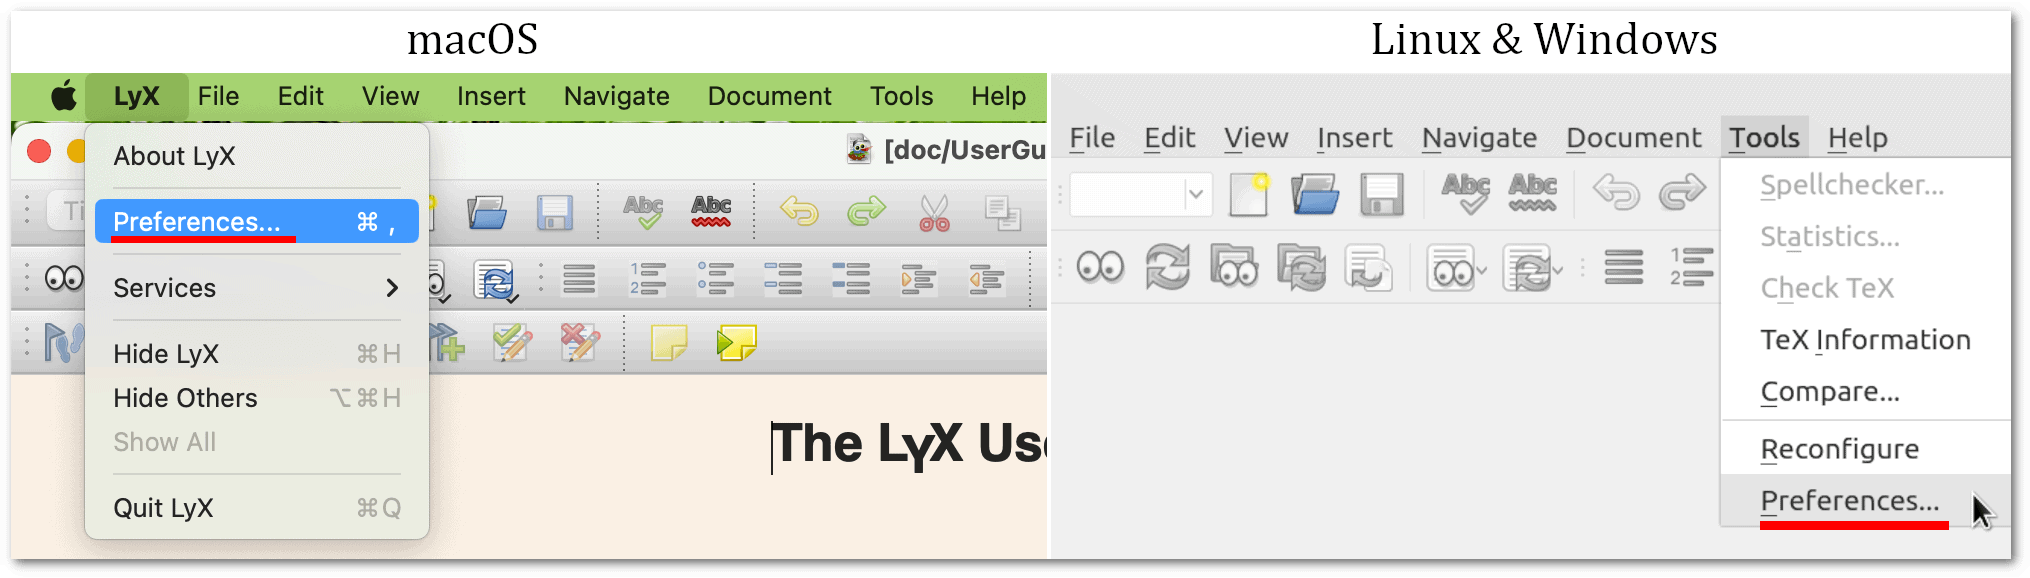
Menus and icons on Linux, macOS, and Windows are arranged almost identically. One exception is the Preferences menu:
In the Preferences menu, we can take a first look at the default settings, which are fine in most cases. As a general rule, we should not touch what we do not understand.
One of the basic features of virtually all text editors is spell checking as we type. LyX has it, but it’s disabled by default. In the Preferences, we need to enable Spellcheck continously:
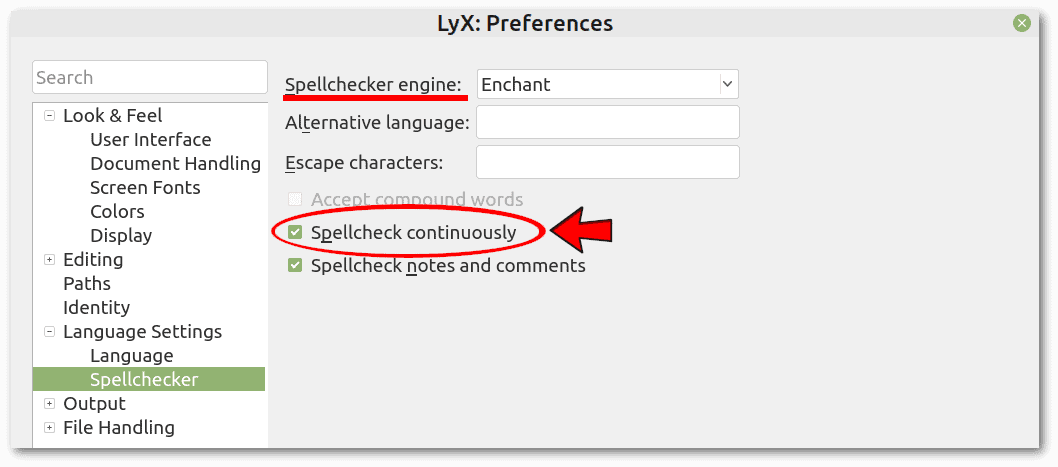 If we followed our installation instructions, the spell check engine is Enchant on Linux, Native on macOS, and Hunspell on Windows.
LyX takes some time to learn. Despite this initial drawback, it has several advantages that justify the effort:
About the last point, LyX can automatically generate:
On the downside, LyX sometimes exhibits seemingly odd behavior that requires some investigation and even a few lines of LaTeX code to fix.
In this article, we explored the basic functionality of LyX, starting with an explanation of its WYSIWYM approach. We created a new document with the desired class and options, used the basic formatting tools, inserted mathematical formulas and floating images, and finally wrote a sample scientific article.
When using LyX to write documents, there are two main things to keep in mind:
This allows us to take full advantage of LyX’s ability to produce well-structured and professionally formatted documents.