

Learn through the super-clean Baeldung Pro experience:
>> Membership and Baeldung Pro.
No ads, dark-mode and 6 months free of IntelliJ Idea Ultimate to start with.
Last updated: March 18, 2024
Learn through the super-clean Baeldung Pro experience:
>> Membership and Baeldung Pro.
No ads, dark-mode and 6 months free of IntelliJ Idea Ultimate to start with.
LyX is a document processor that allows us to create professional-looking documents without worrying about formatting details. LyX uses LaTeX, a powerful typesetting system, to produce high-quality output for print or digital publication. With LyX, we can focus on the content and structure of our documents while LyX takes care of the layout and appearance.
LyX is compatible with many operating systems and supports multiple languages.
In this tutorial, we’ll cover the installation of LyX on Linux, macOS, and Windows.
Installing LyX on Linux is quite simple, as package management systems can install both a complete LaTeX environment and LyX with a single command. However, knowing which packages to install is not so obvious.
LyX has a wide range of recommended and suggested packages, as shown by synaptic on Linux Mint 21:
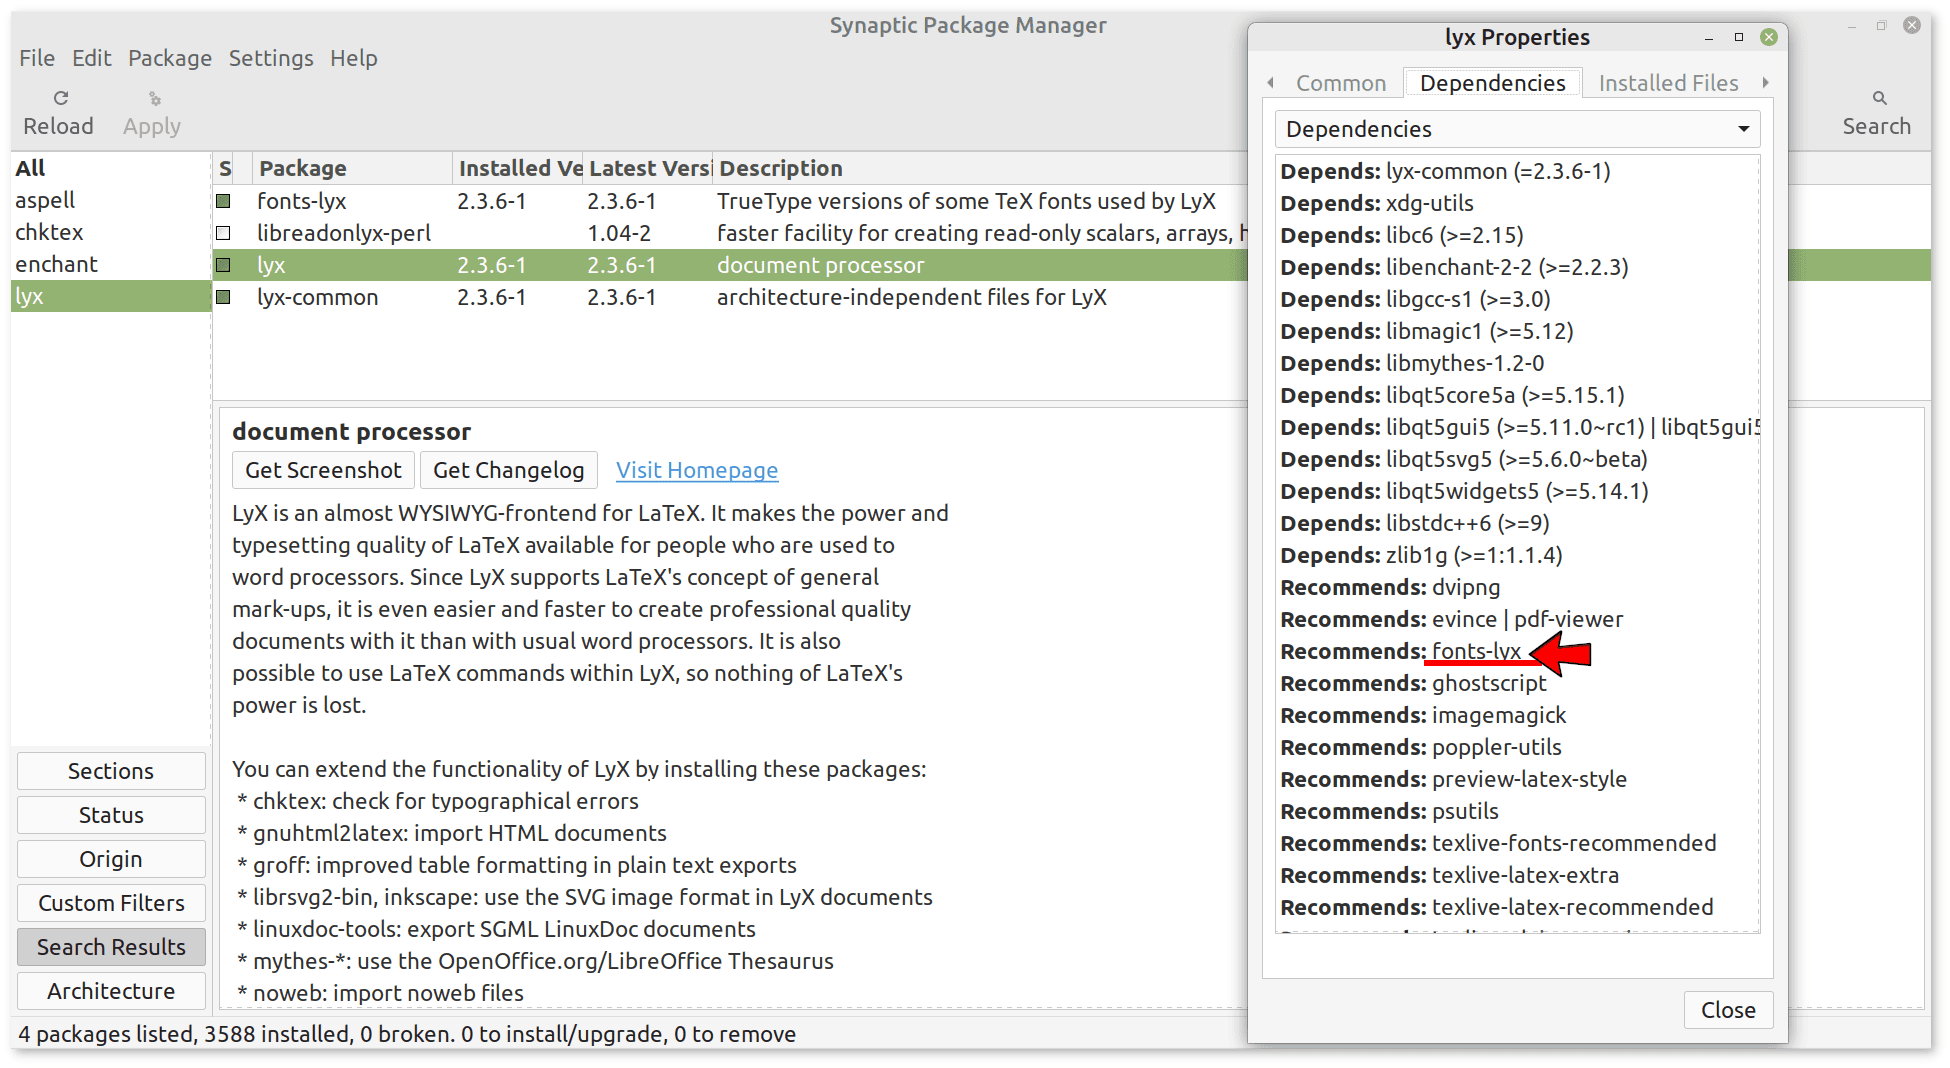 If we are installing LyX for the first time, we may not know exactly what we need. A good choice is the following:
$ sudo apt install lyx fonts-lyx texlive-fullLet’s look at them in detail:
Thanks to automatic package dependencies, we have everything we need to get started.
Unlike the LyX DEB package of Linux Mint 21, the LyX RPM package of Fedora 38 uses more dependencies to provide a more complete environment, as shown by dnfdragora:
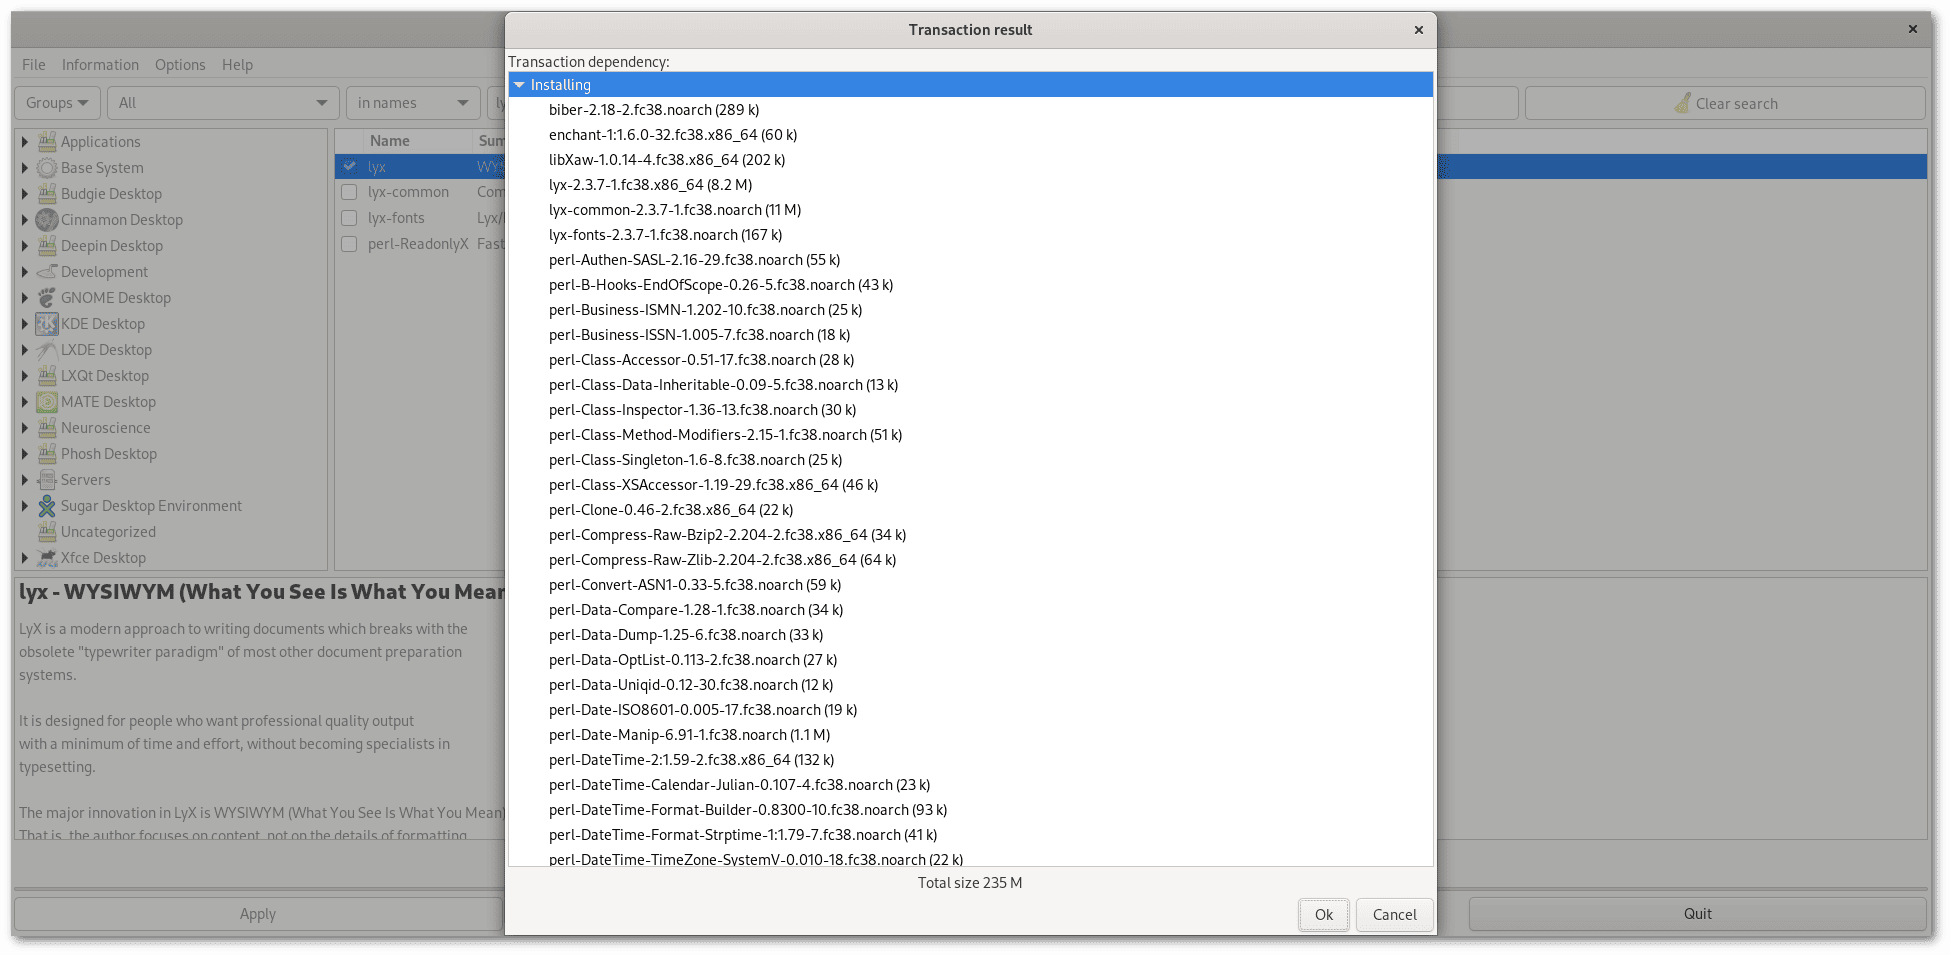 In total, the LyX package has 60 dependencies. To install LyX along with a complete TeX environment, we can use this command:
sudo dnf install lyx texlive-scheme-fullIn this case, we didn’t include font-lyx because it’s already a dependency of lyx. Also, the texlive-scheme-full is the equivalent of the texlive-full DEB package seen earlier.
In the following, we’ll use macOS Ventura 13.3. Before we start installing LyX on macOS, we need to get the installers for Python, MacTeX, and Lyx, as shown below:
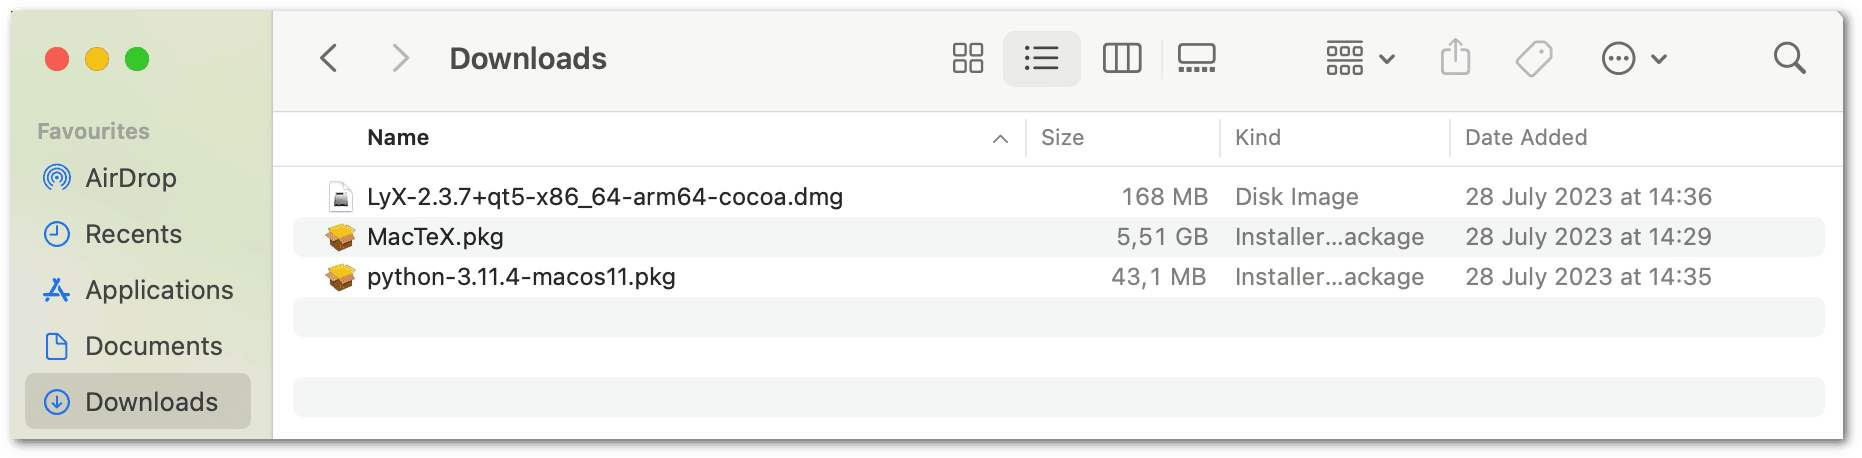 Of course, the file names may be slightly different depending on the versions we’ve downloaded.
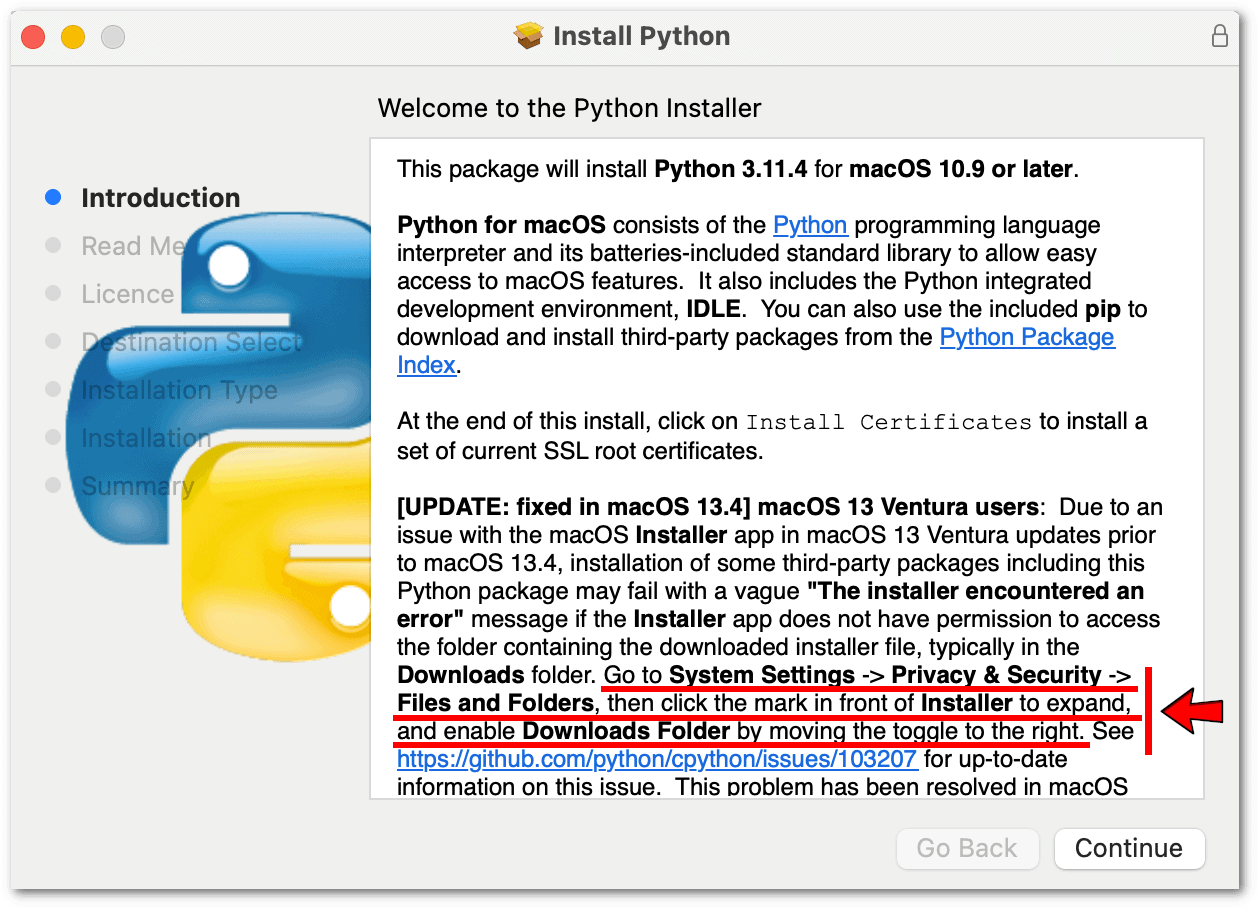
First, we must carefully read the information provided by the installer and, depending on our version of macOS, strictly follow its instructions. In particular, we refer to what we have underlined in red:
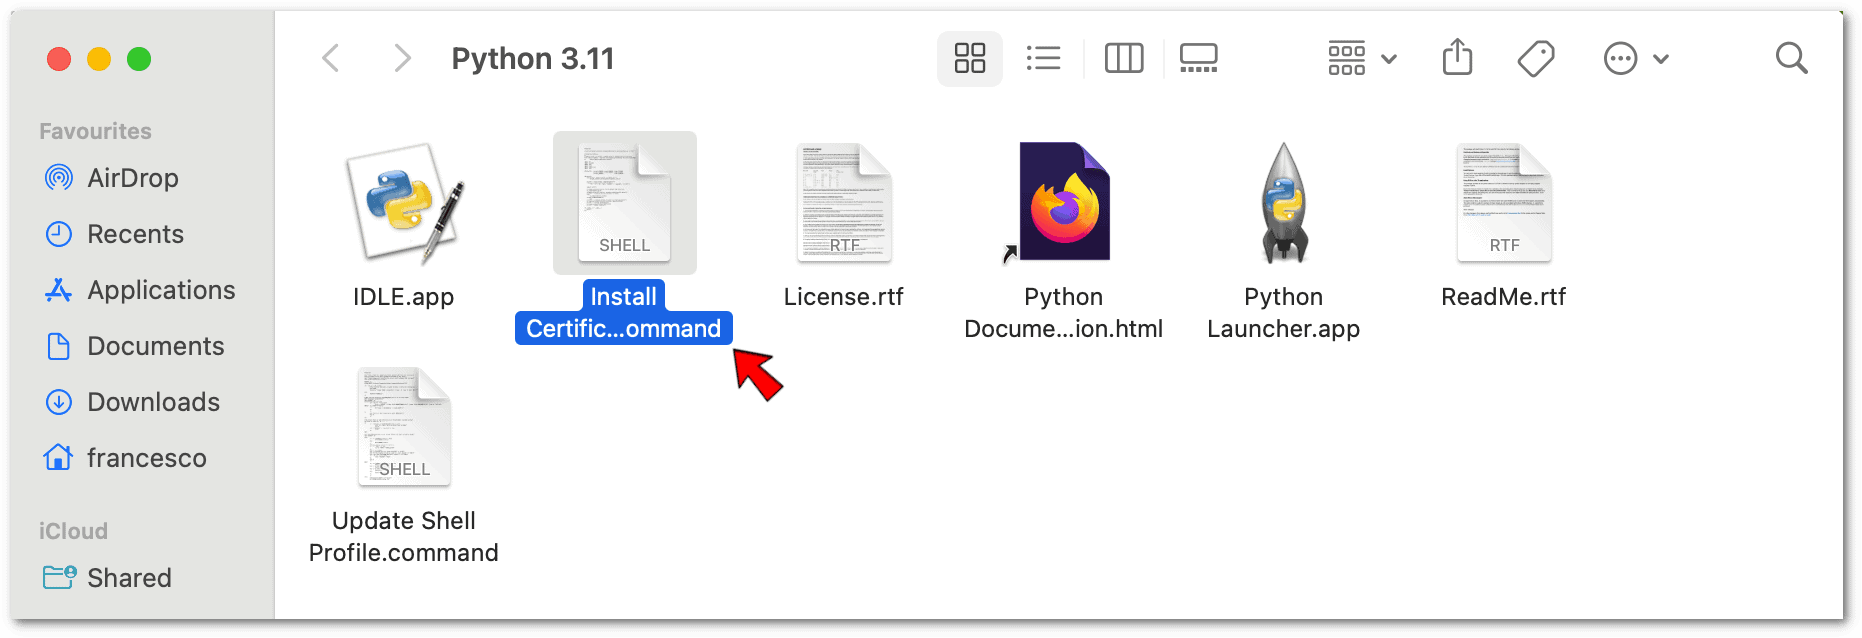
 Once this is done, we can continue with the installation wizard. When it finishes, it will automatically open the installed Python folder. We need to run the highlighted script:
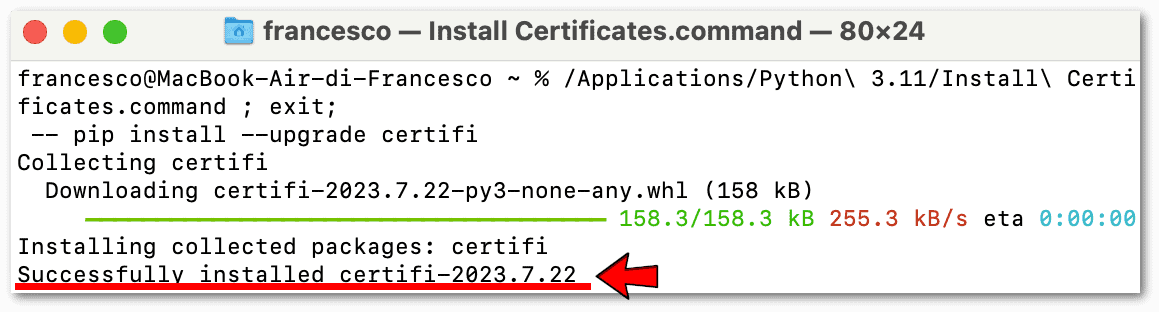
 If all goes well, its output should report that the installation of the certificates was successful:
 Now that Python is done, we can move on to the installation of MacTeX.
Installing MacTeX doesn’t require any special attention. We just have to follow the installation wizard:
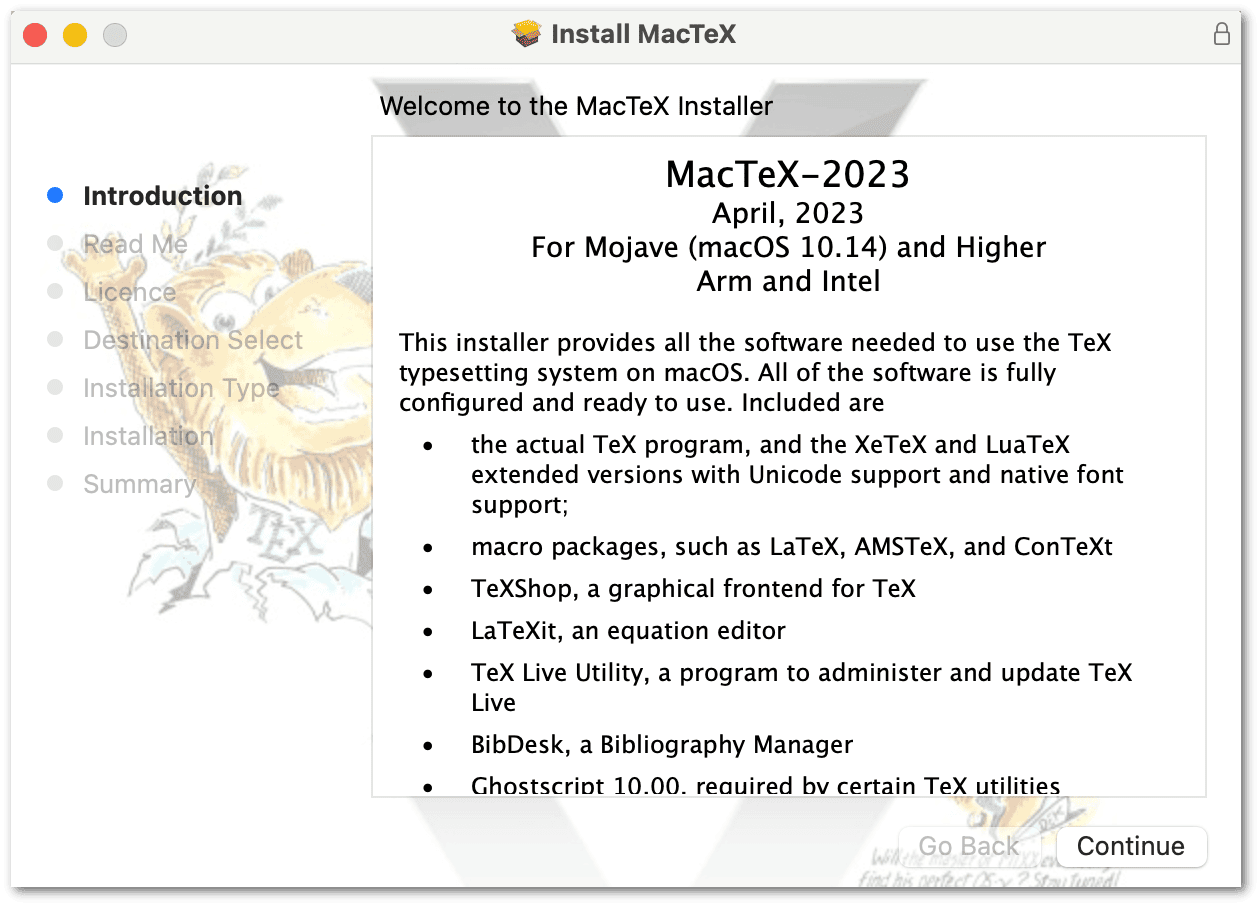 All the default options are fine. At some point, the installer will allow us to customize the software to be installed, but this is a step we can safely skip.
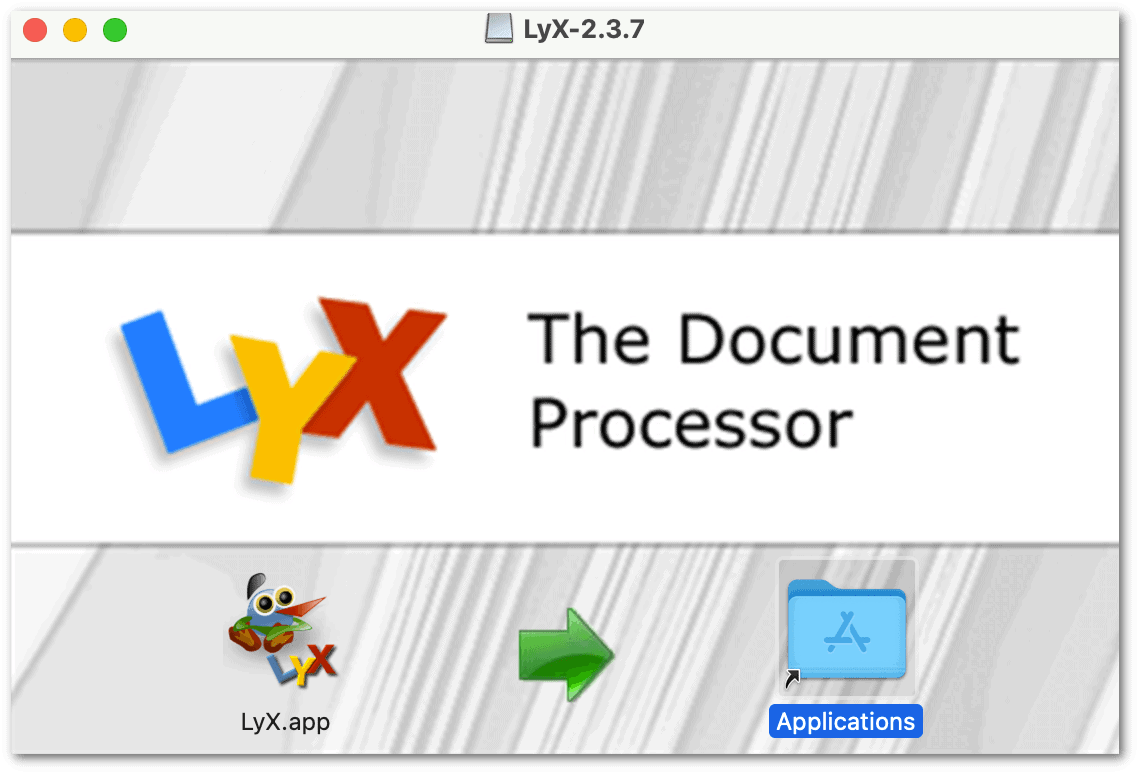
Once we open the LyX installer, we need to drag its icon and drop it on the Applications folder icon:
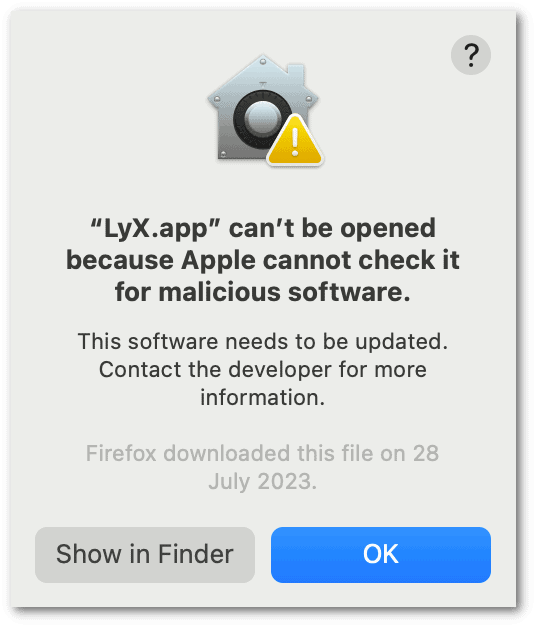
 After that, we find the LyX icon in the Launchpad. The problem is that when we try to open it, the macOS Gatekeeper blocks us:
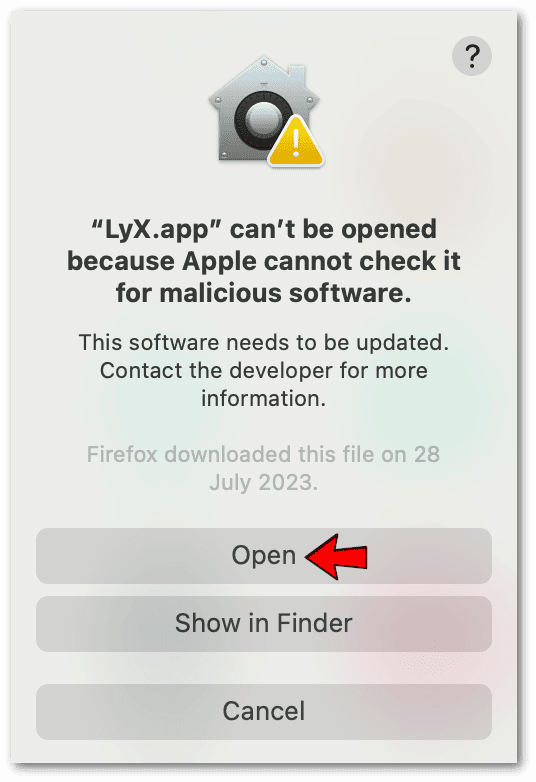
 Fortunately, this is a fairly simple problem to work around. Let’s click on Show in Finder, then right-click on the LyX icon and select Open while holding down the Ctrl key. As a result, a new screen will open, which, unlike the previous one, still allows us to launch LyX:
 We only need to do this selective Gatekeeper deactivation once. More information on this issue can be found in the official LyX documentation.
In the following, we’ll use Windows 11. As with other operating systems, we need to install a complete TeX environment first, and then LyX.
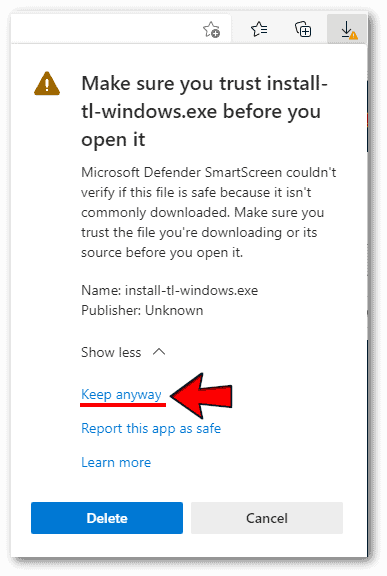
From the official Installing TeX Live over the Internet page, we have to click on install-tl-windows.exe. Unfortunately, Microsoft Defender SmartScreen will block us. It’s not a big deal, as it’s enough to click Show more and then Keep anyway:
 Once that is done, we can open the file to start the installer, which will take some time to get what it needs from the Internet:
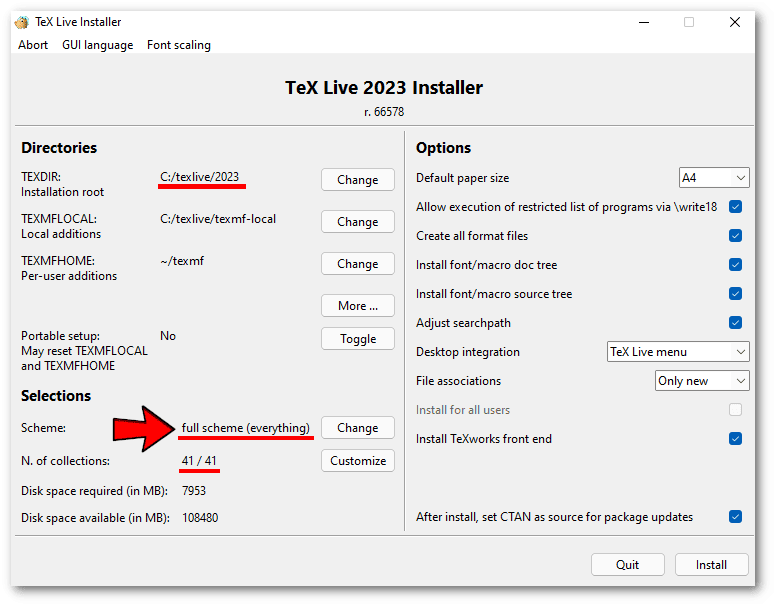
 Before starting the actual installation, we can check the advanced options, which should look like as below. The important thing is to leave everything selected (full scheme). It might also be helpful to make a note of the TeX Live installation folder, as the LyX installer will ask us for it:
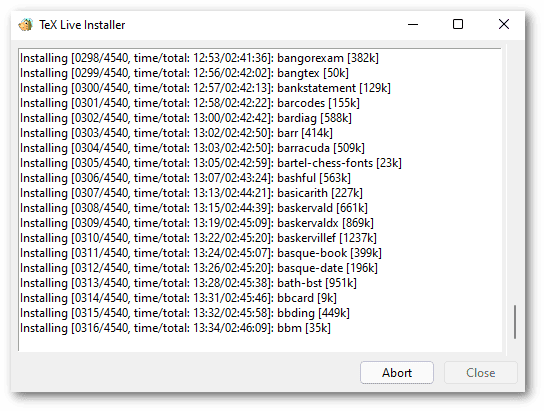
 The installation can be very long, however the installer will show us a complete log in real time:
 Once the TeX Live installation is complete, we are ready to install LyX.
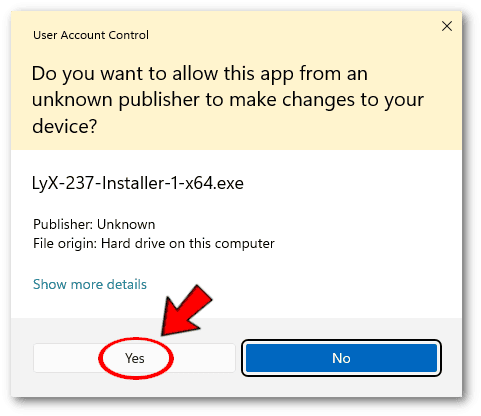
Let’s download the appropriate Windows installer for our case, typically the 64-bit version, from the official download page. Again, Windows will give us a warning that we can safely ignore:
 The installer will allow us to add the dictionaries we need:
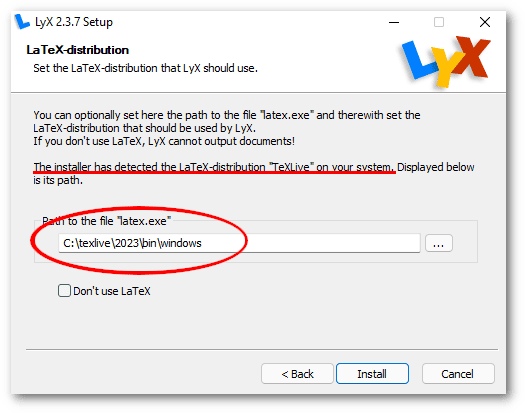
 In this case, the installer automatically detected the installation of LaTeX, however, let’s check if the path is correct:
 Once the installation is complete, we will find LyX in the Windows Applications menu in the Recommended section.
In this article, we’ve looked at how to install LyX on Linux, macOS, and Windows. In general, a complete LaTeX environment needs to be installed first, and then LyX.
Although the installation is conceptually simple, this tutorial has highlighted some details that we need to be aware of.