

Learn through the super-clean Baeldung Pro experience:
>> Membership and Baeldung Pro.
No ads, dark-mode and 6 months free of IntelliJ Idea Ultimate to start with.
Learn through the super-clean Baeldung Pro experience:
>> Membership and Baeldung Pro.
No ads, dark-mode and 6 months free of IntelliJ Idea Ultimate to start with.
In the competitive job market landscape, a well-crafted curriculum vitae (CV) can make a remarkable difference in securing our dream career opportunity. The content and presentation of our CV play a vital role in grabbing the attention of potential employers and highlighting our skills and qualifications effectively.
While various tools are available for creating CVs, one approach that stands out for its professionalism and aesthetic appeal is using LaTeX. In this tutorial, we’ll study step-by-step how to create a CV with LaTeX using ModernCV – one of the most common and powerful package for creating CVs.
Before installing ModernCV, let’s ensure we have LaTeX on our computer. If not, the following will show how to install MikTeX, the core of LaTeX.
If we’re using Windows, we can run the following commands in administrator mode to install the package MikTeX:
winget install MiKTeX.MiKTeX
miktexsetup --shared=yes finish
initexmf --admin --set-config-value [MPM]AutoInstall=1
miktex packages upgrade complete
With Ubuntu and other Linux distros, the install process is less complicated. We can just copy and run these commands:
echo "deb http://miktex.org/download/ubuntu jammy universe" | sudo tee /etc/apt/sources.list.d/miktex.list
sudo apt-get update
sudo apt-get install miktex
sudo miktexsetup --shared=yes finish
sudo initexmf --admin --set-config-value [MPM]AutoInstall=1
miktex packages upgrade complete
After the installation of MikTex, we can run the following command to install ModernCV:
miktex packages install moderncvFirst, we need to define the preamble of the LaTeX document. This starts with the declaration of the class moderncv. Then we can choose the theme for the CV, i.e., the style of the PDF result after compiling the LaTeX document.
The following describes the typical preamble for a LaTeX document using ModernCV:
% (1) Define the use of ModernCV document class
\documentclass[<options>]{moderncv}

% (2) Choose the theme for CV
\moderncvtheme{<theme_name>}

% (3) Choose the color theme
\moderncvcolor{<color>}

% (4) Modify the page margins
\usepackage[<options>]{geometry}
\recomputelengths

% (5) Change the encoding of the file (utf8, latin1, ...)
\usepackage[<encoding>]{inpenc}

% (6) Change the language
\usepackage[<language>]{babel}
There are several options we can modify:
| Parameter | Option |
|---|---|
| paper_size | a4paper, a5paper, b5paper, letterpaper, legalpaper, executivepaper, landscape |
| font_size | 10pt, 11pt, 12pt |
| color_option | nocolor (for black-and-white CVs) |
| theme_name | casual (default), classic, banking, oldstyle, fancy |
| color | blue (default), green, red, orange,grey |
| encoding | utf8, latin1, ascii, … |
| language | english, vietnamese, chinese, japanese, korean, … |
We can freely change the format (page size, text size, etc.) of the CV. For example, if we want to have a CV in the A4 paper size, default text size 10pt, support color printing, and that’s draft, we can define the documentclass as follows:
\documentclass[a4paper, 10pt, draft]If we want a CV to be in letter paper size with a landscape look, default text of size 12pt, black-and-white printing, and the file is the final version, here is the config:
\documentclass[letterpaper, landscape, 12pt, nocolor, final]{moderncv}There are five available themes, as indicated in the above table: casual (default), classic, banking, oldstyle, and fancy. Here is what they look like after compiling:
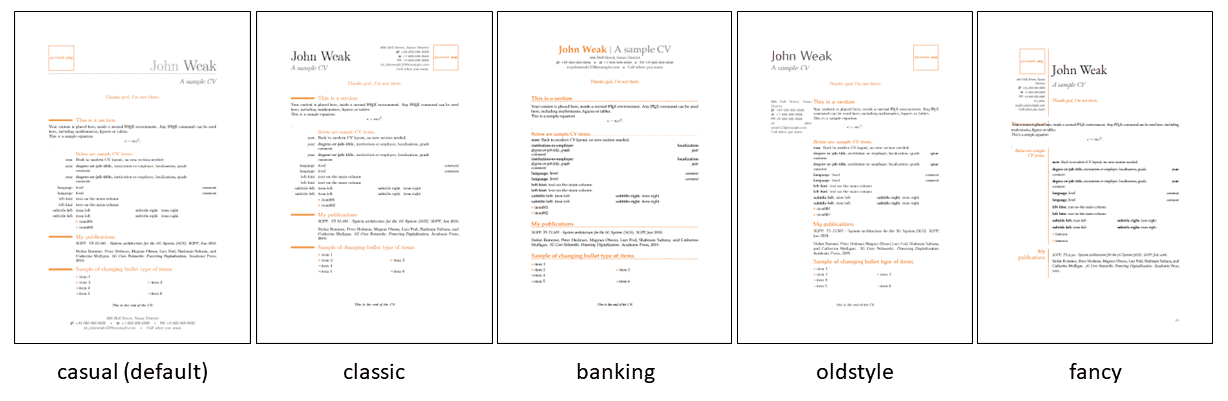
Additionally, we have five available color options for themes (the color of titles and some bars and lines in the CV):

The margin of the CV can also be modified. The below table lists the optional parameters for margins:
| Margin parameter | Description |
|---|---|
| scale | Defines the content space is equal to scale % of the page’s space |
| top | Defines the top margin |
| bottom | Defines the bottom margins |
| left | Defines the left margins |
For example, if we want a CV to have a scale of about 25% of free paper space, here is the command:
\usepackage[scale=0.75]{geometric}Or we can manually set each margin parameters (top, bottom, left, right) with this command:
\usepackage[top=3cm, bottom=3cm, left=2.5cm, right=2.5cm]With this line, we can change the file’s encoding. We usually use the utf8 encoding:
\usepackage[utf8]{inputenc}In this line, we can define the language of the CV. If our CV will be in English, here is the command:
\usepackage[english]{babel}For multi-page CVs, we can add this line to disable page numbering:
\nopagenumbers{}It is commonly recommended to summarize a CV in one page. A résumé, on the other hand, can have multiple pages.
Once all the configurations are done, we can start writing the content of our CV—our personal information. We can use the following lines to define them:
% Name
\firstname{<first_name>}
\familyname{<family_name>}

% Title (optional)
\title{<title_of_cv>}

% Contact informations (optional)
\mobile{<mobile_number>}
\phone{<phone_number>}
\fax{<fax_number>}
\email{<email_address>}
\address{<mailing_address>}

% Homepage (optional)
\homepage{<home_website_address>}

% Extra info (optional)
\extrainfo{<additional_info>} % can be anything, for example, your website's address

% Photo (optional)
\photo[<photo_height_in_pt>][<frame_size>]{<path_to_picture>} % the recommended photo size is 64pt

% Quote (optional)
\quote{<your_life_quote>}

% Social links
\social[<platform>]{<username>}
% platform can be one of following: linkedin, xing, github, gitlab, codeberg, bitbucket, stackoverflow, skype, orcid, researchgate, researcherid, googlescholar, twitter, mastodon, telegram, whatsapp, signal, matrix, discord, youtube, twitch, tiktok, instagram, soundcloud, steam, xbox, playstation, battlenetTo open or close a section or subsection, we can use the following commands:
% (1) Open a new section(s)
\section{<section_title>}
\subsection{<subsection_title>}

% (2) Close the section
\closesection{}

% (3) Create an empty section
\emptysection{}
The command to open a new section is \section{<section_title>}. Every section can be divided into subsections with \subsection{<subsection_title>}. When needed, we can close the section with \closesection{} or create an empty section with \emptysection{}.
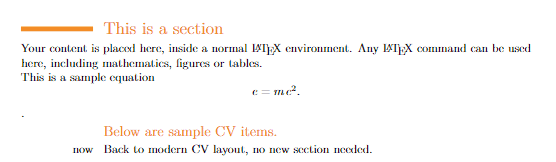
The following lines demonstrate the use of the above commands:
\section{This is a section}
Our content is placed here, inside a normal \LaTeX{} environment.
Any \LaTeX{} command can be used here, including mathematics, figures or tables.
This is a sample equation ![\[e=m\,c^2.\]](/wp-content/ql-cache/quicklatex.com-3d53650020ea5bec315d9826f6d96845_l3.svg "Rendered by QuickLaTeX.com")
.
\emptysection{}
\cvline{now}{Back to modern CV layout, no new section needed.}This results in the below figure:
We can add items of many different types inside sections depending on our purpose.
To describe our education or job experiences, we can use the following command (note that the last three arguments are optional):
\cventry{<year>}{<degree_or_job_title>}{<institution_or_employer>}{<localization>}{<grade>}{<comment>}There is also a language section for any language certificate that we achieved:
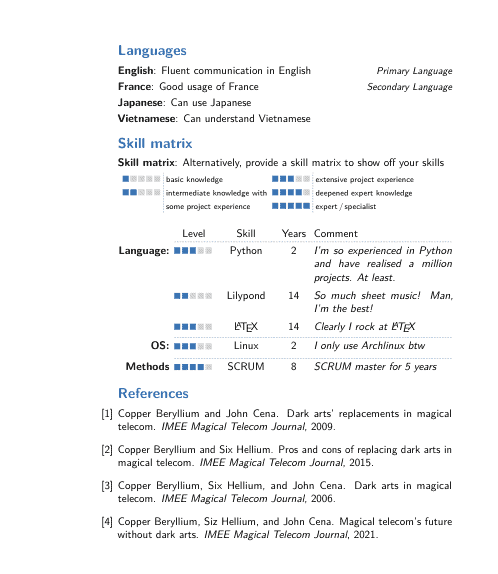
\cvlanguage{<language>}{<level>}{<comment>}The computer skill section contains some parameters as follows:
\cvcomputer{<category_left>}{<programs_left>}{<catergory_right>}{<programs_right>}We can also add a skill entry with rating:
\cvskillentry{<left_hint>}{<rating>}{<name_of_skill>}{<age_of_skill>}{<comment>}To insert a line with a hint on the left, we can use the following command:
\cvline{<left_hint>}{<text_on_the_main_column>}To create a pair of two-item sections, we can use the command \cvdoubleitem. This command is often used to present information in two columns, such as a skill and its corresponding proficiency level, or a qualification and its date of completion:
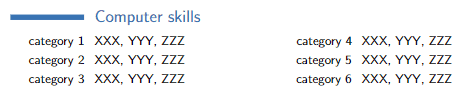
\cvdoubleitem{<subtile_left>}{<item_left>}{<subtile_right>}{<item_right>}For example, if we want to add a section for “Computer Skills” with multiple categories, we can write:
\section{Computer skills}
\cvdoubleitem{category 1}{XXX, YYY, ZZZ}{category 4}{XXX, YYY, ZZZ}
\cvdoubleitem{category 2}{XXX, YYY, ZZZ}{category 5}{XXX, YYY, ZZZ}
\cvdoubleitem{category 3}{XXX, YYY, ZZZ}{category 6}{XXX, YYY, ZZZ}
This will generate the following result:
To insert a list item inside a section, we need the following line:
\cvlistitem{<item001>}We can also insert a section that list all of our publications. These data need to be stored in a BibTeX file (*.bib):
\nocite{*}
\bibliographystyle{plain}
\bibliography{<path_to_BibTeX_file>}
The name of the section title can be changed by the command \renewcommand{\refname}{<new_name>}.
We can modify the symbols used for personal data highlighting by redefining them as follows:
\renewcommand{<command_name>}{<new_symbol>}For command_name, the available options are: phonesymbol, emailsymbol, addresssymbol, mobilesymbol, faxsymbol. For new_symbol, we can use any possible symbol in LaTeX, such as \star or \rightarrow.
\renewcommand{\phonesymbol}{<new_symbol>}In addition, it is possible to change the symbol of the lists:
% Redefining command listitemsymbol
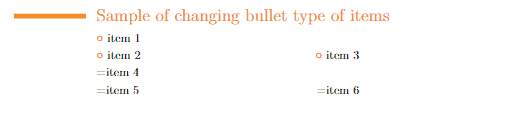
\renewcommand{\listitemsymbol}{<new_symbol>}The following code sums up all of the above commands:
% Sample of changing the bullet type of items
\section{Sample of changeing bullet type of items}
\cvlistitem{item 1}
\cvlistdoubleitem{item 2}{item 3}
\renewcommand{\listitemsymbol}{=}
\cvlistitem{item 4}
\cvlistdoubleitem{item 5}{item 6}
The result is shown in the below figure:
Many distances definitions are used by ModernCV, and all of them can be customized with the command:
\setlength{<length>}{<new_value>}The available options for the parameters length and new_value in the above command are:
In particular, the first column can be set to any width in two ways:
% Method 1
\sethintscolumnlength{<length>}
% <length> is the desired length that LaTeX can understand
% Method 2
\sethintscolumntowidth{<string>}
% <string> is a string of the desired length (usually the longest string in the column)
To indicate the creation date of our CV, we can add the date that our CV was produced with the command \today.
To add some lines at the bottom of the CV, we can drop out the layout of ModernCV and push the line at the end.
\emptysection{}\closesection
\vfill
\begin{center}
\textit{\small This is the end of the CV.}
\end{center}Once we’ve done all of these above steps. It’s time now to compile the LaTeX file and see the result PDFs:

Besides ModernCV, there also exists other packages to create a CV/Resume in LaTeX, such as EuropassCV, Scott Clark CV, EuroCV, friggeri-cv, and so many others. It is worth noticing that some of them do have documentation and sample codes, and others don’t.
This article has provided a fast way to create a CV with LaTeX using the ModernCV package. Whether we are a seasoned LaTeX user or new to this remarkable typesetting system, this article will equip us with the knowledge and skills to create a standout CV that opens doors to exciting career prospects.