1. Introduction
Jenkins allows us to configure credentials for interacting with third-party applications like Git repository hosting services. Once configured accordingly, we can add the credentials to our pipeline, allowing our Jenkins server to gain access to such third-party services.
In this tutorial, we’ll demonstrate how to do a git checkout with credentials in a Jenkins pipeline.
2. Creating Git Credentials in Jenkins
To create credentials in Jenkins, we’ll log into our Jenkins dashboard. Once we’re in, we’ll follow a few simple steps.
2.1. Navigating to the “Global Credentials” Screen
Before we can add credentials to Jenkins, we first need to navigate to the global credentials screen.
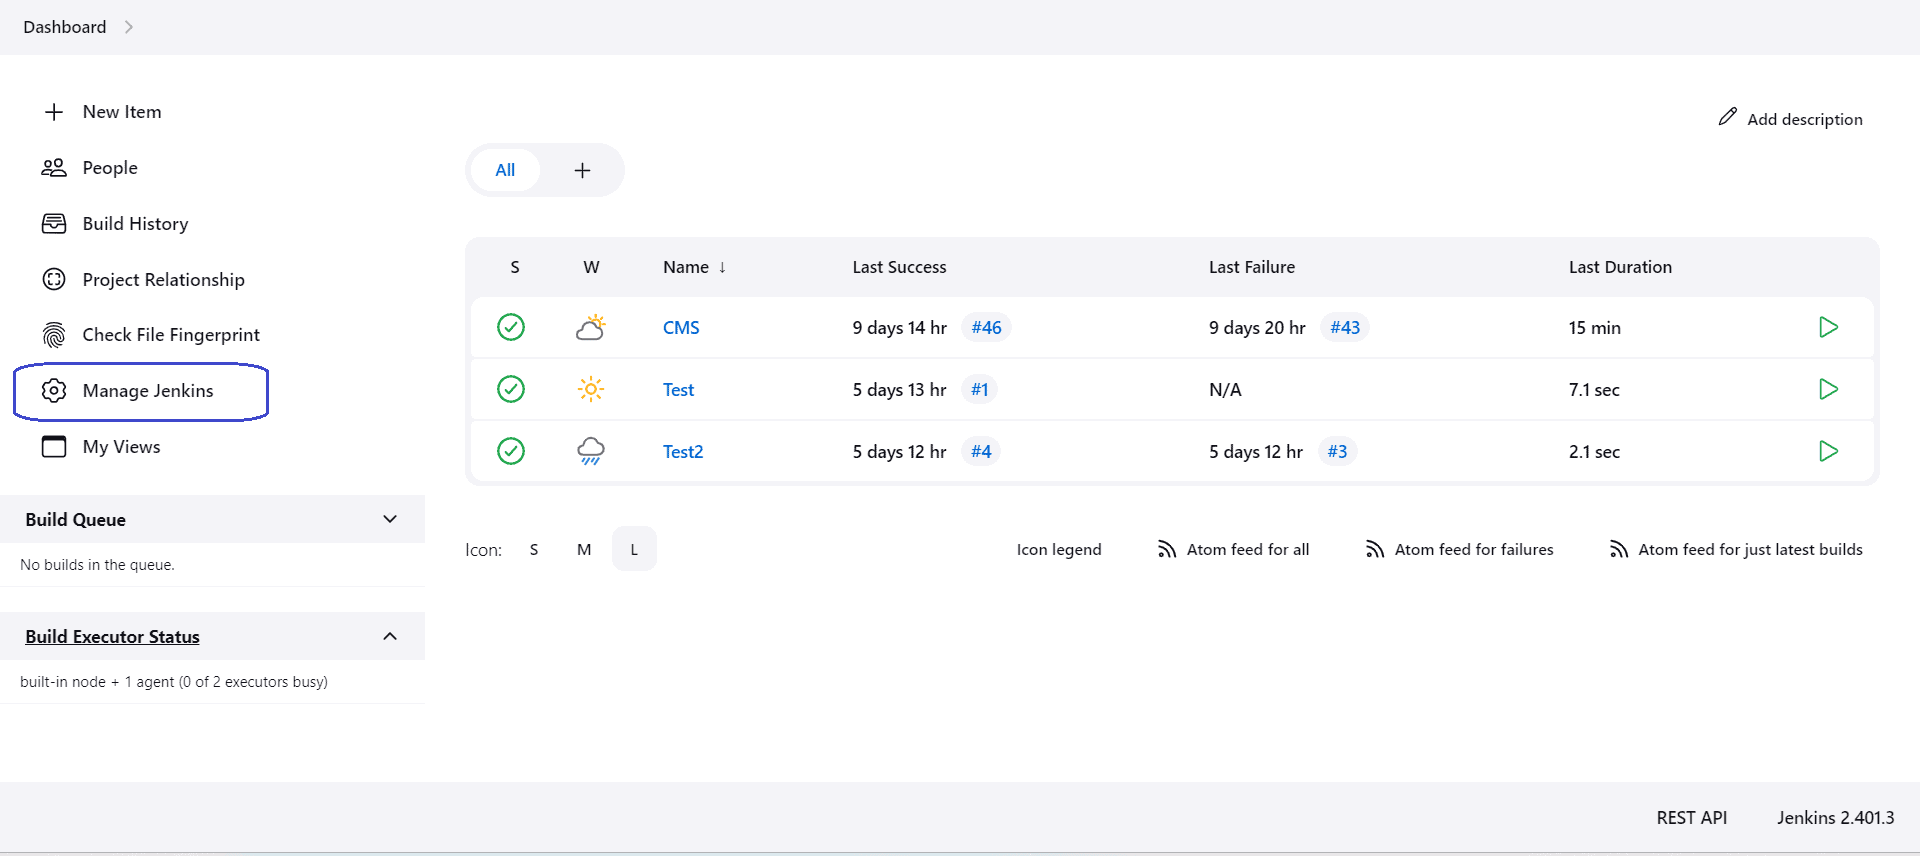
- Click on “Manage Jenkins”:
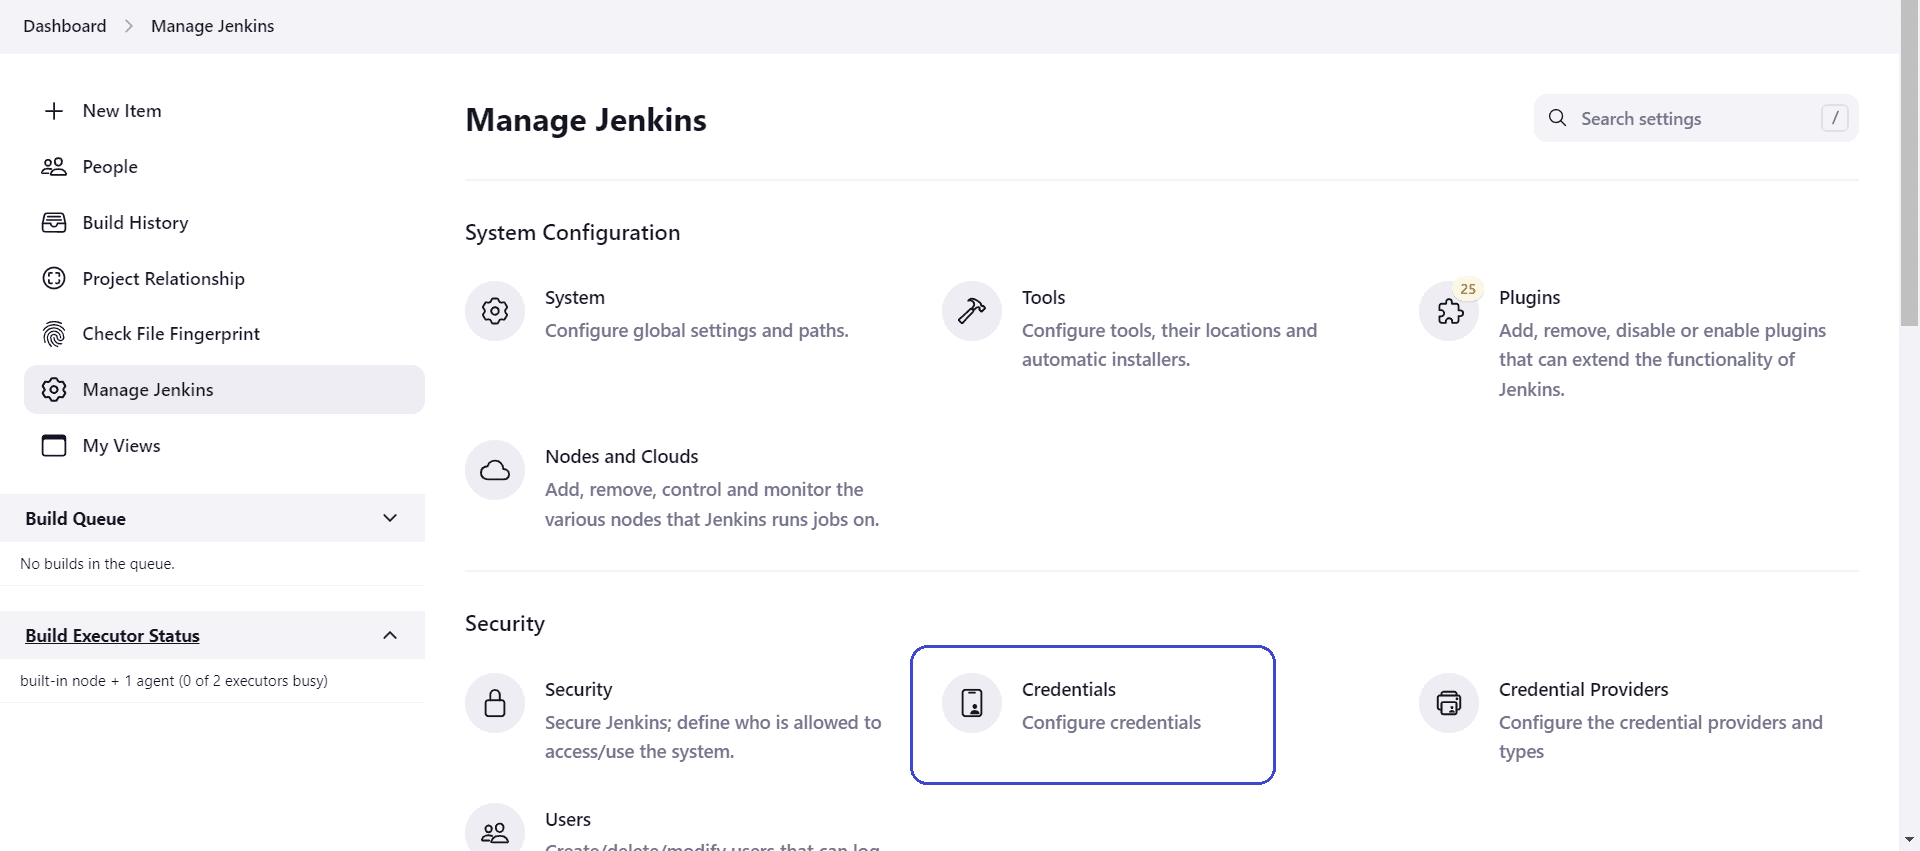
- Under the “Security” menu, we’ll click on “Credentials”:
- Then, under the “Stores scoped to Jenkins” menu, we’ll click on “System”:

- From the ensuing page, we’ll click on “Global credentials (unrestricted)”:

- Finally, we’ll click on the “+ Add Credentials” button at the upper right section of the page:

2.2. Creating a Username With Password Credential
Upon clicking the “+ Add Credentials” button, the link will direct us to a page with multiple input fields:
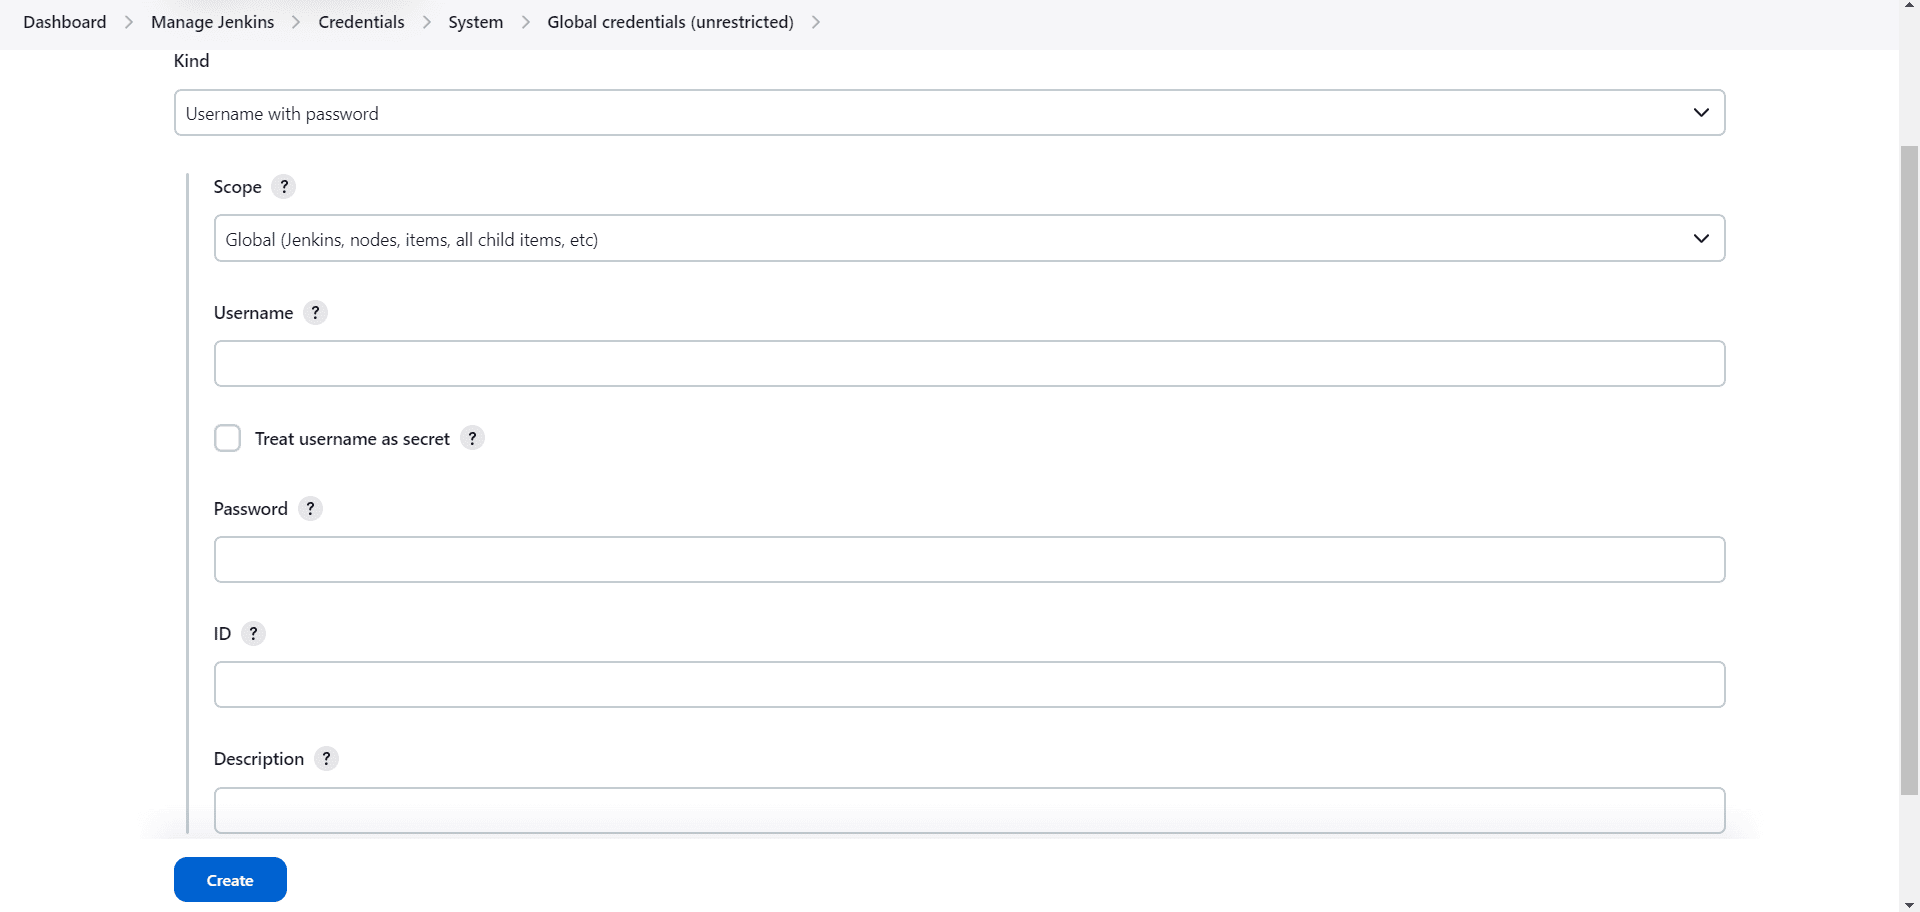
The first is a dropdown field labeled “Kind”. In this field, we’ll select the kind of credential we want to create. For a Git repository hosting service, we can use “Username with password” or “SSH Username with private key” credentials. In this section, we’ll opt for “Username with password”.
After selecting the kind of credential, we’ll select its scope. The scope is basically the range of environments in which we can use the credential. By default, we have two options: Global and System. We’ll leave ours as “Global”.
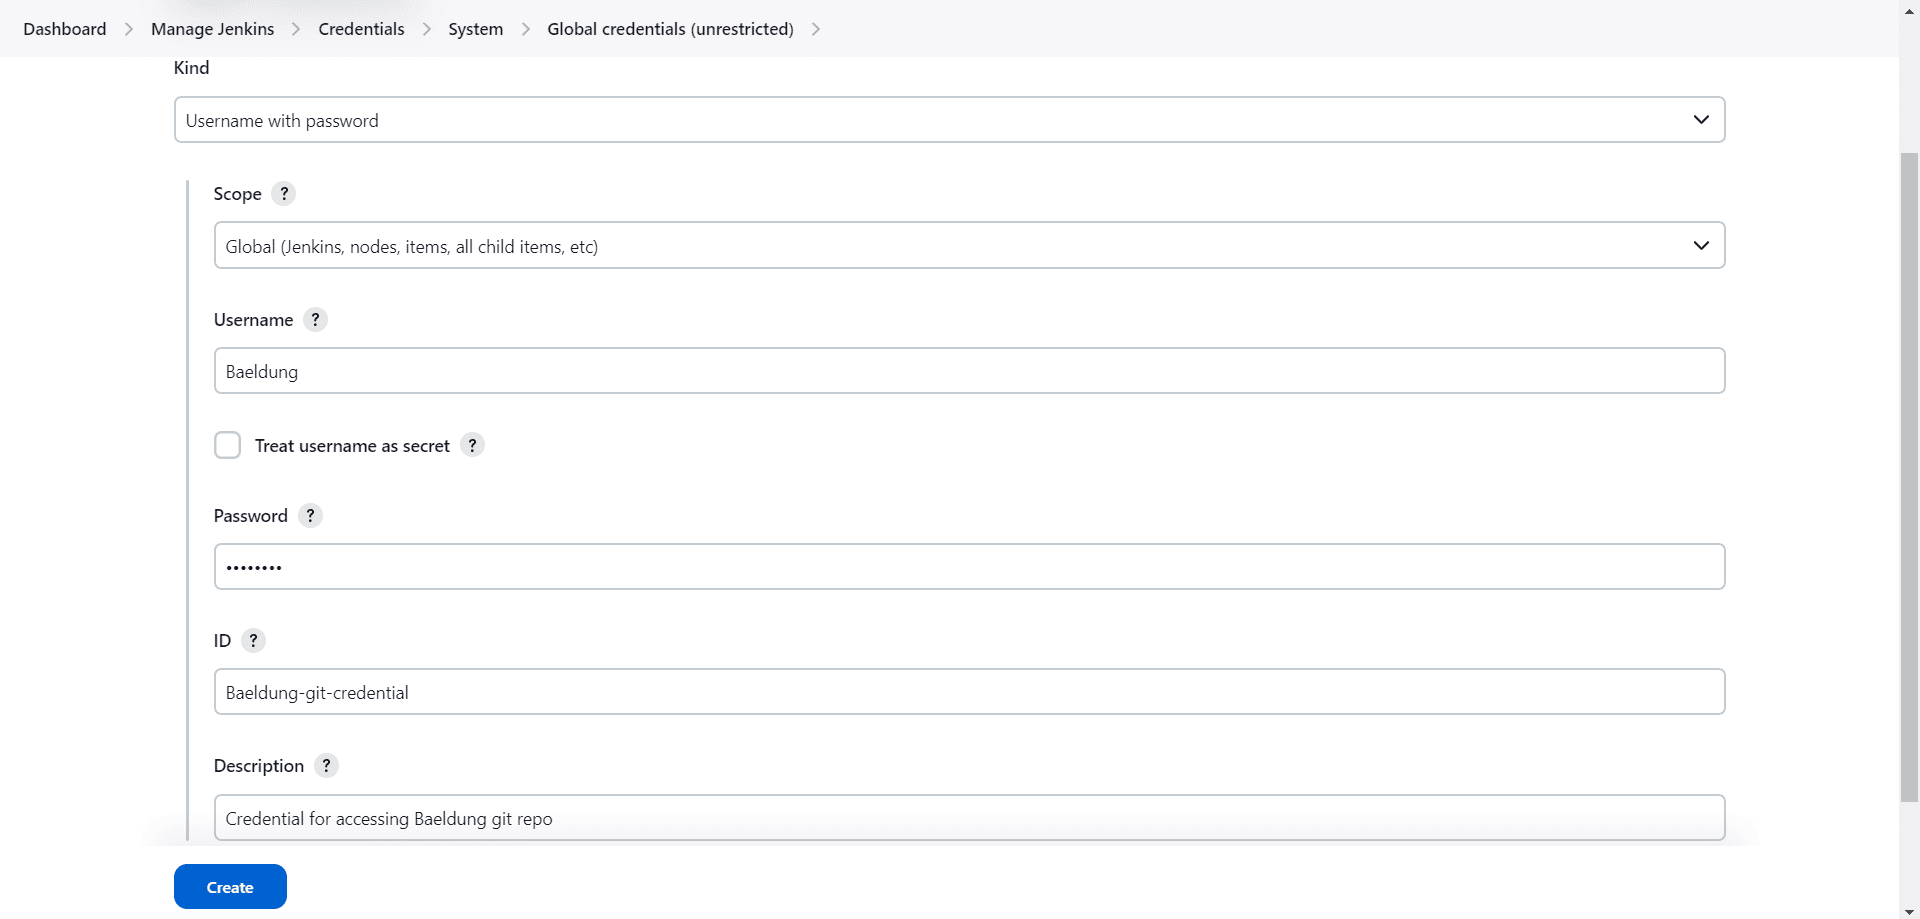
In the “Username” field, we’ll enter our username — we may choose to treat the username as a secret. Then, in the “Password” field, we’ll enter the personal access token or password to our Git repository.
Here, we have the option of specifying an ID in the ID field. But, note that if we don’t specify an ID, the system will generate one. Since we’ll need the ID later when using the credentials in our pipeline, it’s better that we specify it. That way, we can readily recollect and use the ID in the pipeline.
Lastly, we could write a description in the “Description” field. But then, we may also leave it blank.
After filling in all the required fields, we’ll click on “Create” to create the credential:
2.3. Creating an SSH Username With Private Key Credential
If we’d rather use SSH secrets to gain access to our Git repository, we’ll have to create a Jenkins “SSH Username with private key” credential. But before we do that, we’ll generate SSH keys on our Jenkins server:
$ ssh-keygenAfter generating the SSH keys, we’ll add the public key to our remote Git repository account. For GitHub, we can add the public key by clicking on our profile photo, then on Settings > SSH and GPG Keys > New SSH Key.
When we’re done adding the public key to our Git account, we’ll create an SSH credential in Jenkins. To do this, we’ll repeat the five steps highlighted by the bullet points above.
Next, we’ll select “SSH Username with private key” from the options in the “Kind” dropdown menu. Then, we’ll choose a scope:
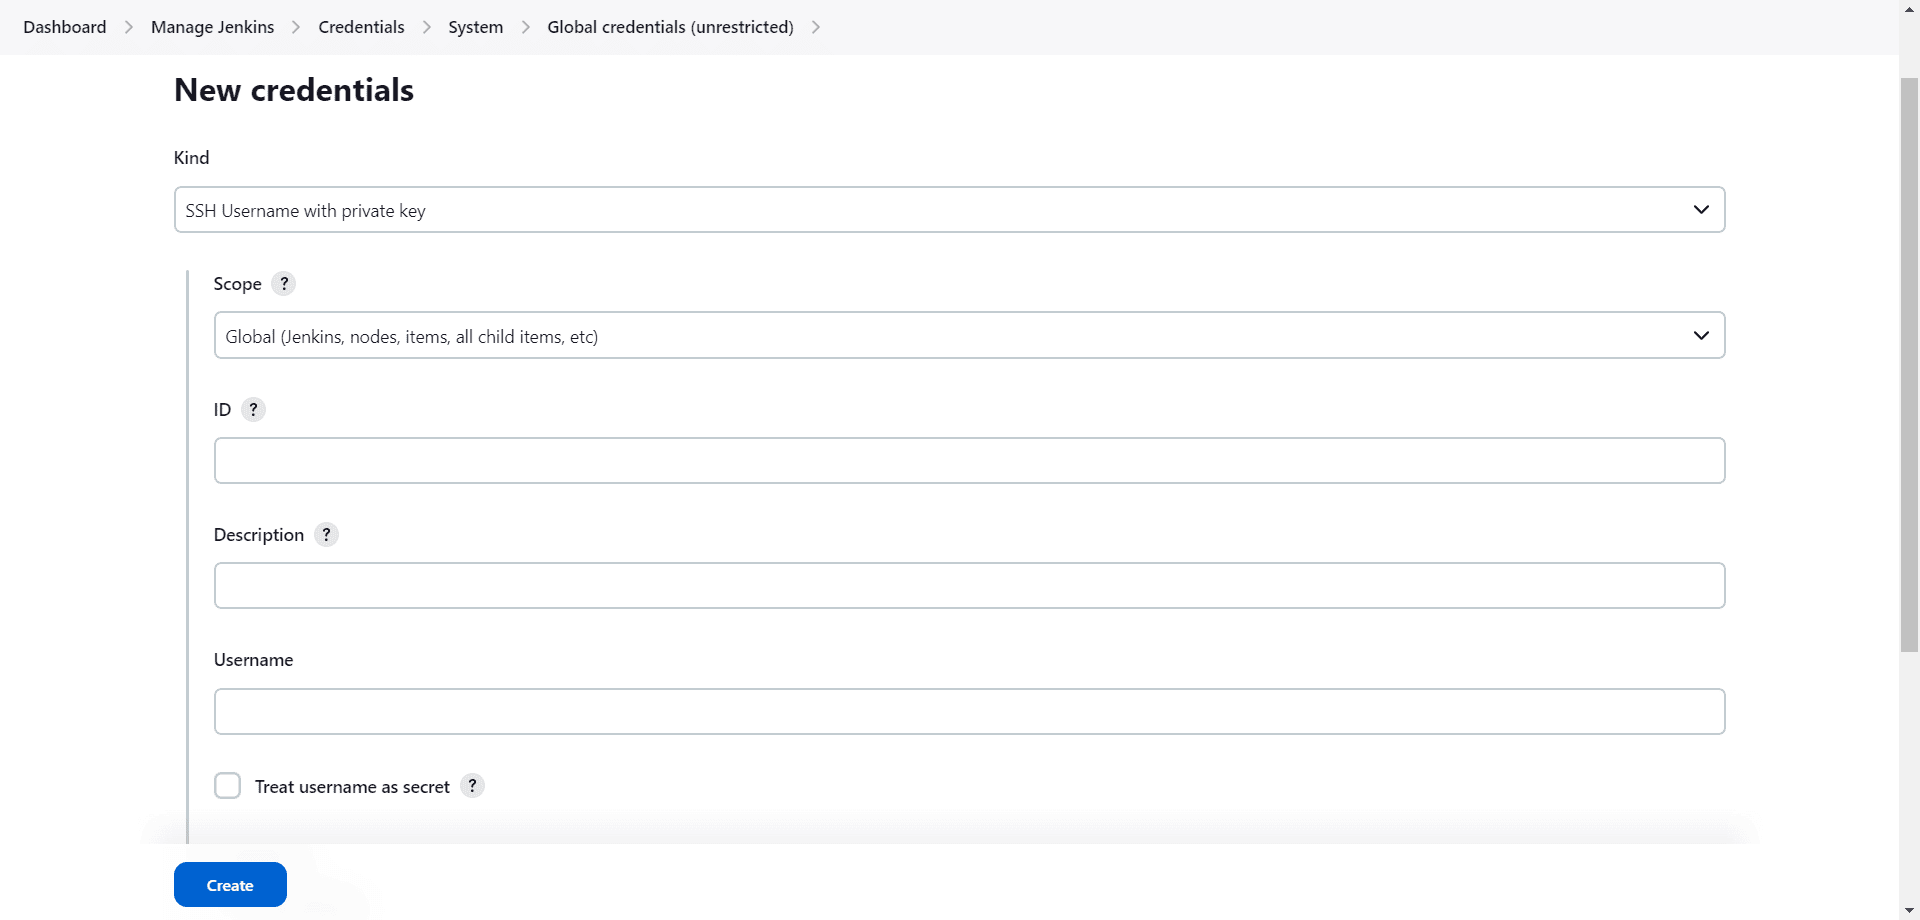
In the ID field, we can specify our desired ID for the credential. But if we don’t, Jenkins will generate an ID.
We may leave the “Description” field blank.
In the “Username” field, we’ll add our SSH username for the Git repository. As mentioned in the previous section, we may choose to treat the username as a secret.
Moving to the next step, we’ll click on the “Enter directly” radio button under “Private Key”. Then, from the ensuing field, we’ll click on the “Add” button:

Next, we’ll enter the private SSH key we generated in the provided field:

We could leave the “Passphrase” field empty. Then, after filling all the necessary fields, we’ll click the “Create” button:

3. Running git checkout With Credentials in a Jenkins Pipeline
To use Git credentials as described below, we must install the Jenkins Git plugin first. Once we’re done with that, we can create a pipeline that runs a git checkout with credentials:
#!/usr/bin/env groovy
pipeline {
    agent any
    stages {
        stage('Git Checkout') {
            steps {
                script {
                    git branch: 'main',
                        credentialsId: 'Credential ID',
                        url: 'https://github.com/username/repository.git'
                }
            }
        }
    }
}
In place of Credential ID, we’ll use the ID value we specified in the previous section. Then, for the url, we’ll write the HTTP address of the repository we want to check out. Of course, we can replace main with a branch of our choice.
We can use the same pipeline syntax with an SSH credential, but instead of using the repository’s HTTP URL, we’ll use its SSH URL:
#!/usr/bin/env groovy
pipeline {
...truncated...
                    git branch: 'main',
                        credentialsId: 'Credential ID',
                        url: '[email protected]/username/repository.git'
...truncated...
}
When doing a git checkout using SSH credentials, we have to add the public key fingerprint of the remote Git repository to our Jenkins server’s “known_hosts” file. Alternatively, we could use one of the other Git host verification strategies such as “Accept first connection”.
If the host key verification is not correctly configured, the git checkout will fail. For instance, if the host verification strategy is set to “Known hosts” but the repository’s public key fingerprint is not in the Jenkins server’s “known_hosts” file, host verification will fail.
4. Conclusion
In this article, we went over how to create Jenkins credentials. Then, we talked about how to do a git checkout using SSH and username-password credentials.
While demonstrating how to do a git checkout with SSH credentials, we emphasized the need to correctly configure the host key verification strategy to ensure success.