Learn through the super-clean Baeldung Pro experience:
>> Membership and Baeldung Pro.
No ads, dark-mode and 6 months free of IntelliJ Idea Ultimate to start with.
Last updated: March 26, 2025

Learn through the super-clean Baeldung Pro experience:
>> Membership and Baeldung Pro.
No ads, dark-mode and 6 months free of IntelliJ Idea Ultimate to start with.
We will provide proxy settings to both Docker Engine and Docker Client so that they can connect to the internet when direct access to the internet is not allowed while using Docker. When we use Docker in corporate networks or private clouds, we may typically have to connect to the internet via a proxy server. In these cases, we need to use a proxy.
In this tutorial, we’ll learn how to troubleshoot problems we may encounter when configuring a proxy with Docker.
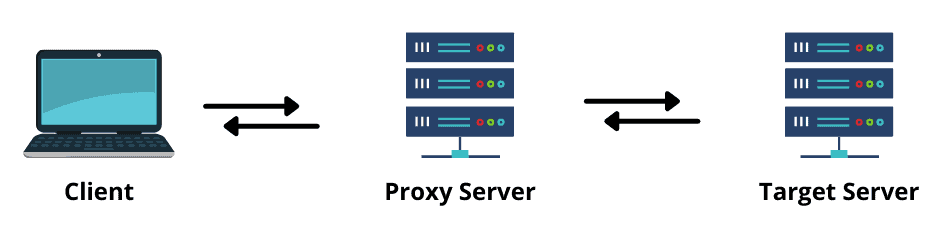
The proxy server controls and routes traffic between the requesting user and websites. Proxying aims to protect users and maintain network security and privacy policies. Without a proxy, the user sends a request directly to the destination server and receives a response:

When we use a proxy, our request first goes to the proxy server, and then the proxy accesses the target server. As shown in the image below, the proxy is located between the client and the target server, and every request from the client comes to the proxy first, and then, the proxy provides access to the target server:
In Docker 17.07 and higher, we can configure the Docker client to pass proxy information to containers automatically. In Docker 17.06 and earlier, we can set the Docker client proxy settings via environment variables.
Let’s add the following JSON example to the ~/.docker/config.json file and complete our proxy settings. Using the * character as a wildcard for hosts and using CIDR notation for IP addresses is supported:
{
  "proxies":
    {
      "default":
        {
          "httpProxy": "http://<ip-address>:<port>",
          "httpsProxy": "https://<ip-address>:<port>",
          "noProxy": "*.<domain>,127.0.0.0/8"
        }
    }
}
When we save the changes, each Docker container will be created with the environment variables specified in the config.json file, and our proxy settings will be valid.
We should use the HTTP_PROXY, HTTPS_PROXY, FTP_PROXY, and NO_PROXY environment variables to configure proxy services for the Docker daemon. Let’s look at these variables in detail:
In Docker 17.07 and earlier, we must set our proxy settings with the –env flag:
docker run [docker_image] --env FTP_PROXY="ftp://<ip-address>:<port>"docker run [docker_image] --env HTTP_PROXY="http://<ip-address>:<port>"docker run [docker_image] --env HTTPS_PROXY="https://<ip-address>:<port>"docker run [docker_image] --env NO_PROXY="*.<domain>,127.0.0.0/8"Or, we have to add them to our Dockerfile:
ENV FTP_PROXY="ftp://<ip-address>:<port>"ENV HTTP_PROXY="http://<ip-address>:<port>"ENV HTTPS_PROXY="https://<ip-address>:<port>"ENV NO_PROXY="*.<domain>,127.0.0.0/8"With these operations, we can now perform our Docker proxy operations.
In this tutorial, we’ve learned what a proxy is and how to set it up in different versions of Docker.