
1. Overview
In this lesson, we will move from the previous cookie-based Remember-Me implementation to a more robust option backed by persistence.
This approach is more secure than the simple cookie mechanism because it does not rely on storing the username and password in the cookie itself. Instead, it validates a token present in the cookie against a token stored in our database.
If a persistent token is compromised, we can simply delete it from the database to revoke access. Unlike the cookie-based approach, the user does not need to change their password to invalidate compromised sessions.
The relevant module we need to import when starting this lesson is: remember-me-persistence-start
If we want to reference the fully implemented lesson, we can import: remember-me-persistence-end
2. Switching to MySQL
To demonstrate this persistence-backed approach effectively, we will switch from our in-memory HSQLDB database to MySQL. This allows us to easily inspect the stored tokens using external tools.
First, we need to add the MySQL connector dependency to our pom.xml:
<dependency>
    <groupId>com.mysql</groupId>
    <artifactId>mysql-connector-j</artifactId>
</dependency>
Next, we need to configure Spring Boot to use our MySQL instance. We will update application.properties with the datasource URL, credentials, and driver class name:
spring.datasource.url=jdbc:mysql://localhost:3306/lss34?createDatabaseIfNotExist=true&useSSL=false&allowPublicKeyRetrieval=true&serverTimezone=UTC
spring.datasource.username=restUser
spring.datasource.password=restmy5ql
spring.datasource.driver-class-name=com.mysql.cj.jdbc.Driver

spring.sql.init.mode=always
Note: We added spring.sql.init.mode=always to ensure our data.sql script (which creates the necessary token table) runs even when using a non-embedded database like MySQL.
3. Configuring the Persistent Token Repository
Now that we have our data source configured, we need to define a repository that Spring Security can use to manage the persistent tokens.
We will define a bean of type PersistentTokenRepository. Spring Security provides a JDBC-based implementation called JdbcTokenRepositoryImpl, which fits our needs perfectly.
Let’s verify our LssSecurityConfig class. We need to inject the DataSource and then configure the repository bean:
@Autowired
private DataSource dataSource;

@Bean
public PersistentTokenRepository persistentTokenRepository() {
    JdbcTokenRepositoryImpl jdbcTokenRepository = new JdbcTokenRepositoryImpl();
    jdbcTokenRepository.setDataSource(dataSource);
    return jdbcTokenRepository;
}
This repository will handle all the CRUD operations for the tokens, leveraging the DataSource we just configured.
4. Updating the Security Configuration
With the repository in place, we can now update the rememberMe() configuration in our filter chain to use it.
Instead of the default in-memory or simple hash-based implementations, we will wire in our new persistentTokenRepository:
@Bean
public SecurityFilterChain filterChain(HttpSecurity http) throws Exception {
    http
        // ... existing configuration
       .rememberMe((rememberMe) -> rememberMe
         .tokenRepository(persistentTokenRepository()))
       // ...

    return http.build();
}
This single change switches the entire mechanism to a persistence-backed flow.
5. Creating the Database Schema
For the JdbcTokenRepositoryImpl to work, the database must contain a specific table named persistent_logins.
We can use the data.sql file to create this table on startup. Let’s add the standard schema definition required by Spring Security:
create table if not exists persistent_logins (
  username varchar(64) not null,
  series varchar(64) primary key,
  token varchar(64) not null,
  last_used timestamp not null );
This table stores:
- username: The user associated with the token.
- series: A primary key that identifies the login series. This does not change for the duration of the persistent session.
- token: A random value that is regenerated every time the user logs in via Remember-Me.
- last_used: A timestamp to track when the token was last used.
Using a series combined with a regenerating token is what makes this approach secure against brute-force attacks and token theft.
6. Verifying the Implementation
Let’s run the application and see this in action. We can inspect the database using a tool like MySQL Workbench.
Initially, the persistent_logins table will be empty.
Log in to the application with the “Remember Me” checkbox enabled:
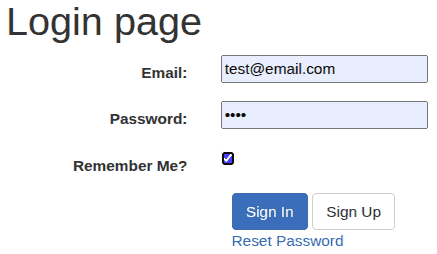
Let’s switch to the database and check the data in the persistent_logins table. You should see a new row in persistent_logins containing your username, a series ID, a token, and a timestamp.

Check the browser: You will see a remember-me cookie. The content of this cookie is now the encoded series and token, rather than the username/password hash we saw in the previous lesson.
Next, if we log out and refresh the database table, the row corresponding to our session will be deleted. This confirms the persistent token is properly removed upon logout.
7. Reviewing the Logical Flow
Before we wrap up, let’s go through the logical flow of this persistent Remember Me mechanism and let’s understand exactly what’s going on behind the scenes:
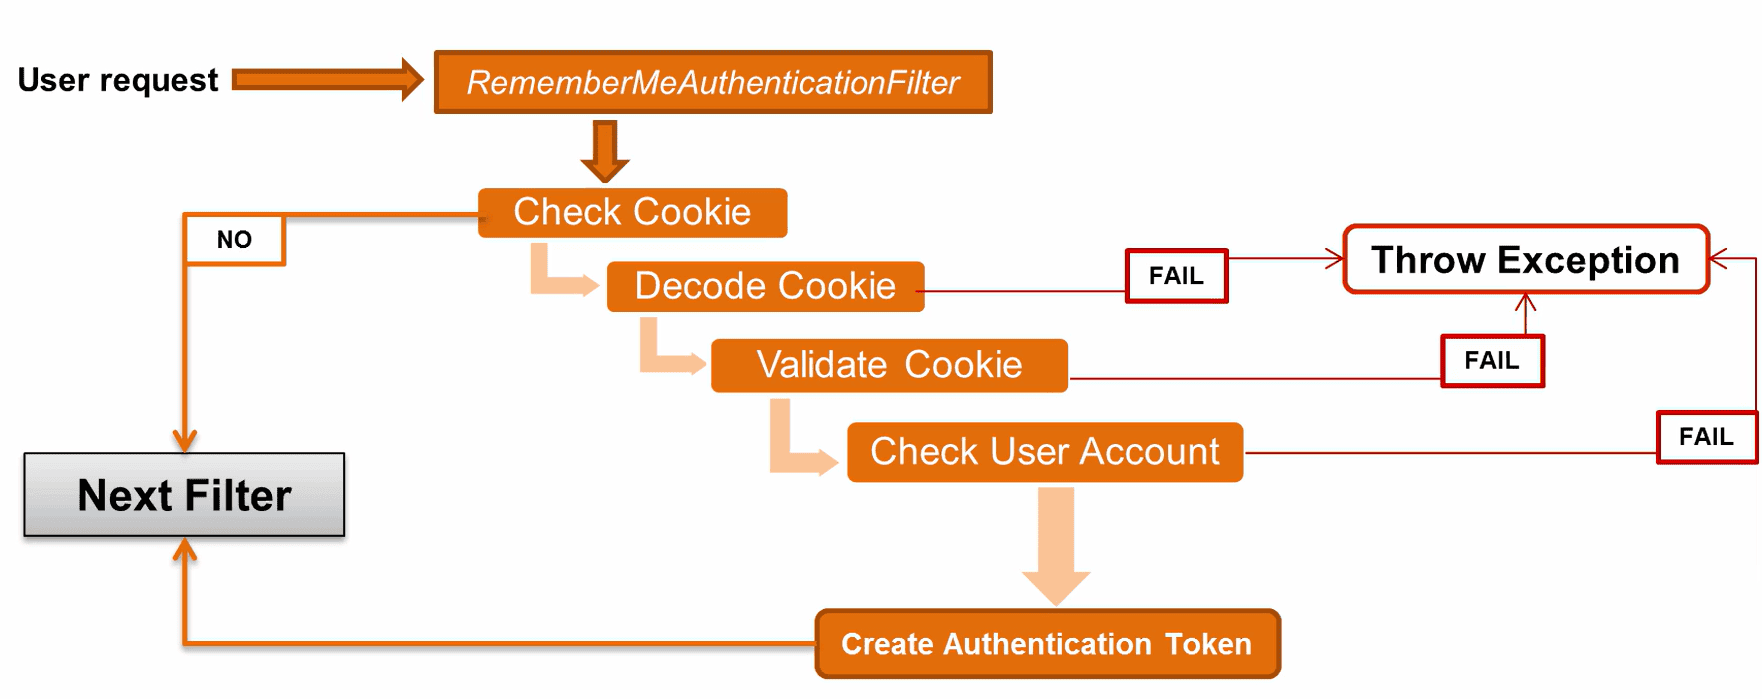
First of all, a request comes in, and the Spring Security filter chain starts executing. And out of this filter chain, we will focus on the RememberMeAuthenticationFilter. This is the main filter that drives the Remember Me process.
The first execution step in this filter is to check if the Remember Me cookie even exists on that request. If the cookie does not exist, then the entire Remember Me filter will simply stop running, and the execution will go to the next filter.
If, however, the cookie does exist, then we’re moving on to decoding that cookie. Now, if the decoding of the cookie fails, then we’re going to throw an exception. And of course, if the decoding succeeds, we are going to move on to the next step, which is going to be validating the cookie.
If that check fails, we’re of course going to end up throwing the exception again. If that check succeeds, we are going to move to the next step, which is going to be checking the user account and essentially performing authentication.
As expected, if that last check fails, we’ll also throw an exception. If it succeeds, we’re going to move on to creating and persisting the authentication token in the database as we’ve just seen.
And after that point, the next filter in the chain starts running.
8. Conclusion
In this lesson, we upgraded our Remember-Me functionality to use a database-backed solution.
We switched our project to use MySQL, configured the JdbcTokenRepositoryImpl, and created the required persistent_logins schema. This approach significantly improves security by decoupling the remember-me token from the user’s sensitive credentials and allowing for easy revocation of compromised sessions.