
1. Overview
As our applications grow, placing every single class in the same location can become messy and difficult to manage. To solve this, Java provides a way to keep our code organized. In this lesson, we’ll learn how packages are Java’s primary mechanism for grouping related classes, working much like folders on a computer’s file system.
To follow along with the examples, let’s create a new project in our IDE and add a Main class. We can place the code snippets from this lesson inside the main method of that class.
If we want to reference the complete code we’ll have at the end of this lesson, we can look at: organizing-code-with-packages-end.
2. What Is a Package?
A package in Java is a namespace that organizes a set of related files. It functions similarly to a folder in a file system, grouping related source files in a logical structure.
We have already encountered a class from a package: the Scanner class, which is used to read input. Its fully qualified name is java.util.Scanner, which indicates that the class Scanner belongs to the package java.util.
Packages are crucial for two main reasons: organizing code and preventing naming conflicts. Within a single package, we can’t have two classes with the same name. However, different packages can contain classes with the same name. For example, we could create our own Scanner class as long as it’s in a different package, like com.baeldung.util.Scanner. The full name that includes the package path is called the fully qualified name, and it uniquely identifies a class in a Java project.
Even though Java treats the entire package name as a single flat identifier and doesn’t impose any hierarchy, developers still follow a well-established hierarchical naming convention to keep packages unique and organized. The standard is to use an organization’s internet domain name in reverse, followed by the project or module name.
For example, if a company’s domain is baeldung.com, its packages would start with com.baeldung.
Packages also influence which parts of our code can see or use other classes. Some classes are meant to be used only inside their own package, while others are made public so they can be used everywhere.
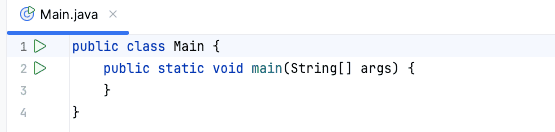
3. The Default Package
So far, we have placed our classes in what’s known as the default package. This is an unnamed package that Java uses for any class that doesn’t have a package declaration at the top of its file:
Using the default package is acceptable for small or experimental examples, but it should be avoided in real-world projects. In larger projects, it can create several problems related to organization, accessibility, and dependency management, which we’ll explore in the following sections.
4. Creating and Naming Packages
Let’s fix this by organizing our code into proper packages. We declare a class’s package using the package keyword, and it must be the very first line of code in the source file. Let’s assign our Main class to the com.baeldung package:
package com.baeldung;

public class Main {
    public static void main(String[] args) {
    }
}
After making this change, the IDE will likely complain about the statement, showing a message similar to:
Package name 'com.baeldung' does not correspond to the file path...Again, Java itself doesn’t enforce any directory structure based on the package name — it’s not a compiler requirement. However, virtually all real-world projects follow this convention. It’s such a common standard that many tools expect the directory layout to match the package name and may malfunction if it doesn’t.
So, let’s create the src/com/baeldung directory and move our Main class there to follow the convention and resolve the IDE warning.
Next, we’ll add a Task class in a com.baeldung.domain package, but this time with the help of IntelliJ.
Instead of creating directories manually, we can tell the IDE to do it for us. In the Project view, right-click on the src folder and select New -> package. In the dialog box that appears, type the full package path:
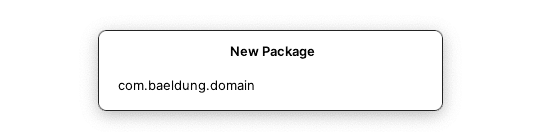
The IDE will automatically create the com/baeldung/domain directory structure. Now we can create the file inside this package. We can again right-click on the domain and select New -> Java Class:
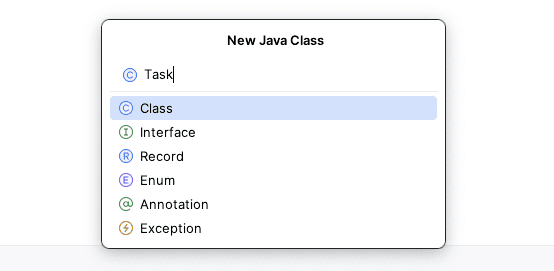
We can provide the class name, which is Task in this case. This creates an empty class including the package declaration at the top:
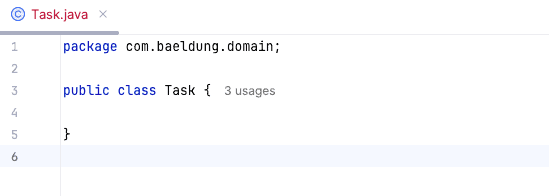
As we can see, IntelliJ automatically added the correct package statement at the top of the file.
Let’s add the content for this class:
package com.baeldung.domain;

public class Task {
    public String description;

    public Task(String description) {
        this.description = description;
    }

    public Task() {
    }
}
One small difference from the previous lesson is that we’ve now declared the fields as public. This is necessary because the classes now live in different packages, as we’ll see in a later section.
5. Using Classes From Other Packages
To use a class from another package, we need to tell Java where to find it.
One way to do this is by using the class’s fully qualified name every time it’s referenced. This makes it clear exactly which class we’re using:
public class Main {
    public static void main(String[] args) {
        com.baeldung.domain.Task myTask = new com.baeldung.domain.Task("Organize code with packages");
        System.out.println(myTask.description);
    }
}
While this works, it’s very verbose. A much cleaner way is to use the import statement, which goes right after the package declaration.
To fix our Main class, we can import the Task class from the com.baeldung.domain package. Let’s add the import statement to Main.java:
package com.baeldung;

import com.baeldung.domain.Task;

public class Main {
    public static void main(String[] args) {
        Task myTask = new Task("Organize code with packages");
        System.out.println(myTask.description);
    }
}
With the line import com.baeldung.domain.Task; added, our code now looks cleaner. This line informs the compiler about the exact location of the Task class so that it can be used without a fully qualified name.
It’s also possible to import all classes from a package using a wildcard, such as import com.baeldung.domain.*;. However, it’s generally better to import each class specifically, as it makes the code clearer about exactly which classes are being used.
6. Packages and Access Control
Packages also play an important role in controlling which classes can access one another.
To see this in action, let’s add a new class called TaskHelper inside the com.baeldung.domain package:
package com.baeldung.domain;

class TaskHelper { // This class is package-private
}
If we declare a class without the public keyword, it has package-private access. This means it’s visible only to other classes within the same package.
Because TaskHelper is not declared as public, the Task class in the same package can use it without any issues. However, the Main class in the com.baeldung package can’t access it, and any attempt to import or use it in Main.java will result in a compiler error:
package com.baeldung;

import com.baeldung.domain.Task;
import com.baeldung.domain.TaskHelper;

public class Main {
    public static void main(String[] args) {
        Task myTask = new Task("Organize code with packages");
        TaskHelper helper = new TaskHelper();
    }
}
We can see the compilation error highlighted in red, with a message explaining that the TaskHelper class isn’t accessible: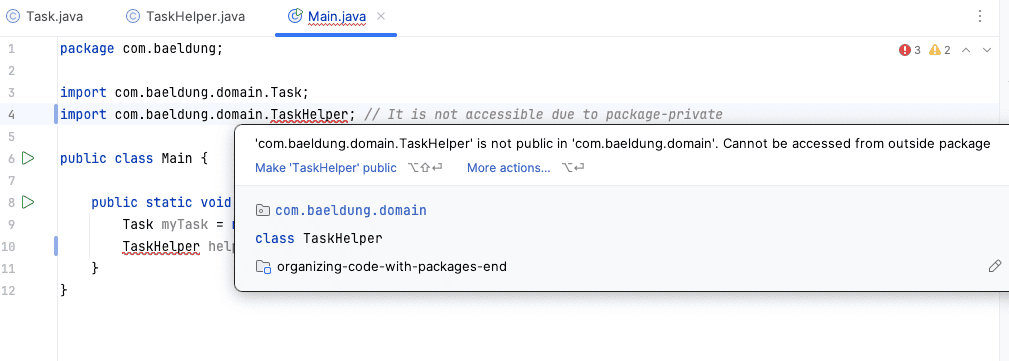 This is a powerful feature for hiding implementation details from other parts of our application. We’ll learn more about access modifiers like public in a future lesson.
7. Best Practices
When organizing Java projects with packages, following a few simple guidelines helps keep code clean, consistent, and maintainable:
-
Use a clear package structure: Group related classes together in logical packages, such as com.baeldung for main application classes and com.baeldung.domain for domain objects like Task.
-
Align package names with folder structure: The package declaration at the top of the file should match the folder path, for example, src/com/baeldung/domain/Task.java should start with package com.baeldung.domain;.
-
Use lowercase letters only: Avoid uppercase letters, underscores, or hyphens in package names to ensure consistency and avoid issues on case-sensitive file systems.
-
Avoid using the default package: Classes without a package declaration go into the default package. This is okay for small examples, but in real projects, always use named packages.
-
Organize test classes close to the classes they test: In larger projects, test classes usually mirror the main package structure. For example, tests for com.baeldung.domain.Task would go in a similar package under a test source folder. We’ll discuss the tests in future lessons.
8. Conclusion
In this lesson, we learned how to bring structure and organization to our Java projects.
We saw that packages are Java’s essential tool for grouping related code, and that relying on the default package is a practice to be avoided. We learned how to declare a package for a class using the package statement and how to use classes from other packages with the import statement. Finally, we got a glimpse of how packages influence class visibility with access control.
Using a proper package structure is a fundamental step toward writing clean, scalable, and professional Java code.