

Learn through the super-clean Baeldung Pro experience:
>> Membership and Baeldung Pro.
No ads, dark-mode and 6 months free of IntelliJ Idea Ultimate to start with.
Learn through the super-clean Baeldung Pro experience:
>> Membership and Baeldung Pro.
No ads, dark-mode and 6 months free of IntelliJ Idea Ultimate to start with.
In this tutorial, we’ll have a look at what TornadoFX is and how we can set it up on Oracle JDK and OpenJDK. We’ll also describe the architecture and look at the different pieces of it. Finally, we’ll provide an overview of how we can use some of its widgets.
Before we begin, it’s good – but not mandatory – to have some familiarity with JavaFX. Since TornadoFX is a JavaFX framework for Kotlin. It’s designed to unleash the power of Kotlin for various purposes like defining views, dependency injection, delegated properties, control extension functions, and other practical features.
Also, it’s important to note TornadoFX is not yet compatible with Java 9 and above, so we’ll use Java 8.
In this section, we’ll demonstrate how to set up a TornadoFX project with Maven and Gradle from scratch.
Since we’ll most likely be using OpenJDK on Linux, we’ll begin with that. As we’ll see, it’s tricky setting up TornadoFX with OpenJDK.
First, we need to upgrade our OpenJDK to version 11. Then for Gradle, our build.gradle should look like this:
plugins {
    id 'org.jetbrains.kotlin.jvm' version '1.5.10'
    id 'org.openjfx.javafxplugin' version '0.0.8'
    id 'application'
}

compileKotlin {
    kotlinOptions.jvmTarget = "11"
}

compileTestKotlin {
    kotlinOptions.jvmTarget = "11"
}
javafx {
    version = "11.0.2"
    modules = ['javafx.controls', 'javafx.graphics']
}
repositories {
    mavenCentral()
}

dependencies {
    // Align versions of all Kotlin components
    implementation platform('org.jetbrains.kotlin:kotlin-bom')

    implementation 'org.jetbrains.kotlin:kotlin-stdlib-jdk8'

    // Use the tornadofx
    implementation "no.tornado:tornadofx:1.7.20"
}
To check out the latest version of the TornadoFX library, we can visit the TornadoFX Maven page. For the OpenJFX plugin version, we can check the OpenJFX plugin Maven page.
For Maven, we need to declare the version of TornadoFX we’ll gonna be using in our pom.xml:
<properties>
    <tornadofx.version>1.7.20</tornadofx.version>
</properties>
Then we need to add the Tornado library as a dependency:
<dependency>
    <groupId>no.tornado</groupId>
    <artifactId>tornadofx</artifactId>
    <version>1.7.20</version>
</dependency>
Then we should define the base APIs for the JavaFX UI toolkit:
<dependency>
    <groupId>org.openjfx</groupId>
    <artifactId>javafx-base</artifactId>
    <version>17-ea+11</version>
</dependency>
In order to use JavaFX controls like ListView, Menubar, etc., we have to define the javafx-controls dependency.
<dependency>
    <groupId>org.openjfx</groupId>
    <artifactId>javafx-controls</artifactId>
    <version>17-ea+11</version>
</dependency>
Finally, we need to add the JavaFX’s maven plugin along with some other plugins:
<plugins>
    <plugin>
        <!--Maven plugin to run JavaFX 11+ applications-->
        <groupId>org.openjfx</groupId>
        <artifactId>javafx-maven-plugin</artifactId>
        <version>0.0.3</version>
        <configuration>
            <mainClass>MyApp</mainClass>
        </configuration>
    </plugin>
    <!--other libraries like kotlin-maven or maven-compiler-->
</plugins>
In addition, we need to add the module-info.jar in our src/main/kotlin folder:
module TFXSAMPLE {
    requires javafx.controls;
    requires javafx.graphics;
    requires javafx.base;
    requires tornadofx;
    requires kotlin.stdlib;
    exports com.example.demo.app to javafx.graphics, tornadofx;
    exports com.example.demo.view to tornadofx;
}If we’re using the Oracle JDK, the setup is handled differently and is much simpler since the JFX module libraries are already included.
In Gradle, we need to provide the TornadoFX library:
repositories {
    mavenCentral()
}

dependencies {
    implementation 'no.tornado:tornadofx:1.7.20'
}
For Maven, it’s the same, but we only need to add the TornadoFX library:
<dependency>
    <groupId>no.tornado</groupId>
    <artifactId>tornadofx</artifactId>
    <version>1.7.20</version>
</dependency>Just like any other Java app, a TornadoFX app needs a main class as a starting point. Therefore we first need to define our application. Let’s create a package named app, then we add a Kotlin class named MyApp. Then we initialize the app with the initial view class. We’ll see how to make a view class later.
For now, let’s just suppose we have a view class named HelloWorld:
class MyApp: App(HelloWorld::class)A view contains any representation of information that we need to show to the user. A view contains display logic as well as a layout of nodes, similar to the JavaFX Stage. But unlike JavaFX, we don’t use a separate language for defining our views. TornadoFX provides the option to bring type-safety and compiled CSS into the game using native Kotlin.
Now let’s create the HelloWorld view class, create a package named view and add a Kotlin class named HelloWorld:
import tornadofx.*
class HelloWorld : View() {
    override val root = hbox {
        label("Hello world")
    }
}
We also instantiate a label and assign it to the hbox(Horizontal Box), then all of it will be a root parent.
Also, take note of the tornadofx.* import. This should be present in all our TornadoFX related files. This is important because some of the framework’s functionality isn’t discoverable by the IDE without the import. This import enabled some advanced extension functions that we really don’t want to live without.
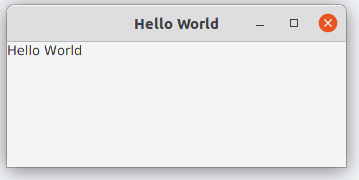
If we take a look at the above example, we’ll see that the HelloWorld class is derived from View. Now, if we run the app, it should look like this:
TornadoFX provides the option to bring type-safety and compiled CSS to JavaFX. We can conveniently choose to create styles in its own class or do it inline within a control declaration. For the example above, we can define a style for the label:
class Styles : Stylesheet() {
    init {
        label {
            padding = box(10.px)
            fontSize = 20.px
            fontWeight = FontWeight.BOLD
        }
    }
}
Then we need to alter the constructor that we used to initialize the application and pass the Styles class as a second argument:
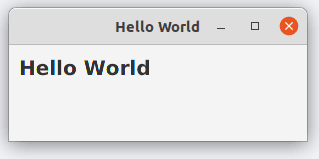
class MyApp: App(MainView::class, Styles::class)Again, if we run the app, we’ll see our label styled:
We could achieve the same thing with inline styles too. This styling will override any other styles applied to the node. This is especially useful when we don’t want to interfere with the general style declaration:
label("Hello world") {
    style {
        padding = box(10.px)
        fontSize = 20.px
        fontWeight = FontWeight.BOLD
    }
}TornadoFX greatly supports dependency injection. We can easily inject different layers in this framework, and it natively supports it. Next, we will see how we can inject our views.
View injection can be done via either find() or inject() method. The difference between find and inject is that when using the inject() method, a delegate is lazily assigned to a given component.
By lazily assigned, we mean the first time that we call the component. It creates the actual instance the first time we call a function on the injected resource. But for the find() method, we retrieve a singleton instance of the view instead of the delegate.
However, using inject is the preferred way, as it allows our components to have circular dependencies and has the advantage of lazy loading:
class SampleView: View() {
    // Explicitly retrieve HeaderView
    private val headerView = find(HeaderView::class)

    // Create a lazy delegate
    private val footerView: FooterView by inject()

    override val root = borderpane {
        top = headerView.root
        bottom = footerView.root
    }
}There are so many reasons why having the logic separated from the view can be a good idea, such as testability and maintainability.
In TornadoFX, we have the full support of a three-layered architecture and its variants. The way to achieve that is similar to the way we injected views. First, we define a controller. Then we make it derived from Controller superclass, and then we inject it into our views:
class SampleView : View() {
    private val controller: SampleController by inject()
    private val input = SimpleStringProperty()

    override val root = form {
        fieldset {
            field() {
                textfield(input)
            }

            button("Post") {
                action {
                    controller.postApi(input.value)
                    input.value = ""
                }
            }
        }
    }
}

class SampleController: Controller() {
    fun postApi(inputValue: String) {
        println("Doing backend stuff with $inputValue")
    }
}Obviously, there are numerous other topics in this area that we can talk about, but the main goal of this tutorial was to introduce TornadoFX and provide enough information to get started.