1. Overview
In this article, we’re going to run and debug applications on WildFly directly from the Eclipse IDE.
We can use the WildFly application server and Eclipse independently to build and run applications. As a first step, we could start and stop the application server on its own. However, when we integrate them both, development will be quicker. For instance, when we change the code in the debug mode the changes are automatically deployed.
Note the screenshots are taken with Eclipse Photon and they might be different in other versions or operating systems.
2. Requirements
First, we start by installing the following software:
Then we verify if everything is properly configured. If both, Eclipse and WildFly, work correctly, then we can continue with our configuration.
We’re going to use the JBoss Tools Plugin for Eclipse. JBoss Tools provides, among others, integration between Eclipse and WildFly.
There are two ways to install the plugin:
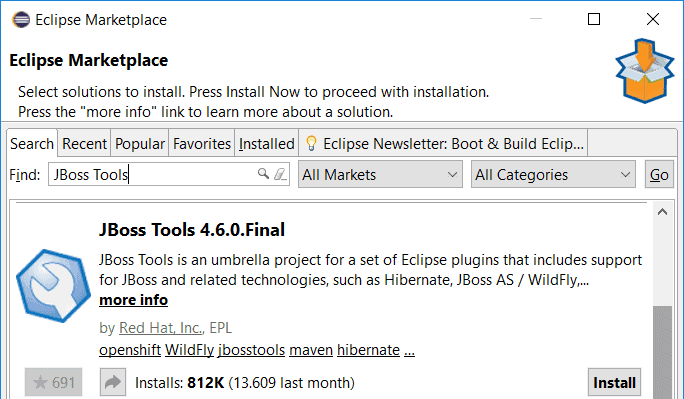
- We can install it through the website
- We can install it through the Eclipse Marketplace
- Open Eclipse
- Click on Help and then on Eclipse Marketplace
- Search for JBoss Tools
- Click Install next to the JBoss Tools solution
- Follow the rest of the wizard
4. Configuring the Application Server in Eclipse
We start by adding the WildFly server to Eclipse.
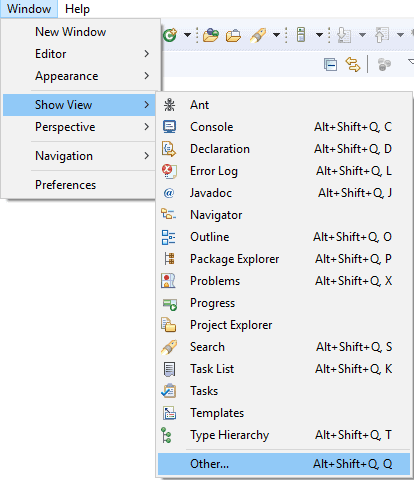
First, we add a new View in Eclipse. Please click on the Window/Show View/Other:
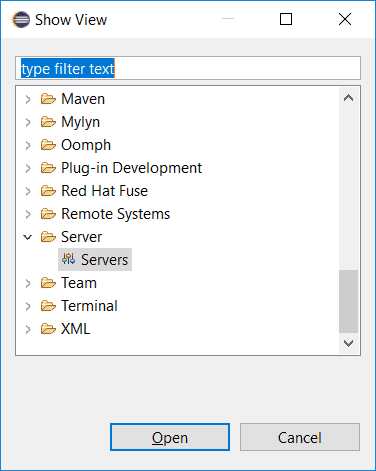
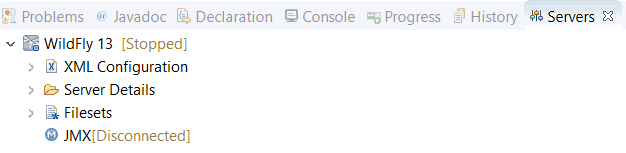
Next, please click Server/Servers. Now Eclipse shows a Servers tab:
After that we can add a server by clicking on No servers are available. Click this link to create a new server… in the Servers tab:

In the next step, we expand the JBoss Community category and select the WildFly version that matches with the WildFly installation. For the rest we simply follow the wizard:
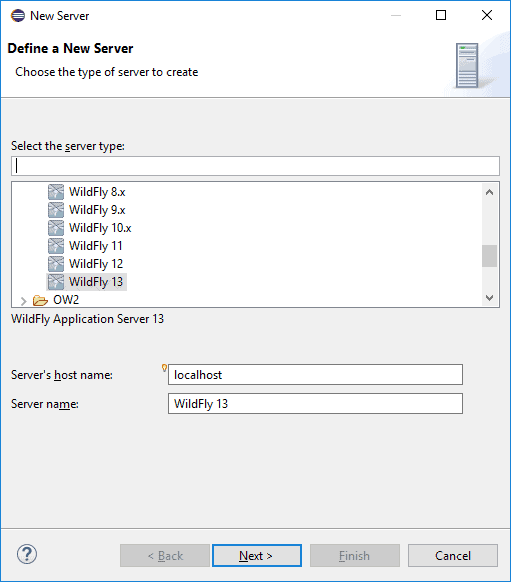
Select the newest version when your installed version isn’t available. But make sure to upgrade JBoss Tools when they have a new release with support for that specific version:
5. Add an Application to WildFly
After configuring the application server we’re going to add an application to the server:
- Right click on the WildFly instance in the Servers tab
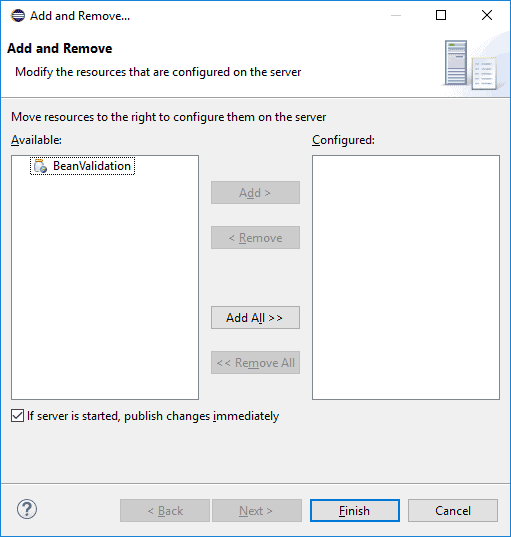
- Click Add and Remove
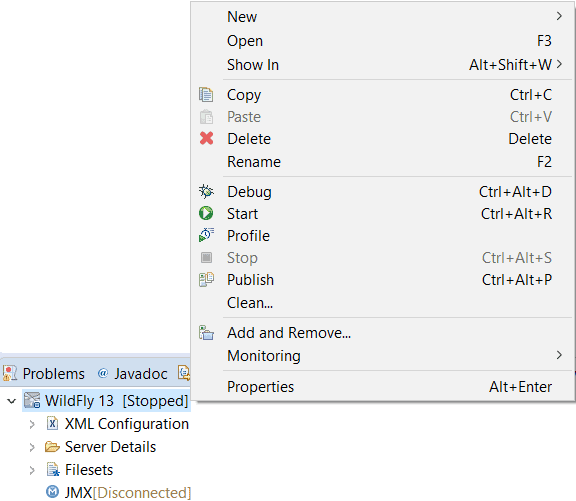
- Select the application to deploy
- Click Add
- Click Finish
The message ‘There are no resources that can be added or removed from the server’ is shown if there is a Servlet API version mismatch.
So first we make sure the Servlet API version matches Servlet API version packaged with the WildFly installation:
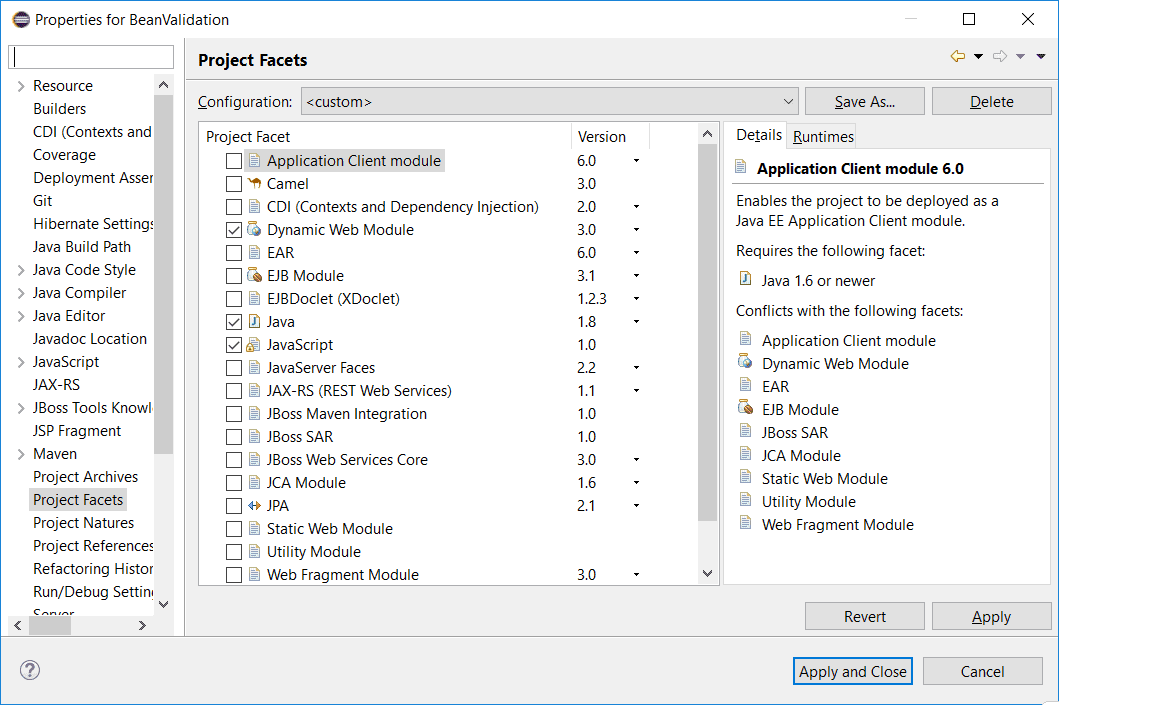
- Right click on the project
- Click on Properties
- Click on Project Facets
- If the project is not yet in the faceted form
- Click on Convert to faceted form…
- Enable ‘Dynamic Web Module’
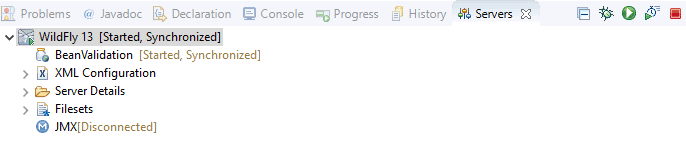
After the configuration, we can see the application under the WildFly server instance:
6. Running the Application
We can finally start WildFly and the application from Eclipse. Right click on the WildFly instance and click on Start. The application is starting and we can use it:
We could have achieved the same result by manually deploying the application or using a build tool. However, starting the application server from within the IDE has some advantages such as the possibility to debug the application.
7. Debugging the Application
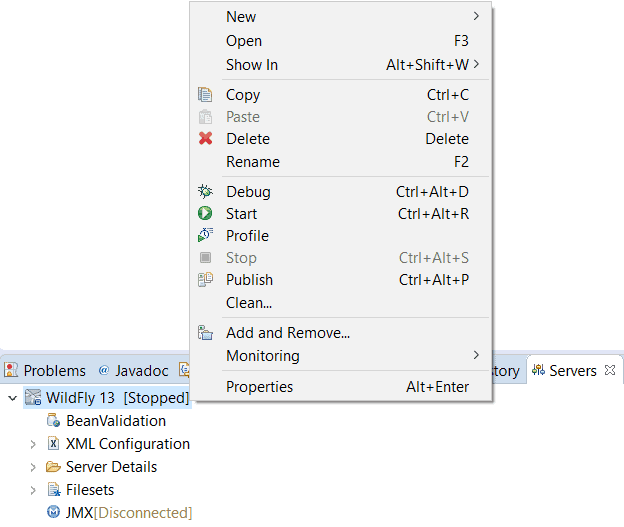
First, we hit the ‘Stop the server’ button (red square) on the Servers or Console tab to stop the server:
Then we start the application in debugging mode by right-clicking on the WildFly instance and then clicking Debug.
When we change the code it’s deployed automatically. If we make bigger changes then we get a message from Eclipse telling us to restart. We can also restart the application server manually by right-clicking on the instance and then on Restart in Debug.
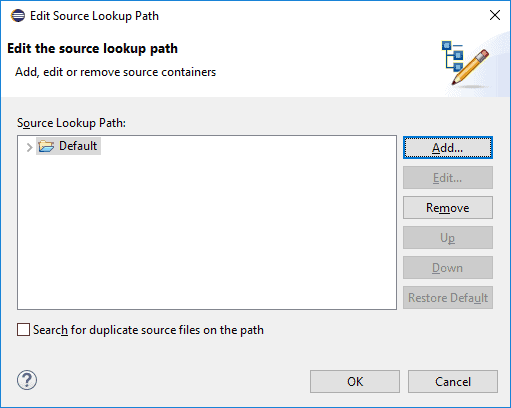
Often the source code isn’t yet available for the debugger. Resulting in the following message: Source not found. If that’s the case we can simply make the source available:
- Click Edit Source Lookup Path
- Click Add
- Select Java Project
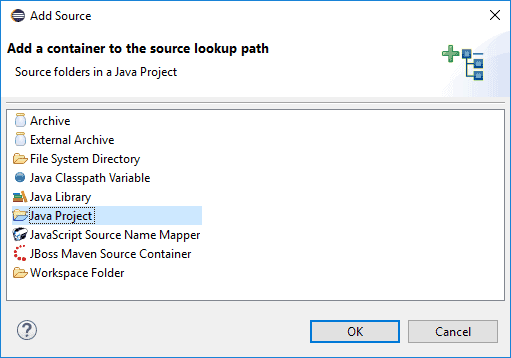
- Select the project
- Follow the wizard
8. Conclusion
In this article, we used the JBoss Tools plugin to integrate WildFly and Eclipse. By combining these tools we can deploy our applications easier.
However, the biggest advantage is that with this setup we can start the application in debug mode and code changes are immediately visible. That way we made our development process faster and more efficient.


