Learn through the super-clean Baeldung Pro experience:
>> Membership and Baeldung Pro.
No ads, dark-mode and 6 months free of IntelliJ Idea Ultimate to start with.
Last updated: November 6, 2023

Learn through the super-clean Baeldung Pro experience:
>> Membership and Baeldung Pro.
No ads, dark-mode and 6 months free of IntelliJ Idea Ultimate to start with.
In this tutorial, we’ll learn how to clone a Jenkins job. Cloning a job is useful when we want to reuse partially or totally its configuration. We’ll see various examples with different source trees.
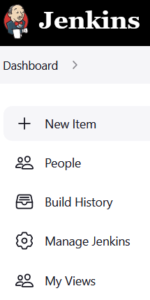
We’ll start by creating a new job. In Jenkins’ left panel, let’s click on New Item:
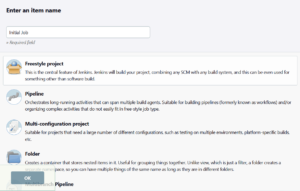
The interface for item creation appears. We’ll fill in the Enter an item name text field with Initial Job and select the Freestyle project option:
Let’s now validate. The job configuration tab appears. For the sake of this tutorial, we can leave all the fields empty and click directly on the Save button. This will finish the creation of the job. We can now move back to Jenkins’ home page and we’ll see that our Initial Job is listed in the main panel:

Let’s now click again on New Item. This time, in Enter an item name we’ll put the name Copy Job. We’ll now scroll down until the Copy from section:
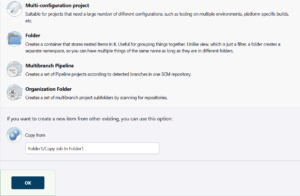
As we can see on the screenshot, we can take advantage of the auto-completion to select our Initial Job. We can now validate, and as we did before, directly click Save to complete the job’s creation. On Jenkins’ home page, we’ll now see the updated job list:

As of now, we’ve only worked in Jenkins’ root directory. Let’s see how we can copy our job into other folders.
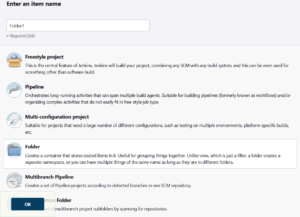
First, let’s create a new folder in Jenkins. Once again, we’ll click on New Item. This time, we’ll choose the Folder option. Let’s call it Folder1:
We can validate, and, as always, directly save it.
Let’s now come back to the home page. The folder Folder1 is now visible in the item list:

Let’s open Folder1. It’s empty:

We can click on the Create a job button. The item creation will appear once again. Let’s call our new job Copy Job In Folder1. As we’re creating a job this time, let’s remember to choose the Freestyle project option.
Let’s now scroll down to the Copy from field. Here, we’ll need to refer to the relative path of the Initial Job. It’s located in the parent directory, thus we’ll complete the field this way:
Similarly to what we did in the previous sections, we can validate and finish the job’s creation. This leads us to the job’s page:

Let’s note the full project name: Folder1/Copy Job In Folder1, as we’ll use this information in the next section.
We’ll now go back to the home page and follow the steps to create a new folder once again. We’ll call this one Folder2, leading us to the following view from the home page:

Let’s open Folder2 and create a new job inside it. We’ll call this job Copy Job In Folder2. This time, we want to copy the Copy Job In Folder1. As we remember its full project name Folder1/Copy Job In Folder1, we can enter it in the Copy from field:
We can now validate and we’re done!
In this article, we’ve discussed how to clone a Jenkins job. We’ve seen various ways to write the path of the source job.