1. Overview
Adding a copyright license header for source files in the Eclipse IDE is known to be a difficult and error-prone task.
In this tutorial, we’ll learn two ways to make this task easy and error-free. The first uses the Eclipse IDE’s Code Template feature. The second uses the Copyright Generator Plugin.
2. Using the Code Template
First, let’s see how to add a copyright license header using the Code Template. Let’s begin with the Eclipse setup:
2.1. Eclipse Setup
- From the main menu bar, navigate to Preferences
- Then, navigate to Java -> Code Style -> Code Templates
- From the right-hand side of the window, expand the Code section and select New Java files
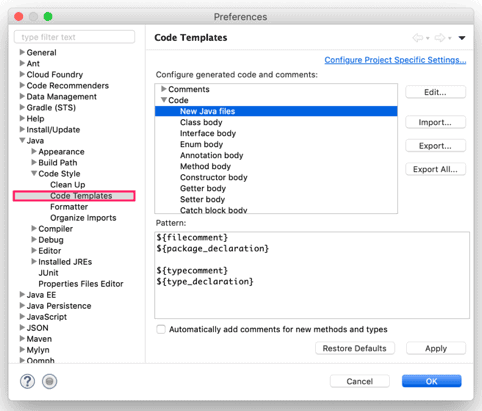
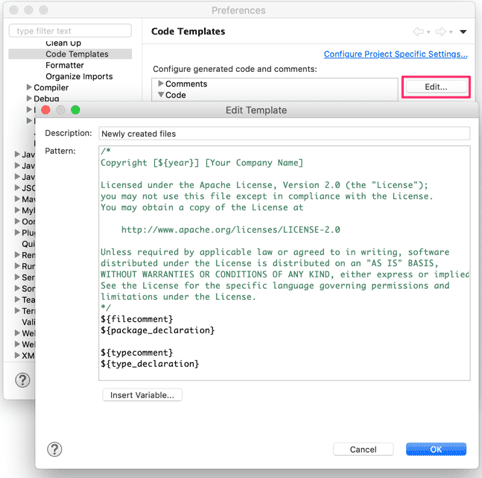
- Then, we go to Edit Template by clicking on the Edit button
- In the Edit Template window, we add our copyright license header in the Pattern text area
- And, click on the OK button to update the template
- Finally, let’s click on the Apply button to finish the setup
2.2. Applying Copyright
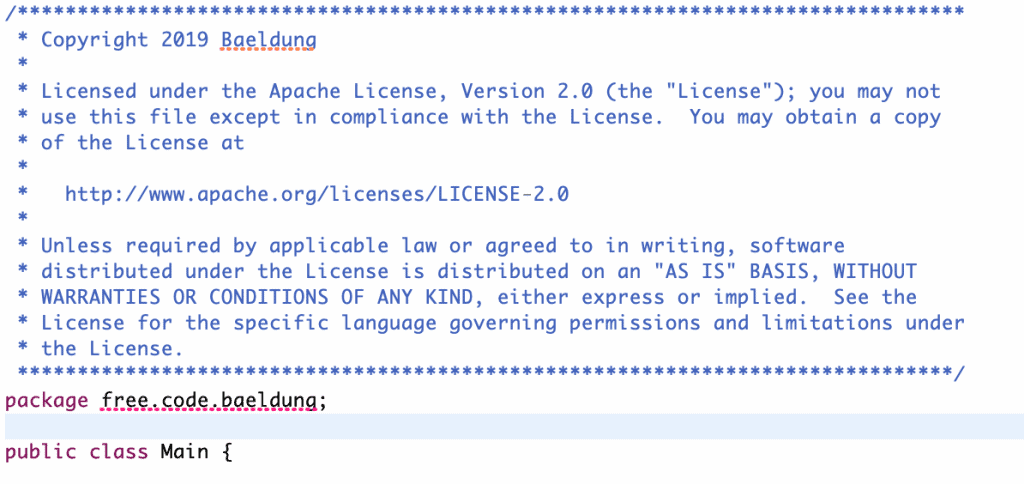
We now get a copyright header automatically applied to each new Java source file:
However, this method has some disadvantages:
- We cannot use this to add a copyright header to existing source files
- We cannot include custom variables in the license text, like our company name
- It’s not flexible enough to let us choose different copyright license headers
- We can use this only on Java and Javascript source files
Luckily, there is an alternative in the form of the copyright generator plugin.
3. Using the Copyright Generator Plugin
Let’s start by setting up the Copyright Generator plugin.
3.1. Installing the Plugin
- We install the plugin by navigating to Help -> Eclipse Marketplace
- Then we search for Eclipse Copyright Generator in the Find text box
- Finally, let’s click on the Install button and follow the instructions
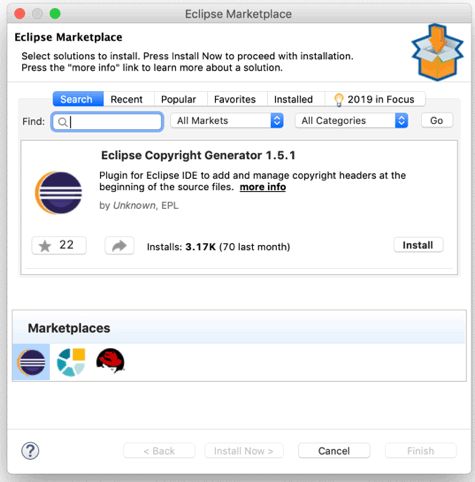
All standard copyright license headers are preinstalled with the plugin.
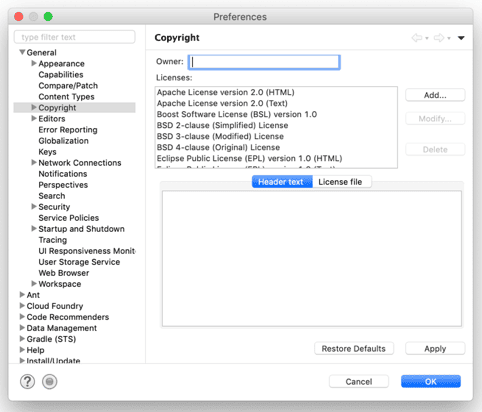
But what if we want to add a custom header, or edit one? Let’s see how to do that in Copyright Preferences:
- We first navigate to Preferences -> General -> Copyright
- Then, to add a new copyright header, we click on the Add button
- To modify an existing license, we select a license from the Licenses and then click on the Modify button
3.3. Applying Copyright
After installing the plugin, applying a copyright license header to one or more source files is quite easy.
Let’s see how to apply it on the selected source files:
- From the Project Explorer panel, we select the source files
- Then, right-click on the selected source files
- From the context menu, we select the Apply copyright option
Similarly, to apply this to one or more projects:
- From the main menubar, select Project -> Apply copyright

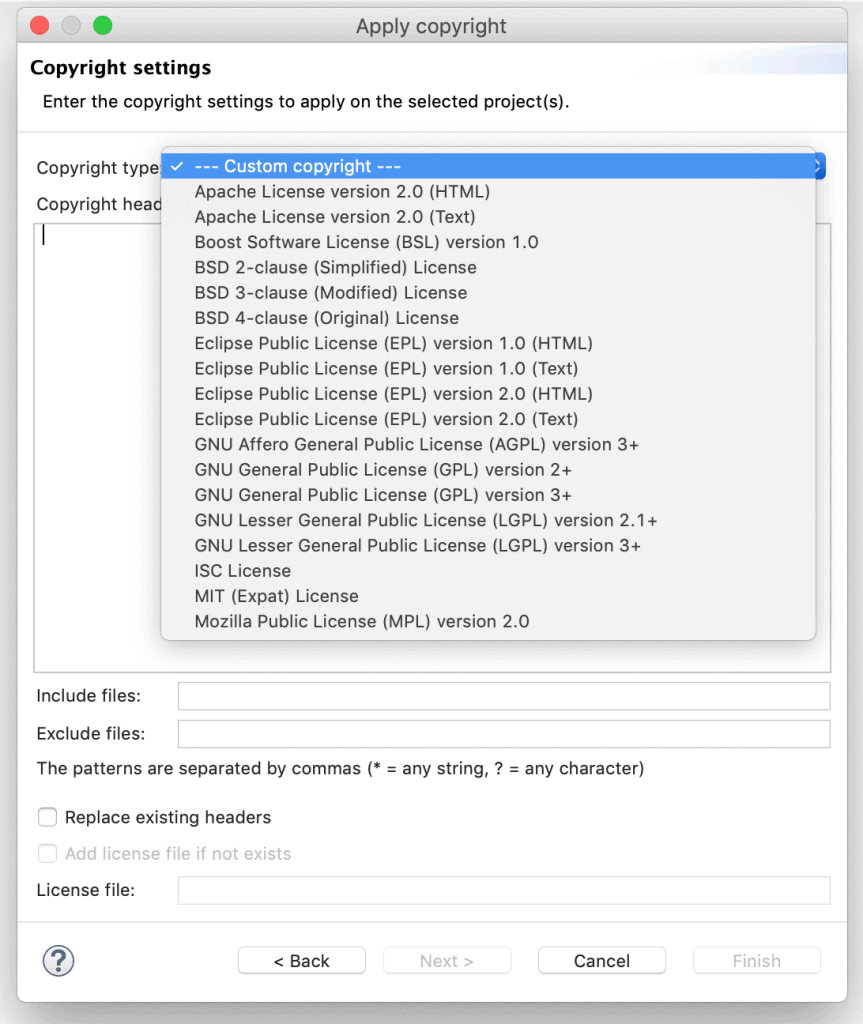
And then we follow the instruction in the Apply copyright dialog box to add the copyright header to the files:
- We click on the Next button, which takes us to the Copyright settings
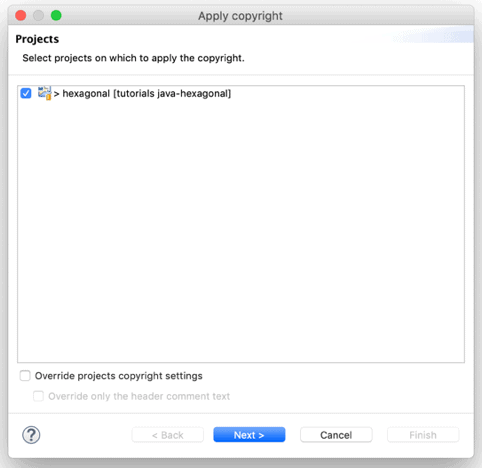
- Then, select a copyright license from the Copyright type select box

- And, click on the Next button, which takes us to the files window
- Finally, we click on the Finish button to apply the copyright header to the selected source files
Now unlike Code Template, the plugin will not add a copyright header automatically on the creation of a new file.
However, the plugin has several advantages over the Code Template:
- It’s easy to add a copyright license header for the existing source files
- We can include custom variables in the license text, like company name
- The plugin supports many different copyright license headers
- We can add a copyright header to all type of source files and not limited to Java source files
4. Conclusion
In this article, we’ve learned two different ways to add a copyright license header to our source files.
The Eclipse Copyright Generator plugin is the easiest and the most flexible way to add copyright headers.
The only disadvantage is that it needs to be applied after the files are created, where the Code Template will add a copyright header for us when each file is created.