1. Overview
Spring REST Docs generates documentation for RESTful services that is both accurate and readable. It combines hand-written documentation with auto-generated document snippets produced with Spring tests.
2. Advantages
One major philosophy behind the project is the use of tests to produce the documentation. This ensures that the documentation always generated accurately matches the actual behavior of the API. Additionally, the output is ready to be processed by Asciidoctor, a publishing toolchain centered around the AsciiDoc syntax. This is the same tool that is used to generate the Spring Framework’s documentation.
These approaches reduce the limitations imposed by other frameworks. Spring REST Docs produces documentation that is accurate, concise, and well-structured. This documentation then allows the web service consumers to get the information they need with a minimum of fuss.
The tool has some other advantages, such as:
- curl and http request snippets are generated
- easy to package documentation in projects jar file
- easy to add extra information to the snippets
- supports both JSON and XML
The tests that produce the snippets can be written using either Spring MVC Test support, Spring Webflux’s WebTestClient or REST-Assured.
In our examples, we’re going to use Spring MVC tests, but using the other frameworks is very similar.
3. Dependencies
The ideal way to get started using Spring REST Docs in a project is by using a dependency management system. Here, we’re using Maven as build tool, so the dependency below can be copied and pasted into your POM:
<dependency>
    <groupId>org.springframework.restdocs</groupId>
    <artifactId>spring-restdocs-mockmvc</artifactId>
    <version>3.0.0</version>
</dependency>
You can also check Maven Central for a new version of the dependency here.
In our example, we need the spring-restdocs-mockmvc dependency since we’re using the Spring MVC test support to create our tests.
If we want to write tests using WebTestClient or REST Assured, we’ll need the spring-restdocs-webtestclient and spring-restdocs-restassured dependencies.
4. Configuration
As mentioned, we’ll use Spring MVC Test framework to make requests to the REST services which are to be documented. Running the test produces documentation snippets for the request and the resulting response.
We can use the library with both JUnit 4 and JUnit 5 tests. Let’s see the configuration necessary for each.
4.1. JUnit 4 Configuration
The very first step in generating documentation snippets for JUnit 4 tests is to declare a public JUnitRestDocumentation field that is annotated as a JUnit @Rule.
The JUnitRestDocumentation rule is configured with the output directory into which the generated snippets should be saved. For example, this directory can be the build out directory of Maven:
@Rule
public JUnitRestDocumentation restDocumentation = new JUnitRestDocumentation("target/generated-snippets");
Next, we set up the MockMvc context so that it will be configured to produce documentation:
@Autowired
private WebApplicationContext context;

private MockMvc mockMvc;

@Before
public void setUp(){
    this.mockMvc = MockMvcBuilders.webAppContextSetup(this.context)
      .apply(documentationConfiguration(this.restDocumentation))
      .build();
}
The MockMvc object is configured using a MockMvcRestDocumentationConfigurer. An instance of this class can be obtained from the static documentationConfiguration() method on org.springframework.restdocs.mockmvc.MockMvcRestDocumentation.
4.2. JUnit 5 Configuration
To work with a JUnit 5 test, we have to extend the test with the RestDocumentationExtension class:
@ExtendWith({RestDocumentationExtension.class, SpringExtension.class})
@SpringBootTest
public class ApiDocumentationJUnit5IntegrationTest { //... }
This class is automatically configured with a /target/generated-snippets output directory when using Maven, or /build/generate-snippets for Gradle.
Next, we have to set up the MockMvc instance in a @BeforeEach method:
@BeforeEach
public void setUp(WebApplicationContext webApplicationContext,
  RestDocumentationContextProvider restDocumentation) {
    this.mockMvc = MockMvcBuilders.webAppContextSetup(webApplicationContext)
      .apply(documentationConfiguration(restDocumentation)).build();
}
If we’re not using JUnit for the tests, then we have to use the ManualRestDocumentation class.
5. RESTful Service
Let’s create a CRUD RESTful service that we can document:
@RestController
@RequestMapping("/crud")
public class CRUDController {

    @GetMapping
    public List<CrudInput> read(@RequestBody CrudInput crudInput) {
        List<CrudInput> returnList = new ArrayList<CrudInput>();
        returnList.add(crudInput);
        return returnList;
    }

    @ResponseStatus(HttpStatus.CREATED)
    @PostMapping
    public HttpHeaders save(@RequestBody CrudInput crudInput) {
        HttpHeaders httpHeaders = new HttpHeaders();
        httpHeaders.setLocation(
          linkTo(CRUDController.class).slash(crudInput.getTitle()).toUri());
        return httpHeaders;
    }

    @DeleteMapping("/{id}")
    public void delete(@PathVariable("id") long id) {
        // delete
    }
}
Then, let’s also add an IndexController that returns a page with a link to the CRUDController base endpoint:
@RestController
@RequestMapping("/")
public class IndexController {

    static class CustomRepresentationModel extends RepresentationModel<CustomRepresentationModel> {
        public CustomRepresentationModel(Link initialLink) {
            super(initialLink);
        }
    }

    @GetMapping
    public CustomRepresentationModel index() {
        return new CustomRepresentationModel(linkTo(CRUDController.class).withRel("crud"));
    }
}
6. JUnit Tests
Back in the tests, we can use the MockMvc instance to call our services and document the request and response.
First, to make sure every MockMvc call is automatically documented without any further configuration we can use the alwaysDo() method:
this.mockMvc = MockMvcBuilders
  //...
  .alwaysDo(document("{method-name}",
    preprocessRequest(prettyPrint()), preprocessResponse(prettyPrint())))
  .build();
This set up ensures that every for every MockMvc call, the default snippets are created in a folder with the test method’s name. Also, applying the prettyPrint() pre-processor displays the snippets in a more easily-readable manner.
Let’s continue with customizing some of our calls.
To document our index page which contains a link, we can use the static links() method:
@Test
public void indexExample() throws Exception {
    this.mockMvc.perform(get("/")).andExpect(status().isOk())
      .andDo(document("index",
        links(linkWithRel("crud").description("The CRUD resource")),
        responseFields(subsectionWithPath("_links")
          .description("Links to other resources"))
        responseHeaders(headerWithName("Content-Type")
          .description("The Content-Type of the payload"))));
}
Here, we’re using the linkWithRel() method to document a link to /crud.
To add a Content-Type header to the response we’re documenting it using the headerWithName() method and adding it to the responseHeaders() method.
We’re also documenting the response payload using the responseFields() method. This can be used to document a more complex subsection of the response or a single field using the subsectionWithPath() or fieldWithPath() methods.
Similar to the response payload, we can also document the request payload using requestPayload():
@Test
public void crudCreateExample() throws Exception {
    Map<String, Object> crud = new HashMap<>();
    crud.put("title", "Sample Model");
    crud.put("body", "http://www.baeldung.com/");

    this.mockMvc.perform(post("/crud").contentType(MediaTypes.HAL_JSON)
      .content(this.objectMapper.writeValueAsString(crud)))
      .andExpect(status().isCreated())
      .andDo(document("create-crud-example",
        requestFields(fieldWithPath("id").description("The id of the input"),
          fieldWithPath("title").description("The title of the input"),
          fieldWithPath("body").description("The body of the input"),
        ))));
}
In this example, we’ve documented our POST request that receives a CrudInput model with title and body fields and sends a CREATED status. Each field is documented using the fieldWithPath() method.
To document request and path parameter, we can use the requestParameters() and pathParameters() methods. Both methods use a parameterWithName() method to describe each parameter:
@Test
public void crudDeleteExample() throws Exception {
    this.mockMvc.perform(delete("/crud/{id}", 10)).andExpect(status().isOk())
      .andDo(document("crud-delete-example",
      pathParameters(
        parameterWithName("id").description("The id of the input to delete")
      )));
}
Here, we’ve documented our delete endpoint which receives an id path parameter.
The Spring REST Docs project contains even more powerful documentation functionalities, such as field constraints and request parts that can be found in the documentation.
7. Output
Once the build runs successfully, the output of the REST docs snippets will be generated and will be saved to the target/generated-snippets folder:
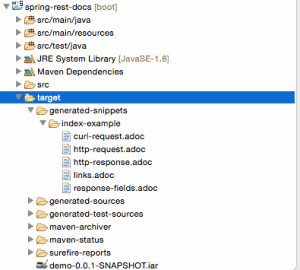
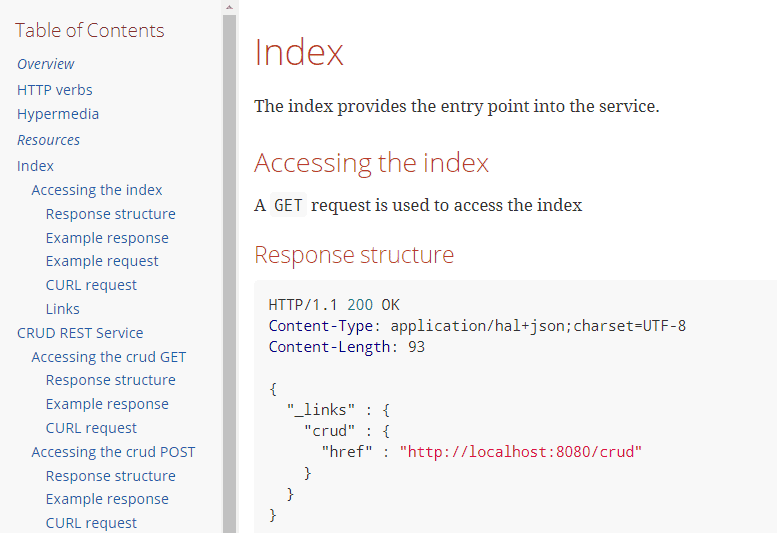
The generated output will have the information about the service, how to call the REST service like ‘curl’ calls, the HTTP request and response from the REST service, and links/endpoints to the service:
<strong>CURL Command</strong>
----
$ curl 'http://localhost:8080/' -i
----
<strong>HTTP – REST Response</strong>
[source,http,options="nowrap"]
----
HTTP/1.1 200 OK
Content-Type: application/hal+json;charset=UTF-8
Content-Length: 93

{
  "_links" : {
    "crud" : {
      "href" : "http://localhost:8080/crud"
    }
  }
}
----
8. Using Snippets to Create Documentation
To use the snippets in a larger document, you can reference them using Asciidoc includes. In our case, we have created a document in src/docs called api-guide.adoc:
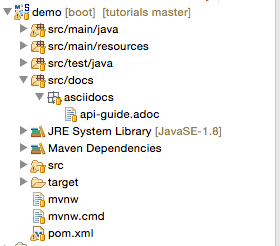
In that document, if we wished to reference the links snippet, we can include it, using a placeholder {snippets} that will be replaced by Maven when it processes the document:
==== Links

include::{snippets}/index-example/links.adoc[]
9. Asciidocs Maven Plugins
To convert the API guide from Asciidoc to a readable format, we can add a Maven plugin to the build lifecycle. There are several steps to enable this:
- Apply the Asciidoctor plugin to the pom.xml
- Add a dependency on spring-restdocs-mockmvc in the testCompile configuration as mentioned in the dependencies section
- Configure a property to define the output location for generated snippets
- Configure the test task to add the snippets directory as an output
- Configure the asciidoctor task
- Define an attribute named snippets that can be used when including the generated snippets in your documentation
- Make the task depend on the test task so that the tests are run before the documentation is created
- Configure the snippets directory as input. All the generated snippets will be created under this directory
Add the snippet directory as a property in pom.xml so the Asciidoctor plugin can use this path to generate the snippets under this folder:
<properties>
    <snippetsDirectory>${project.build.directory}/generated-snippets</snippetsDirectory>
</properties>
The Maven plugin configuration in the pom.xml to generate the Asciidoc snippets from the build is as below:
<plugin>
    <groupId>org.asciidoctor</groupId>
    <artifactId>asciidoctor-maven-plugin</artifactId>
    <version>1.5.6</version>
    <executions>
        <execution>
            <id>generate-docs</id>
            <phase>package</phase>
            <goals>
                <goal>process-asciidoc</goal>
            </goals>
            <configuration>
                <backend>html</backend>
                <doctype>book</doctype>
                <attributes>
                    <snippets>${snippetsDirectory}</snippets>
                </attributes>
                <sourceDirectory>src/docs/asciidocs</sourceDirectory>
                <outputDirectory>target/generated-docs</outputDirectory>
             </configuration>
	 </execution>
    </executions>
</plugin>
10. API Doc Generation Process
When the Maven build runs and the tests are executed, all the snippets will be generated in the snippets folder under the configured target/generated-snippets directory. Once the snippets are generated, the build process generates HTML output.
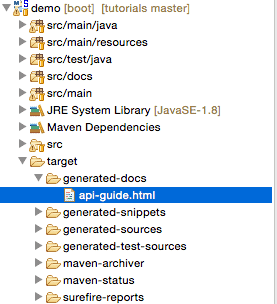
The generated HTML file is formatted and readable, so the REST documentation is ready to use. Every time the Maven build runs, the documents also get generated with the latest updates.
11. Conclusion
Having no documentation is better than wrong documentation, but Spring REST docs will help generate accurate documentation for RESTful services.
As an official Spring project, it accomplishes its goals by using three test libraries: Spring MVC Test, WebTestClient and REST Assured. This method of generating documentation can help support a test-driven approach to developing and documenting RESTful APIs.
You can find an example project based on the code in this article in the linked GitHub repository.


