

Mocking is an essential part of unit testing, and the Mockito library makes it easy to write clean and intuitive unit tests for your Java code.
Get started with mocking and improve your application tests using our Mockito guide:
Handling concurrency in an application can be a tricky process with many potential pitfalls. A solid grasp of the fundamentals will go a long way to help minimize these issues.
Get started with understanding multi-threaded applications with our Java Concurrency guide:
Spring 5 added support for reactive programming with the Spring WebFlux module, which has been improved upon ever since. Get started with the Reactor project basics and reactive programming in Spring Boot:
Since its introduction in Java 8, the Stream API has become a staple of Java development. The basic operations like iterating, filtering, mapping sequences of elements are deceptively simple to use.
But these can also be overused and fall into some common pitfalls.
To get a better understanding on how Streams work and how to combine them with other language features, check out our guide to Java Streams:
Explore Spring Boot 3 and Spring 6 in-depth through building a full REST API with the framework:
Yes, Spring Security can be complex, from the more advanced functionality within the Core to the deep OAuth support in the framework.
I built the security material as two full courses - Core and OAuth, to get practical with these more complex scenarios. We explore when and how to use each feature and code through it on the backing project.
You can explore the course here:
Spring Data JPA is a great way to handle the complexity of JPA with the powerful simplicity of Spring Boot.
Get started with Spring Data JPA through the guided reference course:
Refactor Java code safely — and automatically — with OpenRewrite.
Refactoring big codebases by hand is slow, risky, and easy to put off. That’s where OpenRewrite comes in. The open-source framework for large-scale, automated code transformations helps teams modernize safely and consistently.
Each month, the creators and maintainers of OpenRewrite at Moderne run live, hands-on training sessions — one for newcomers and one for experienced users. You’ll see how recipes work, how to apply them across projects, and how to modernize code with confidence.
Join the next session, bring your questions, and learn how to automate the kind of work that usually eats your sprint time.
1. Overview
Apache Cayenne is an open-source library, distributed under the Apache license, providing features like a modeling tool, object-relational mapping aka ORM for local persistence operations and remoting services.
In the following sections, we’ll see how to interact with a MySQL database using Apache Cayenne ORM.
2. Maven Dependencies
To start, we just need to add the following dependencies to bring up Apache Cayenne and MySQL connector the JDBC driver together to access our intro_cayenne database:
<dependency>
    <groupId>org.apache.cayenne</groupId>
    <artifactId>cayenne-server</artifactId>
    <version>4.0.M5</version>
</dependency>
<dependency>
    <groupId>mysql</groupId>
    <artifactId>mysql-connector-java</artifactId>
    <version>5.1.44</version>
    <scope>runtime</scope>
</dependency>
Let’s configure Cayenne modeler plugin that will be used for designing or setting our mapping file that acts as a bridge between the database schema and the Java object:
<plugin>
    <groupId>org.apache.cayenne.plugins</groupId>
    <artifactId>maven-cayenne-modeler-plugin</artifactId>
    <version>4.0.M5</version>
</plugin>
Instead of building XML mapping file by hand (made rarely), it’s recommended to use the modeler which is a pretty advanced tool that comes with the Cayenne distribution.
It’s available for download from this archive depending on your OS or just use the cross-platform version (JAR) included as a Maven plugin up there.
The Maven Central repository host the latest versions of Apache Cayenne, his modeler, and MySQL Connector.
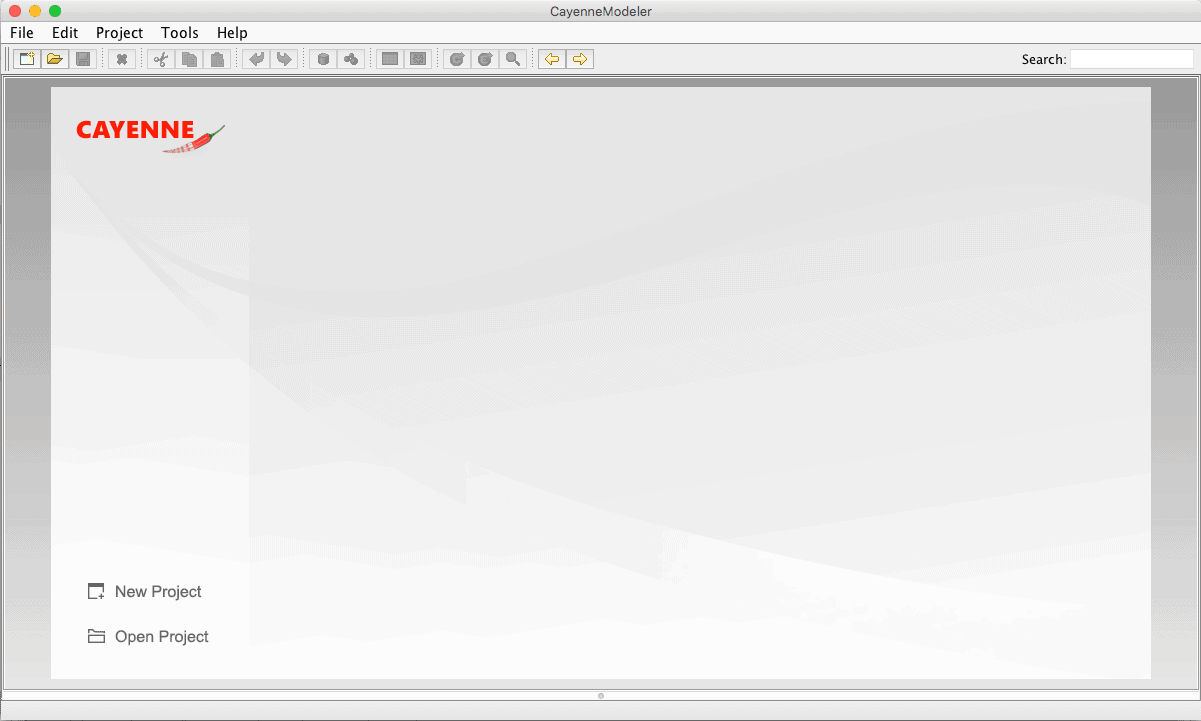
Next, let’s build our project with the mvn install and launch the modeler GUI with the command mvn cayenne-modeler:run to get as output this screen:
3. Setup
To make Apache Cayenne look up the correct local database, we just need to fill his configuration file with the right driver, URL, and a user in the file cayenne-project.xml located in the resources directory:
<?xml version="1.0" encoding="utf-8"?>
<domain project-version="9">
    <node name="datanode"
          factory
      ="org.apache.cayenne.configuration.server.XMLPoolingDataSourceFactory"
          schema-update-strategy
      ="org.apache.cayenne.access.dbsync.CreateIfNoSchemaStrategy">
        <data-source>
            <driver value="com.mysql.jdbc.Driver"/>
            <url value
              ="jdbc:mysql://localhost:3306/intro_cayenne;create=true"/>
            <connectionPool min="1" max="1"/>
            <login userName="root" password="root"/>
        </data-source>
    </node>
</domain>
Here we can see that:
- The local database is named intro_cayenne
- If it’s not yet created, Cayenne will do it for us
- We’ll connect using the username root and password root (change it according to the users registered in your database management system)
Internally, it’s the XMLPoolingDataSourceFactory responsible for loading JDBC connection information from an XML resource associated to the DataNodeDescriptor.
Be aware that these parameters are relative to the database management system and a JDBC driver because this library can support many different databases.
Each of them has an adapter available in this detailed list. Notice, that the full documentation for version 4.0 is not yet available, so we refer to the previous version here.
4. Mapping & Database Design
4.1. Modeling
Let’s now click on the “Open Project”, navigate to the project’s resources folder and chose the file cayenne-project.xml, the modeler will show this:

Here, we’ve got the choice to either create our mapping structure from an existing database or to proceed manually. This article will handle the one using the modeler and existing database to get into Cayenne and know quickly how it works.
Let’s take a look at our intro_cayenne database which has a one-to-many relationship across two tables, as an author can publish or own many articles:
- author: id (PK) and name
- article: id (PK), title, content, and author_id(FK)
Now let’s go to “Tools > Reengineer Database Schema“, and we’ll have all our mapping configs filled automatically. On the prompt screen just fill the data source configuration available up there in the cayenne-project.xml file and hit continue:

On the next screen, we need to check “Use Java primitive types” as follows:

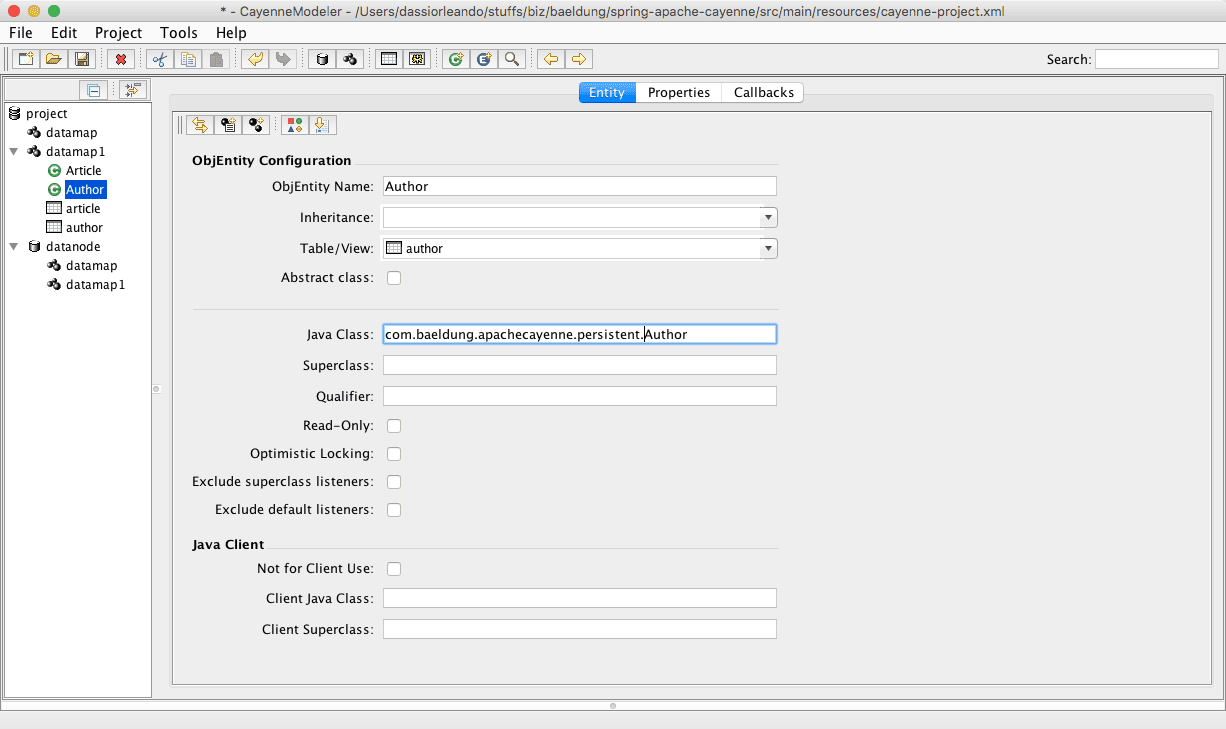
We need also to ensure to put com.baeldung.apachecayenne.persistent as Java package and save it; we’ll see that the XML configuration file has been updated for its defaultPackage property to match the Java package:

In each ObjEntity we must specify the package for subclasses as shown in the following image and click the “save” icon again:
Now on “Tools > Generate Classes” menu, select “Standard Persistent Objects” as the type; and on the “Classes” tab check all classes and hit “generate”.
Let’s go back to the source code to see that our persistent objects have been generated successfully, talking about _Article.java and _Author.java.
Note that all these configurations are saved in the file datamap.map.xml also located in the resources folder.
4.2. Mapping Structure
The generated XML mapping file presents in the resource folder is using some unique tags relative to Apache Cayenne:
- DataNode(<node>) – the model of the database, its contents all information necessary to get connected to a database (the name of the database, the driver and the user credentials)
- DataMap(<data-map>) – it’s a container of persistent entities with their relations
- DbAttribute(<db-attribute>) – represents a column in a database table
- DbEntity(<db-entity>) – the model of a single database table or view, it can have DbAttributes and relationships
- ObjEntity(<obj-entity>) – the model of a single persistent java class; made of ObjAttributes that correspond to entity class properties and ObjRelationships that are properties that have a type of another entity
- Embeddable(<embeddable>) – the model of a Java class that acts as a property of an ObjEntity, but corresponds to multiple columns in the database
- Procedure(<procedure>) – to register stored procedure in the database
- Query(<query>) – the model of a query, used to mapped query in configuration file without forget that we can also do it in the code
Here are the full details.
5. Cayenne API
The only remaining step is to use the Cayenne API to do our database operations using generated classes, knowing that subclassing our persistent classes is just a best practice used for customizing the model later.
5.1. Creating an Object
Here, we just save an Author object and check later that there is only one record of this type in the database:
@Test
public void whenInsert_thenWeGetOneRecordInTheDatabase() {
    Author author = context.newObject(Author.class);
    author.setName("Paul");

    context.commitChanges();

    long records = ObjectSelect.dataRowQuery(Author.class)
      .selectCount(context);

    assertEquals(1, records);
}
5.2. Reading an Object
After saving an Author, we just pick it among others via a simple query by a particular property:
@Test
public void whenInsert_andQueryByFirstName_thenWeGetTheAuthor() {
    Author author = context.newObject(Author.class);
    author.setName("Paul");

    context.commitChanges();

    Author expectedAuthor = ObjectSelect.query(Author.class)
      .where(Author.NAME.eq("Paul"))
      .selectOne(context);

    assertEquals("Paul", expectedAuthor.getName());
}
5.3. Retrieving All Records of a Class
We’re going to save two authors and retrieve a collection of author objects to check that there are just these two saved:
@Test
public void whenInsert_andQueryAll_thenWeGetTwoAuthors() {
    Author firstAuthor = context.newObject(Author.class);
    firstAuthor.setName("Paul");

    Author secondAuthor = context.newObject(Author.class);
    secondAuthor.setName("Ludovic");

    context.commitChanges();

    List<Author> authors = ObjectSelect
      .query(Author.class)
      .select(context);

    assertEquals(2, authors.size());
}
5.4. Updating an Object
The updating process is easy too, but we need first to have the desired object before modifying its properties and applying it to the database:
@Test
public void whenUpdating_thenWeGetAnUpatedeAuthor() {
    Author author = context.newObject(Author.class);
    author.setName("Paul");
    context.commitChanges();

    Author expectedAuthor = ObjectSelect.query(Author.class)
      .where(Author.NAME.eq("Paul"))
      .selectOne(context);
    expectedAuthor.setName("Garcia");
    context.commitChanges();

    assertEquals(author.getName(), expectedAuthor.getName());
}
5.5. Attaching an Object
We can assign an article to an author:
@Test
public void whenAttachingToArticle_thenTheRelationIsMade() {
    Author author = context.newObject(Author.class);
    author.setName("Paul");

    Article article = context.newObject(Article.class);
    article.setTitle("My post title");
    article.setContent("The content");
    article.setAuthor(author);

    context.commitChanges();

    Author expectedAuthor = ObjectSelect.query(Author.class)
      .where(Author.NAME.eq("Smith"))
      .selectOne(context);

    Article expectedArticle = (expectedAuthor.getArticles()).get(0);

    assertEquals(article.getTitle(), expectedArticle.getTitle());
}
5.6. Deleting an Object
The deletion of a saved object completely removes it from the database, thereafter we’ll see null as the result of the query:
@Test
public void whenDeleting_thenWeLostHisDetails() {
    Author author = context.newObject(Author.class);
    author.setName("Paul");
    context.commitChanges();

    Author savedAuthor = ObjectSelect.query(Author.class)
      .where(Author.NAME.eq("Paul"))
      .selectOne(context);
    if(savedAuthor != null) {
        context.deleteObjects(author);
        context.commitChanges();
    }

    Author expectedAuthor = ObjectSelect.query(Author.class)
      .where(Author.NAME.eq("Paul"))
      .selectOne(context);

    assertNull(expectedAuthor);
}
5.7. Delete All Records of a Class
It’s also possible to drop all the records of a table usingSQLTemplate, here we do this after each test method to always have a void database before each test is launched:
@After
public void deleteAllRecords() {
    SQLTemplate deleteArticles = new SQLTemplate(
      Article.class, "delete from article");
    SQLTemplate deleteAuthors = new SQLTemplate(
      Author.class, "delete from author");

    context.performGenericQuery(deleteArticles);
    context.performGenericQuery(deleteAuthors);
}
6. Conclusion
In this tutorial, we focused on using Apache Cayenne ORM to easily demonstrate how to do CRUD operations with a one-to-many relationship.


